Giriş
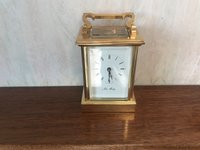
Non-technical people are often intimidated by electronics, but conversely, we techies might feel equally at a loss faced with an intricate clock mechanism. In fact, stripping down, cleaning and reassembly of a relatively simple clock such as a mantelpiece carriage clock is well within the capability of anyone prepared to spend a little time and to take reasonable care.
A carriage clock is an excellent introduction to clock maintenance as you can see all the working parts. After a number of years the oil on the bearings will have evaporated or congealed, and picked up a surprising amount of dirt. At this point it will no longer run for as long as it should, or even run at all. A service clean should return it to good working order.
Warning
A fully or partially wound clock spring stores considerable energy. Its uncontrolled release can cause serious injury and considerable damage. Always unwind the spring before starting work. Never attempt to replace a main spring - this is a hazardous operation best left to an expert.
Cleaning materials and lubricants
Only ever use specialist clock oil. This has sufficient surface tension to keep it where you put it, leaves no residue as it gradually evaporates, and doesn't attack any lacquer that might have been applied to brass parts.
Only use specialist clock cleaning fluid for cleaning the various parts. There are two types of this:
Ammoniated cleaning fluid is tough on dirt and grease and removes any tarnish, bringing up brass to a lovely shine. On no account must it be mixed with or contaminated by other cleaning agents as some combinations can generate highly toxic fumes.
However it has a pungent smell and must be used in a well ventilated area. It can also cause stress fractures in brass and so parts should not be left to soak in it. Only ever buy it in a plastic bottle as it may cause a tin to leak.
Non-ammoniated cleaning fluid may not be as powerful but is safe to use, and is certainly to be preferred for rare or potentially valuable clocks.
Further information
The website of the National Association of Watch and Clock Collectors includes forums which are a mine of information if you have questions, perhaps because your clock is not exactly the same as mine or if anything is not quite clear.
Acknowlegements
I was encouraged to service my 35-year old carriage clock by a blog posting by Braintree Clock Repairs (a site well worth browsing). This guide owes much to that, coloured by my personal experience and salted with wisdom from amateur horologist Phil Harris.
Neye ihtiyacın var
-
-
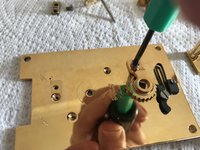
While holding the spring tension with the winding key, release the ratchet.
-
Still keeping a firm hold on the winding key, allow the spring to unwind in a controlled manner by 180 degrees, or only as much as the rotation of your wrist will allow.
-
Re-engage the ratchet while you prepare to repeat the process.
-
Repeat until there is no tension left in the spring.
-
-
-
Before starting disassembly it's a good idea to wrap a length of sticky tape around the front and two sides of the clock towards the bottom, from one rear pillar to the other, to prevent the front and side glasses falling out as you remove the case.
-
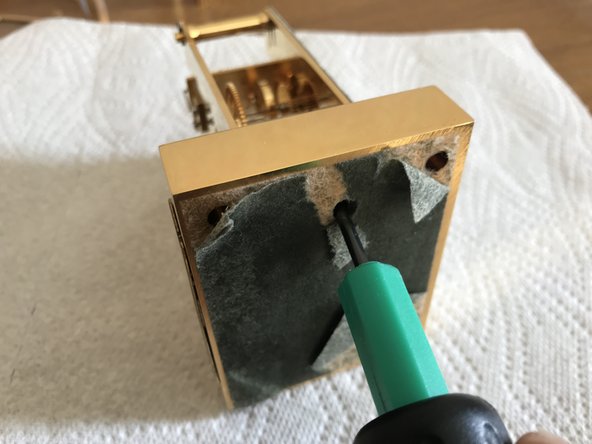
Turn the clock over and peal back the felt covering the base at each corner, to reveal the holes for the screws holding the four brass case pillars to the base.
-
With a suitable screwdriver, loosen all four screws just a little. They may initially be fairly tight. Do not let the screwdriver slip in the screw heads. Do not remove the screws just yet.
-
-
-
Loosen the screws until you can separate the case from the base by just a few millimetres. You should then be able to remove the back door.
-
The back door has a pin in the top engaging with the top of the clock and a pin in the bottom engaging with the base. These are liable to fall out and get lost. Stow them somewhere safe.
-
-
-
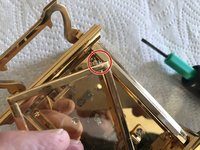
With the clock on its face and if possible, holding the case to ensure that the vertical pillars hold the glass panels, remove all four screws in the base and remove the base.
-
Check to see whether any of the glass panels is now loose and at risk of falling out. If so, carefully remove it and put it aside. Put the case aside standing upright, so that at worst, the glass panels can only slip down in their grooves until they are resting on the table.
-
On reassembly, if any of the glass panels and their plastic strips came out, ensure that the strips are at the far ends of the grooves from the base otherwise you may not be able to get all the screws in the base to engage with the threaded holes in the pillars.
-
-
-
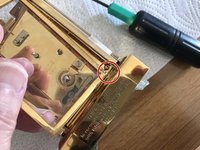
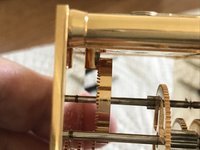
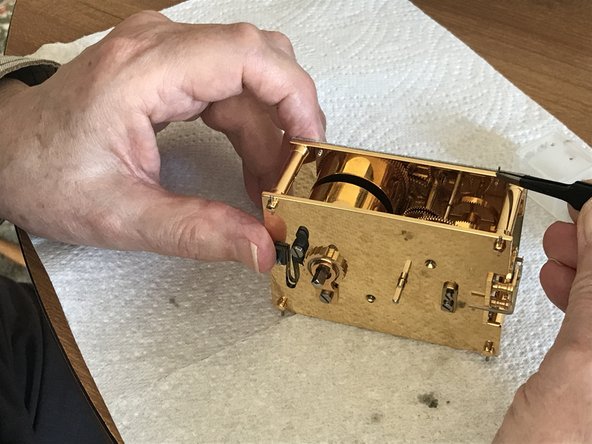
Examining the two horizontal pillars at the base of the clock which connect the front and back plates, you will see that each has a threaded hole for a screw to clamp the movement to the base.
-
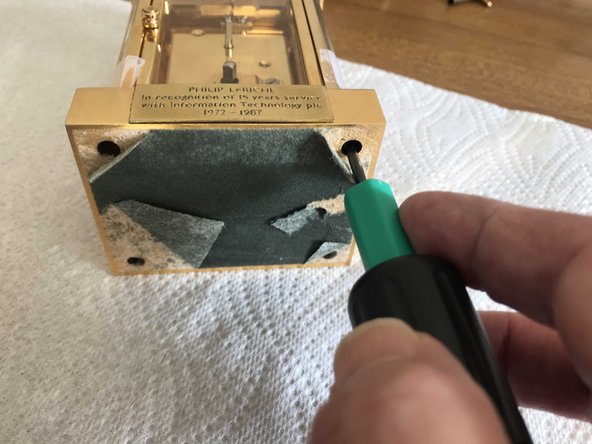
Noting where those screws are, peel back the felt on the base further to reveal the screw holes.
-
Remove the two screws and put the base aside.
-
-
-
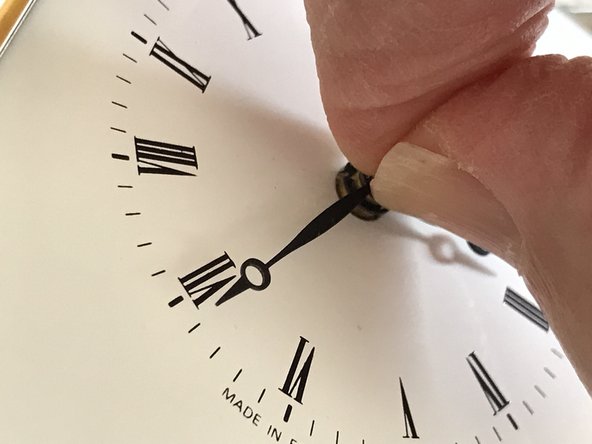
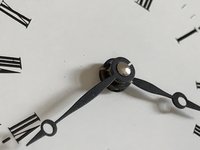
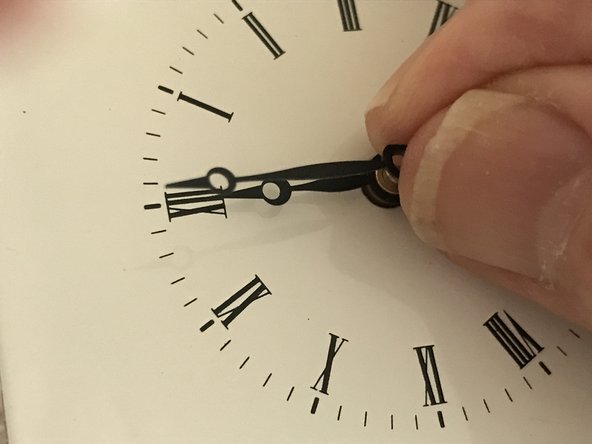
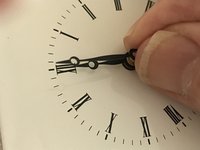
Grip the minute hand either side of the spindle, between your thumbnail and a fingernail, and pull it off.
-
In the same way, remove the hour hand.
-
-
-
-
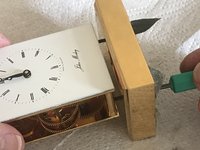
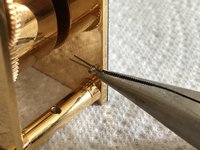
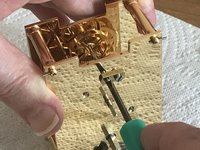
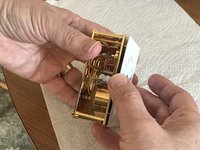
Remove each of the tapered pins in turn by gripping the thicker end with a small pair of pliers and pulling. These pins are easily lost - put them somewhere safe.
-
If the pins don't come out easily, make sure you're holding the clock mechanism firmly so as not to jerk it violently if a pin comes out suddenly.
-
You can now lift off the clock face and put it aside.
-
-
-
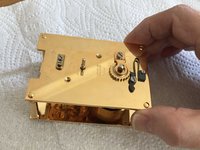
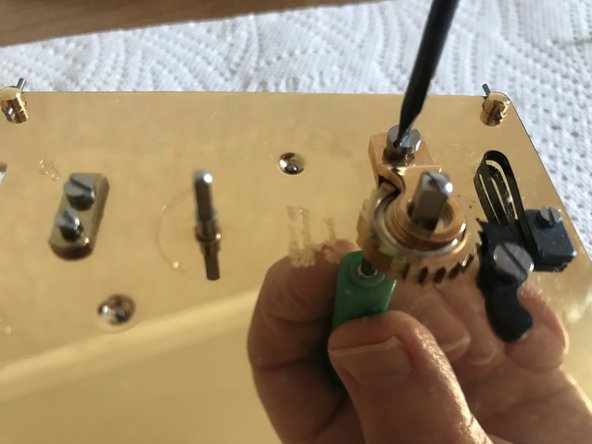
With a small screwdriver, loosen the screws until you can lift the platform off.
-
-
-
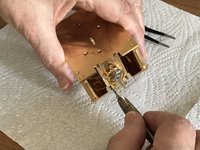
Remove each of the tapered pins in turn by gripping the thicker end with a pair of pliers and pulling. They may be stiff. Hold the clock frame firmly to avoid it being violently jerked if a pin comes out suddenly.
-
-
-
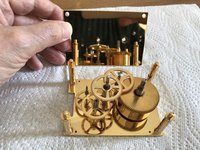
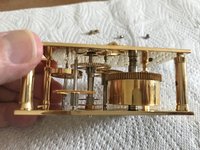
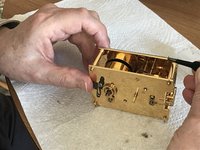
Gently and progressively lift the back plate off the pillars joining it to the front plate. As you do so the pivots of the gear train will be released from the pivot holes in the rear panel.
-
As you lift off the rear plate some of the gears of the gear train may lift out of their pivot holes in the front panel. If so, gently remove them and reinsert them temporarily in their pivot holes in the front plate.
-
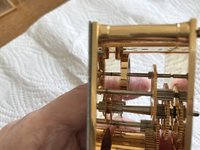
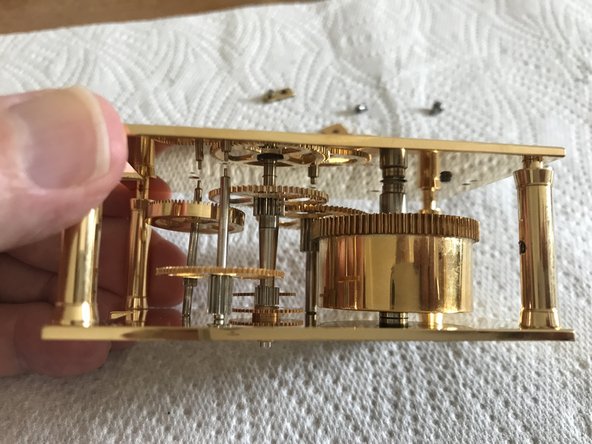
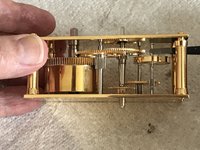
You will now have a forest of arbors. Take a photo of the gear train with the rear plate removed, or maybe several from different angles. This will be greatly helpful on reassembly.
-
-
-
Some of the wheels will be blocked from being removed by others. Starting with one which is not blocked at all, lift them all off in turn and put them aside in order of removal. Take another photo after removing each one.
-
Finally, remove the drum containing the main spring.
-
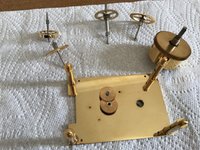
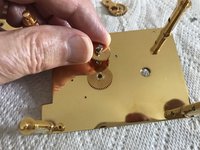
Two more wheels remain, secured to the front plate by a screw. These form the reduction gear between the minute and hour hands. Remove the retaining screw and lift the wheels off.
-
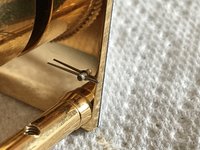
On the back of the back plate you will see a small piece of brass with two screws in it. One of these, covering the contrate wheel pivot hole, is an end float adjustment for the contrate wheel. Do not adjust this. The other attaches it to the back plate. Remove this screw and put the brass piece aside.
-
Another brass piece secured with a screw covers the ratchet wheel. REmove this too.
-
The clock is now fully disassembled. Take another photo of all the bits so that tomorrow you can brag to all your friends about how you got it all back together again!
-
-
-
Take each item from the gear chain in turn, soak it for a little while and then clean the pivots with a nylon brush. Use a magnifying glass to check that they are completely clean with no residual black deposits on the pivots.
-
Rinse with clean water (preferably deionised water if you live in a hard water area). Dry carefully with a paper towel, finishing with a hair dryer or hot air gun on a low setting.
-
-
-
The process is similar for the front and back plates except that you will need a thin hardwood stick such as a sharpened cocktail stick, a toothpick or a sliver of spit bamboo, or better still, pegwood. (Pegwood sticks are available cheaply online.)
-
Examine the pivot holes carefully with a magnifying glass to ensure they are completely clean. It may take several attempts but is well worth the effort. Do not proceed with reassembly until you are certain they are 100% dry.
-
-
-
With the front plate flat on the table, first replace the two minute-to-hour wheels,
-
Referring to the photos you took earlier, insert all the arbors into their pivot holes in the reverse order to that in which you removed them.
-
The square main spring winder and minute hand adjuster are taller than any of the pivots. Lower the back plate onto these and onto the four posts joining the front and back plates.
-
At this stage, none of the pivots will be lined up with its pivot holes, but with the back plate at a very slight angle, it will be resting on one of the pivots. Gently manoeuvre this into its pivot hole.
-
Repeat for each pivot in turn. Once all the pivots are in their pivot holes (double check that they indeed are) you should be able to press the back plate down onto the four pillars as far as it will go.
-
Holding the back plate firmly in place try gently spinning one of the wheels and check that all the others turn completely freely. You can now reinsert the locking pins.
-
-
-
Each of the pivot holes in the front of the front plate and the back of the back plate is surrounded by a little well. This retains the oil by surface tension. Add a tiny drop to each one.
-
-
-
Replace the small brass piece covering the contrate wheel pivot hole. Adjust the screw over the pivot hole by the tiniest amount, first of all anticlockwise, until there is the least perceptible play. Check that the contrate wheel still turns completely freely.
-
You can wind the main spring by a minimal amount to check that the contrate wheel turns freely. Unwind it once you are satisfied.
-
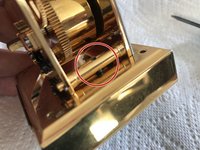
Also, replace the ratchet (make sure it's the right way up) and its retaining brass piece, engaging it with the ratchet spring.
-
-
-
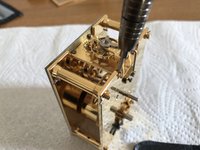
You can now replace the escapement platform. Do not completely tighten the screws.
-
Visually check that the escapement pinion is fully engaged with the contrate wheel, but not pressing on it, otherwise it will create friction and prevent the clock from running as long as it should. Examine with a magnifying glass.
-
Tighten the screws and check the escapement platform hasn't moved in doing so. Wind the main spring just a little and make sure the clock runs.
-
-
-
You can now replace the clock face, lining up its 4 pins with the holes in the front panel. Insert the tapered pins to secure it.
-
Press the hour hand, then the minute hand onto their spindles, lining them both up accurately at 12 o'clock.
-
-
-
Offer up the movement to the clock base and secure it with the two screws.
-
If any of the glasses came out of the case, replace them, not forgetting the plastic strips in the grooves, which should be at the top ends of their grooves.
-
Offer up the case to the base and insert the 4 screws. Do not completely tighten them.
-
With just enough clearance remaining between the base and the vertical pillars for the rear door hinge pins, insert the top pin in the top of the door into the top of the case.
-
Line up the bottom of the door with the hinge pin hole in the base and tighten the nearest screw to secure the door hinge.
-
Tighten the remaining base screws.
-
Wind the clock and make sure it's working. Once you've shown that it runs for a full week, you can glue back or replace the felt on the base.
-


To reassemble your device, follow these instructions in reverse order.
To reassemble your device, follow these instructions in reverse order.
İptal et: Bu kılavuzu tamamlamadım.
2 farklı kişi bu kılavuzu tamamladı.

Ekip

1Rehber Yorum
Philip, that’s excellent! Thank you also for the kind acknowledgement.
One minor point worth stressing is that, when assembling the back plate and trying to get the pivots into their holes, it often (but not always) helps to start with the larger pivots in the bottom of the plate, and work gently upwards. Be very careful not to break a pivot - especially with the fine pivots found in carriage clocks, it’s all too easy to snap off a pivot, and subsequent repair requires professional and expensive attention!
Congratulations again on an excellent iFixit guide.
Phil