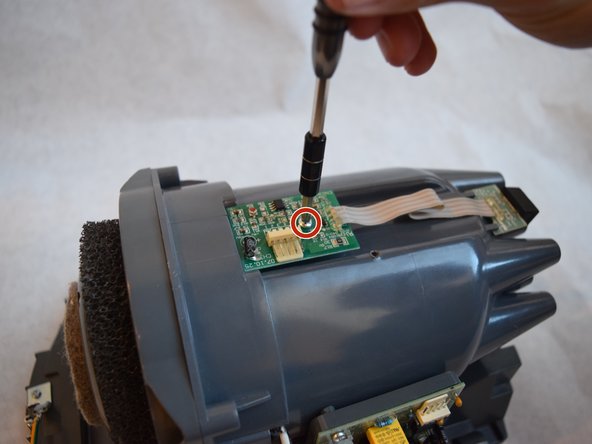
Ana içeriğe geç

World Dryer Airforce J4-973A3 Sensor Board Replacement

Neye ihtiyacın var

  1. World Dryer Airforce J4-973A3 Sensor Board Replacement, Sensor Board: adım 1, 3 resimden 1. World Dryer Airforce J4-973A3 Sensor Board Replacement, Sensor Board: adım 1, 3 resimden 2. World Dryer Airforce J4-973A3 Sensor Board Replacement, Sensor Board: adım 1, 3 resimden 3.
    • In order to change the air filter, start with the removal of the outer metal casing.

    • Using the special bit, remove the large screws at the bottom of the casing.

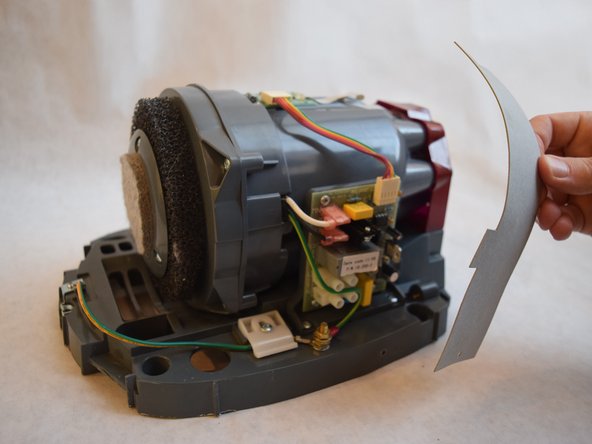
    • To remove the case, lift the indicated spot with your hands.

    • The direction for turning the screws is different than what was indicated on the small sticker above the hole.

  2. World Dryer Airforce J4-973A3 Sensor Board Replacement: adım 2, 3 resimden 1. World Dryer Airforce J4-973A3 Sensor Board Replacement: adım 2, 3 resimden 2. World Dryer Airforce J4-973A3 Sensor Board Replacement: adım 2, 3 resimden 3.
    • Remove the 1/2" Ph1 screws at the bottom of the red fan cap.

    • Turn over the unit.

    • Push the red tabs on the back of the unit with medium to heavy pressure, using a plastic opening tool.

    • Carefully remove the cap, to prevent damage to the sensor.

  3. World Dryer Airforce J4-973A3 Sensor Board Replacement: adım 3, 2 resimden 1. World Dryer Airforce J4-973A3 Sensor Board Replacement: adım 3, 2 resimden 2.
    • Remove both 3/8" Ph2 screws attached to the grey belt at the top and bottom.

    • Lift the grey belt away. This gives access to the server board.

  4. World Dryer Airforce J4-973A3 Sensor Board Replacement: adım 4, 3 resimden 1. World Dryer Airforce J4-973A3 Sensor Board Replacement: adım 4, 3 resimden 2. World Dryer Airforce J4-973A3 Sensor Board Replacement: adım 4, 3 resimden 3.
    • Remove the rainbow ribbon cable from the middle circuit board, using a plastic opening tool.

    • Remove the 1/2" Ph1 screw from the center of the circuit board.

  5. World Dryer Airforce J4-973A3 Sensor Board Replacement: adım 5, 1 resimden 1.
    • Carefully remove the sensor board from your device.

Sonuç

To reassemble your device, follow these instructions in reverse order.

Luke Clancy

Üyelik tarihi: 09/17/18

123 İtibar

1 Kılavuz yazıldı

Ekip

0 Yorum

Yorum Ekle

İstatistikleri Görüntüle:

Son 24 Saat: 0

Son 7 gün: 3

Son 30 gün: 9

Her zaman: 616