Ana içeriğe geç

Xbox 360 E CD Drive Replacement

Neye ihtiyacın var

  1. Xbox 360 E CD Drive Replacement, Top Panel: adım 1, 1 resimden 1.
    Bu adımda kullanılan alet:
    Spudger
    $2.99
    Satın Al
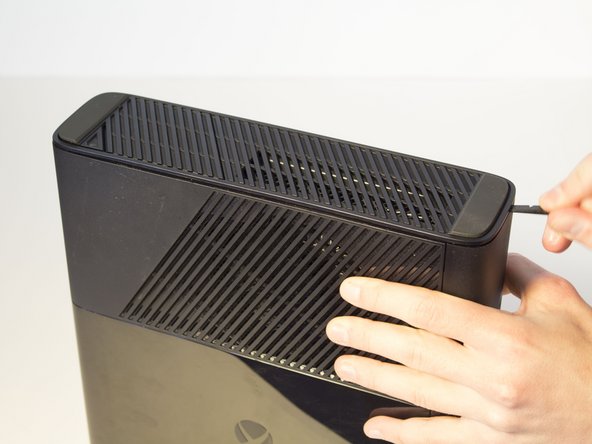
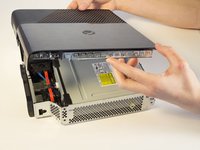
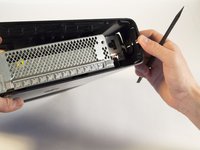
    • Push the Spudger into the crevice between the grated top panel of the Xbox and the bottom body with the rubber feet.

    • Pull back on the spudger like a lever, keeping it pressed firmly into the crevice.

  2. Xbox 360 E CD Drive Replacement: adım 2, 1 resimden 1.
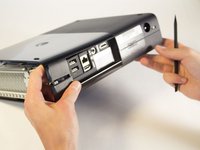
    • Slide the spudger along the separation you have created between the grated panel and the bottom body of the Xbox.

    • Periodically pull back on the spudger like a lever, keeping it pressed firmly into the crevice.

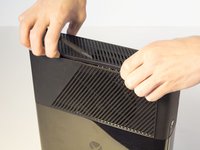
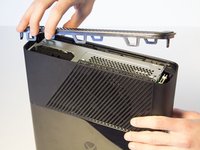
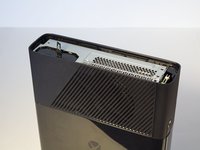
  3. Xbox 360 E CD Drive Replacement: adım 3, 3 resimden 1. Xbox 360 E CD Drive Replacement: adım 3, 3 resimden 2. Xbox 360 E CD Drive Replacement: adım 3, 3 resimden 3.
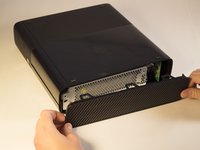
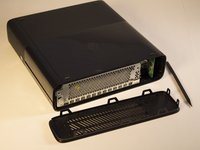
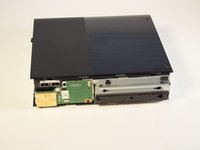
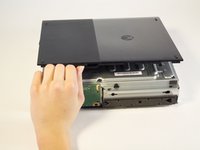
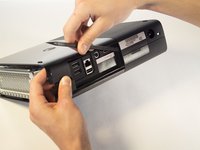
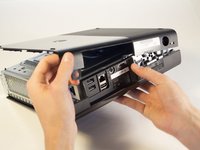
    • Continue sliding the spudger along the perimeter of the left grated face of the Xbox.

    • Pull the top panel off.

  4. Xbox 360 E CD Drive Replacement, Wi-Fi Card: adım 4, 1 resimden 1.
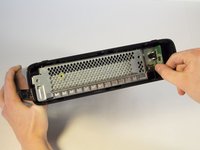
    • Remove the 11 mm screw left of the green wifi-card using the T9 Torx screw bit.

  5. Xbox 360 E CD Drive Replacement: adım 5, 2 resimden 1. Xbox 360 E CD Drive Replacement: adım 5, 2 resimden 2.
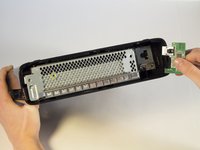
    • Firmly grip the green Wi-Fi card and pull it out of the Xbox.

  6. Xbox 360 E CD Drive Replacement, Bottom Panel: adım 6, 1 resimden 1.
    • Push the spudger into the crevice between the right grated face and the top body of the Xbox. It's easier to begin away from the vent.

    • Pull up on the spudger like a lever, keeping it pressed firmly into the crevice.

  7. Xbox 360 E CD Drive Replacement: adım 7, 2 resimden 1. Xbox 360 E CD Drive Replacement: adım 7, 2 resimden 2.
    • Slide the spudger along the crevice to separate the grated face and the top body.

  8. Xbox 360 E CD Drive Replacement: adım 8, 3 resimden 1. Xbox 360 E CD Drive Replacement: adım 8, 3 resimden 2. Xbox 360 E CD Drive Replacement: adım 8, 3 resimden 3.
    • Wiggle the spudger in the crevice as you slide the spudger to loosen the bottom plate.

    • Slide the spudger along the crevice, going completely about the perimeter of the bottom panel.

    • Pull the bottom panel off.

  9. Xbox 360 E CD Drive Replacement, Top Body: adım 9, 2 resimden 1. Xbox 360 E CD Drive Replacement, Top Body: adım 9, 2 resimden 2.
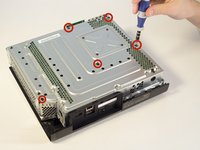
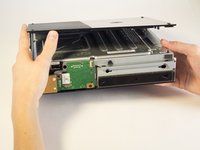
    • Remove the five long black 55 mm screws labeled C2-5 and C7 with a T9 Torx screwdriver.

    • Carefully flip the device and pull off the body by lifting from the metal section that is attached to the plastic exterior.

  10. Xbox 360 E CD Drive Replacement, Bottom Body: adım 10, 3 resimden 1. Xbox 360 E CD Drive Replacement, Bottom Body: adım 10, 3 resimden 2. Xbox 360 E CD Drive Replacement, Bottom Body: adım 10, 3 resimden 3.
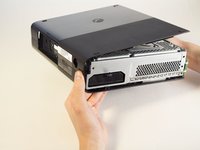
    • Orient the Xbox so the bottom body is facing upwards. Make sure you see the rubber feet to know you have the correct side of the device.

    • Lift the bottom body slightly away from the core at a 45 degree angle.

  11. Xbox 360 E CD Drive Replacement: adım 11, 2 resimden 1. Xbox 360 E CD Drive Replacement: adım 11, 2 resimden 2.
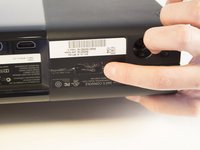
    • Rotate the Xbox so you are now looking at the back of the device.

    • This step of disassembly requires the removal of the warranty sticker. This will void your warranty. Check the main page for a link to warranty information from Microsoft.

    • Remove the sticker from the back of the Xbox.

    • The sticker is not needed for reassembly.

  12. Xbox 360 E CD Drive Replacement: adım 12, 3 resimden 1. Xbox 360 E CD Drive Replacement: adım 12, 3 resimden 2. Xbox 360 E CD Drive Replacement: adım 12, 3 resimden 3.
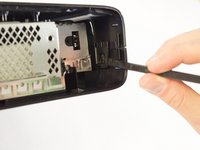
    • Turn the Xbox to the left to locate the clip holding the body together.

    • With a spudger, press up on the clip like a latch. Move to the far end to undo the other clip the same way.

  13. Xbox 360 E CD Drive Replacement: adım 13, 2 resimden 1. Xbox 360 E CD Drive Replacement: adım 13, 2 resimden 2.
    • Push the spudger into the crevice. Slide the spudger along the vertical crevice to detach the last clip. The bottom body should slide off after this.

  14. Xbox 360 E CD Drive Replacement, CD Drive: adım 14, 2 resimden 1. Xbox 360 E CD Drive Replacement, CD Drive: adım 14, 2 resimden 2.
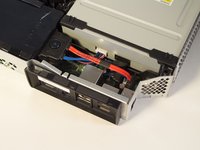
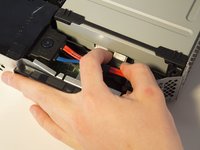
    • Use your fingers to unplug the blue ribbon cable from the CD drive.

  15. Xbox 360 E CD Drive Replacement: adım 15, 1 resimden 1.
    • Use tweezers to unplug the blue and pink wires.

  16. Xbox 360 E CD Drive Replacement: adım 16, 1 resimden 1.
    • Lift the front end of the CD drive and take it out.

Sonuç

To reassemble your device, follow these instructions in reverse order.

22 farklı kişi bu kılavuzu tamamladı.

George

Üyelik tarihi: 02/02/14

536 İtibar

1 Kılavuz yazıldı

Ekip

Cal Poly, Team 2-11, Amido Winter 2014 Cal Poly, Team 2-11, Amido Winter 2014 üyesi

CPSU-AMIDO-W14S2G11

4 Üyeler

43 adet Kılavuz yazıldı

11 Yorum

i wish the bottom cover magically came off like in step 9

sandjo - Yanıt

screws are actually C1- C5 one is incorrectly labelled - C7 = C1 also in step 8.5 there are 3 clips holding back edge of bottom cover to top one. one on each end and one just to right of I/O area. can get 2 of them with a spudger (ends) and the middle one with a isesamo.

Andrew Boyd - Yanıt

Several steps missing between 8 and 9

Freddie Parsons - Yanıt

Like remove wifi adaptor.

william capewell -

There is some consistency errors in this guide. Step 9 seems to blast ahead beyond where we should be at this point of the guide.

Joe G. - Yanıt

Yorum Ekle

İstatistikleri Görüntüle:

Son 24 Saat: 4

Son 7 gün: 29

Son 30 gün: 147

Her zaman: 21,105