Giriş
Replace that drive that ate your favorite copy of Call of Duty.
Note: The optical drive and motherboard are paired and must be replaced together. If you try to replace the optical drive but not the motherboard, game disks may not read, and you may have issues with online play.
Neye ihtiyacın var
-
-
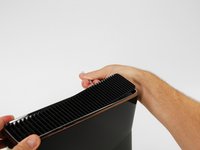
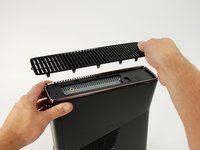
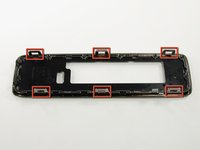
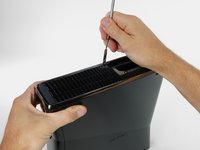
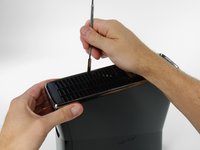
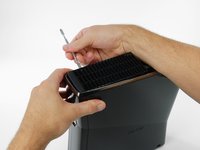
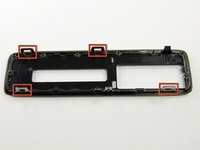
In the following steps, you will remove the top vent, secured to the top panel by the thirteen clips shown.
-
-
-
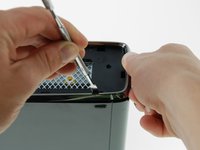
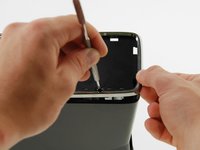
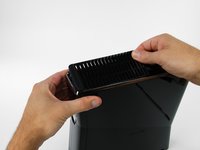
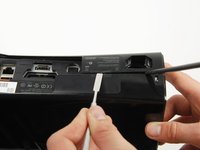
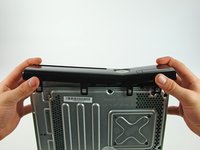
Orient the console so that the words "XBOX 360" on the sides are right-side up, and the faceplate is facing to the left.
-
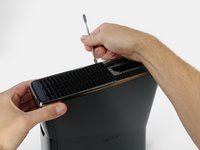
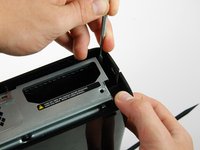
Insert a metal spudger between the top vent and the top bezel near the rear of the Xbox.
-
Rotate the spudger away from the console, prying the edge of the fan vent up until the two plastic clips come free.
-
-
-
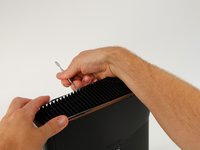
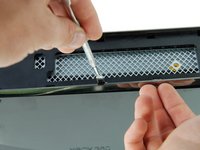
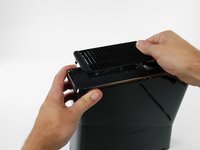
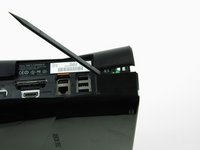
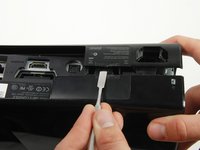
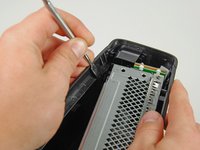
Rotate the console so that the rear of the Xbox 360 S is facing to the right, and the right case is facing you.
-
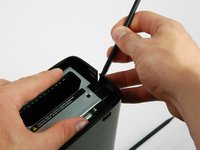
Insert a metal spudger through the rear-most slit on the right edge of the top bezel and between the bottom edge of the clip and the right case.
-
While lifting up on the top bezel with your fingers, rotate the spudger away from the console to free the clip.
-
-
-
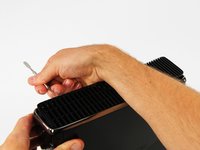
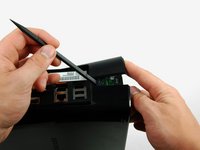
Push the latch holding down the hard drive cover to the left.
-
Pull the hard drive cover away from the console.
-
-
-
-
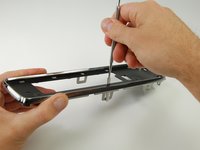
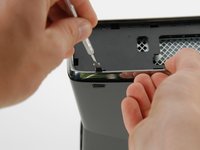
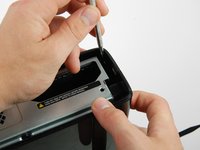
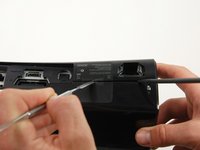
Insert a metal spudger through the left middle slit of the bottom bezel, and between the bottom edge of the clip and the left case.
-
Simultaneously pull the bottom bezel up and rotate the spudger away from the console to free the clip.
-
In a similar fashion, free the clip at the front of the bottom bezel's left edge.
-
-
-
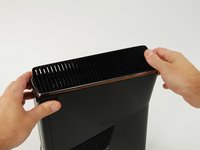
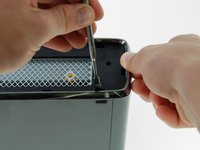
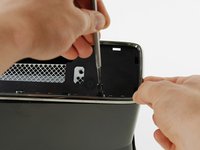
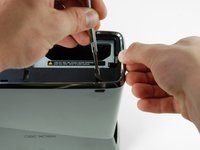
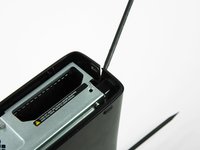
Release the clip near the front right corner of the top edge securing the right case to the faceplate.
-
-
-
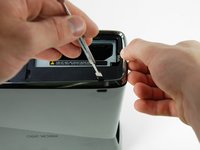
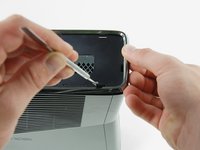
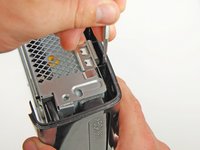
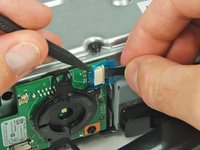
Using a spudger or fingernail, lift the clear blue tab away from the connector.
-
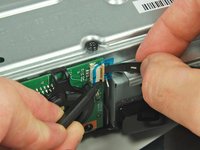
Slide the locking tab on the power switch board cable connector toward the top of the console.
-
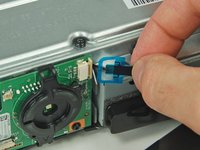
Pull the power switch cable straight out of the connector.
-
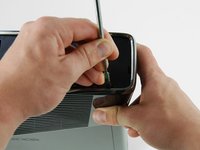
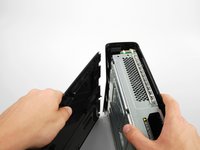
The faceplate is now free of the rest of the console.
-
-
-
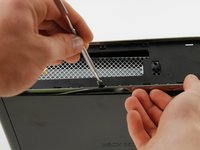
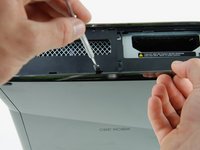
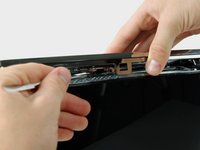
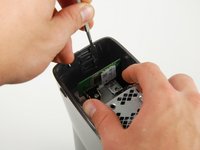
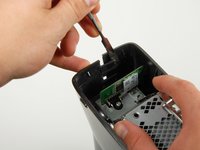
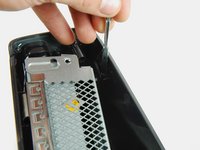
Remove the two 5.6 mm T8 Torx screws securing the RF module to the metal case.
-
-
-
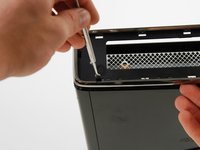
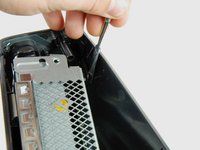
Remove the single T10 Torx screw holding in the wireless card.
-
Pull the Wi-Fi Board out of the console.
-
-
-
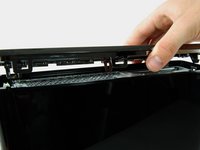
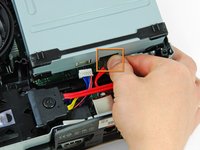
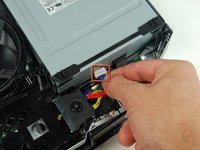
Disconnect the optical drive data cable from the back of the optical drive.
-
Disconnect the power cable from the back of the optical drive.
-


To reassemble your device, follow these instructions in reverse order.
İptal et: Bu kılavuzu tamamlamadım.
172 farklı kişi bu kılavuzu tamamladı.

18Kılavuz Yorumları
I have to admit that i used this exact guide step by step and managed to fix a stuck DVD tray. I had to use another guide to disassemble the DVD drive but this guide is top notch.
How did you get it unstuck? I’m having the same problem?
Used this guide to remove the optical drive from my sons Xbox to remove a piece of paper put there by his little sister! The guide is relatively easy to follow and the hardest part is getting the casing off, beyond that you just need patience.
I agree. Especially near the back where the warranty sticker is. I think they made it hard on purpose so you wouldn’t break it
Hi Fixit, I work pretty much exclusively with Apple products, but was bullied into replacing the optical drive in a 360S.
Having never opened an XBox, I followed your guide to the letter. I completed the job in 1 hour with no problems, broken parts or skinned knuckles.
Keep up the good work guys.
A grateful Ian Younie