Ana içeriğe geç

Xbox 360 Top Vent Replacement

Neye ihtiyacın var

  1. Xbox 360 Top Vent Replacement, Hard Drive: adım 1, 2 resimden 1. Xbox 360 Top Vent Replacement, Hard Drive: adım 1, 2 resimden 2.
    • Grasp the hard drive assembly and press the release button while lifting its front edge.

    • Remove the hard drive assembly from the top vent.

    WARNING: Just replacing the drive will not make it work correctly. Microsoft has married the drives to the motherboard. Hence, in order to get full operation out of the drive you'll have to perform more steps not listed here. Search in the FAQ on this specific topic for more details. Otherwise, before buying a new drive, try cleaning the inside of the old one and/or replace the belt involved in opening and closing the drive door.

    - Good Luck

    Eric - Yanıt

    Thanks..helped!

    joseph zulu - Yanıt

    bress the button and lift with the same hand! i thought mine was stuck because of this pic!!!

    Maths with Luigi - Yanıt

  2. Xbox 360 Top Vent Replacement, Top Vent: adım 2, 2 resimden 1. Xbox 360 Top Vent Replacement, Top Vent: adım 2, 2 resimden 2.
    • Stand the console vertically with the top edge facing up.

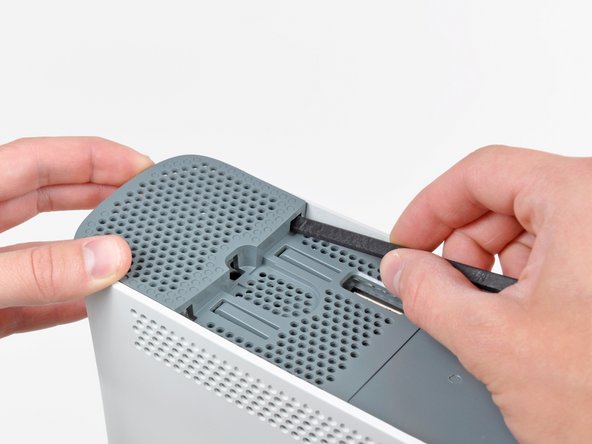
    • The top vent is secured to the console via clips. The first two clips are located underneath the top vent closest to the faceplate, as shown in the pictures.

  3. Xbox 360 Top Vent Replacement: adım 3, 2 resimden 1. Xbox 360 Top Vent Replacement: adım 3, 2 resimden 2.
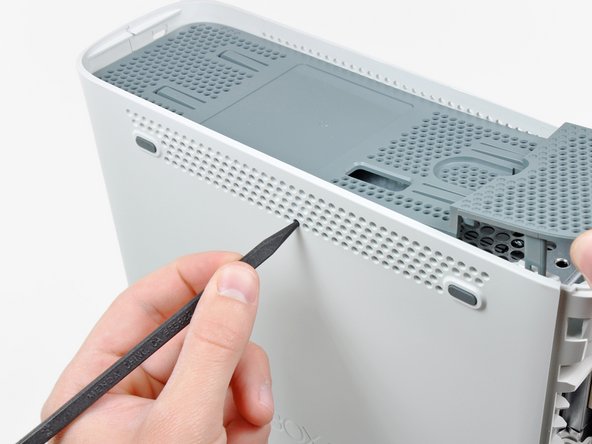
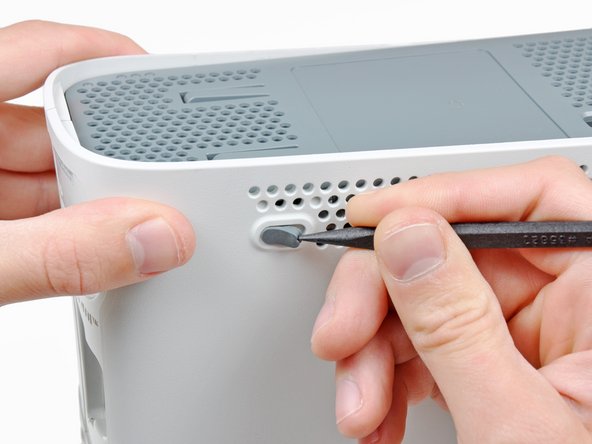
    • Insert the flat end of a spudger into the small gaps previously mentioned to release the clips.

    • You may also use the long finger of an Xbox 360 opening tool to accomplish this task.

    I found it easier to open these clips using the pointy end of the spudger rather than the flat end. Just slide it in against the side of the case and the clip will pop off.

    dave - Yanıt

  4. Xbox 360 Top Vent Replacement: adım 4, 3 resimden 1. Xbox 360 Top Vent Replacement: adım 4, 3 resimden 2. Xbox 360 Top Vent Replacement: adım 4, 3 resimden 3.
    • In the next few steps, you will use the tip of a spudger or the finger of an Xbox 360 opening tool to release the clips along the left and right sides of the top vent. Their locations are highlighted in red.

  5. Xbox 360 Top Vent Replacement: adım 5, 2 resimden 1. Xbox 360 Top Vent Replacement: adım 5, 2 resimden 2.
    • To release the clips, work from the middle of the top vent.

    • While slightly lifting the front edge of the top vent, use the tip of a spudger to push the clips closest to the center of the top vent towards the inside of the console.

  6. Xbox 360 Top Vent Replacement: adım 6, 1 resimden 1.
    • Use the tip of your spudger to release the clip on the top vent nearest the back of the Xbox's upper case.

  7. Xbox 360 Top Vent Replacement: adım 7, 2 resimden 1. Xbox 360 Top Vent Replacement: adım 7, 2 resimden 2.
    • The last clip is hidden underneath the rubber foot nearest the back of the console.

    • Use the tip of your spudger to release the clip on the top vent nearest the back of the Xbox.

    • Remove the top vent from the 360.

Sonuç

To reassemble your device, follow these instructions in reverse order.

39 farklı kişi bu kılavuzu tamamladı.

Bir Yorum

where could I buy a replacement for the top vent? thanks

blaze warior17 - Yanıt

Yorum Ekle

İstatistikleri Görüntüle:

Son 24 Saat: 0

Son 7 gün: 8

Son 30 gün: 38

Her zaman: 12,935