Ana içeriğe geç
Onarım Topluluğuna Katılın - Hesap Oluşturun

Xbox One Wireless Controller Potentiometer Replacement

Neye ihtiyacın var

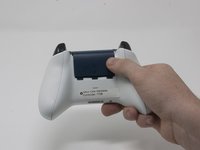
  1. Xbox One Wireless Controller Potentiometer Replacement, Cover Plate: adım 1, 2 resimden 1. Xbox One Wireless Controller Potentiometer Replacement, Cover Plate: adım 1, 2 resimden 2.
    • Slide the battery cover toward the top of the controller to remove it.

    • Lift up the batteries or the battery pack from the battery compartment.

    FixBot'a Sor
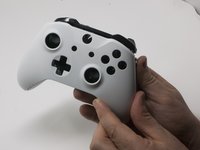
  2. Xbox One Wireless Controller Potentiometer Replacement: adım 2, 2 resimden 1. Xbox One Wireless Controller Potentiometer Replacement: adım 2, 2 resimden 2.
    • Insert a plastic opening tool into the top seam, and gently work the opening tool to the bottom of the controller.

    • Continue using the opening tool to gently pry the side plate off of the controller.

    • Repeat this process for the second side plate.

    FixBot'a Sor
  3. Xbox One Wireless Controller Potentiometer Replacement: adım 3, 1 resimden 1.
    • Gently peel the battery label or punch a hole in the center of the sticker in the battery compartment to reveal the hidden screw.

    • Remove the five 9mm torx-9 security screws from the back of the controller.

    FixBot'a Sor
  4. Xbox One Wireless Controller Potentiometer Replacement: adım 4, 2 resimden 1. Xbox One Wireless Controller Potentiometer Replacement: adım 4, 2 resimden 2.
    • Orient the controller so the front plate is facing up.

    • Lift the front cover off of the controller.

    FixBot'a Sor
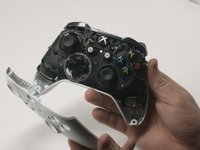
  5. Xbox One Wireless Controller Potentiometer Replacement: adım 5, 1 resimden 1.
    • Turn the controller face down and gently lift the rear plate.

    • Be careful with the rumble motors, as they tend to fall out, risking damage to the motherboard.

    FixBot'a Sor
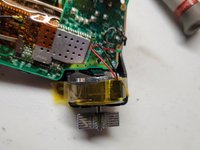
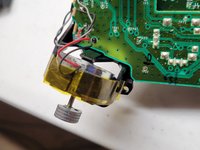
  6. Xbox One Wireless Controller Potentiometer Replacement, Tape Shock Motors in place: adım 6, 3 resimden 1. Xbox One Wireless Controller Potentiometer Replacement, Tape Shock Motors in place: adım 6, 3 resimden 2. Xbox One Wireless Controller Potentiometer Replacement, Tape Shock Motors in place: adım 6, 3 resimden 3.
    • Tape the Rumbler/shock motors in place.

    • This will prevent the motors from falling out.

    FixBot'a Sor
  7. Xbox One Wireless Controller Potentiometer Replacement, Directional Pad: adım 7, 1 resimden 1.
    • Turn the device over and remove the directional pad by gently pulling it away from the controller.

    FixBot'a Sor
  8. Xbox One Wireless Controller Potentiometer Replacement, Joystick Caps: adım 8, 1 resimden 1.
    • Pull the joysticks off of the controller.

    FixBot'a Sor
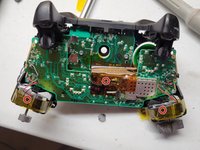
  9. Xbox One Wireless Controller Potentiometer Replacement, Top Motherboard: adım 9, 1 resimden 1.
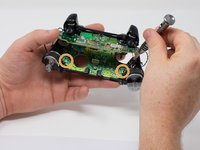
    • If the rumble motors fall out of frame, the wires may disconnect from the motherboard . The wires will have to be soldered to reattach the motor.

    • Turn the device over and remove the two 7mm torx-6 screws in the bottom left and right corners.

    FixBot'a Sor
  10. Xbox One Wireless Controller Potentiometer Replacement, De-soldering required: adım 10, 3 resimden 1. Xbox One Wireless Controller Potentiometer Replacement, De-soldering required: adım 10, 3 resimden 2. Xbox One Wireless Controller Potentiometer Replacement, De-soldering required: adım 10, 3 resimden 3.
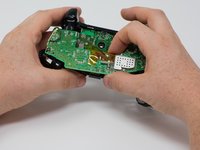
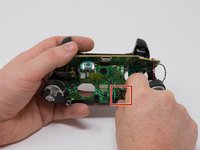
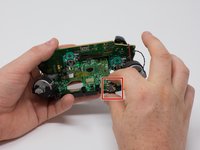
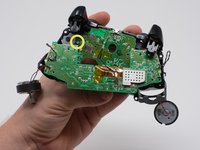
    • Firmly grasp the top and bottom motherboards in opposite hands, then gently pull them apart.

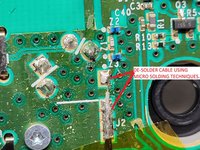
    • The top motherboard is still connected to the bottom motherboard. To fully separate the top motherboard, you will need to use a soldering iron.

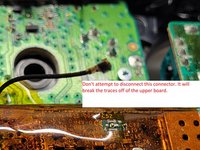
    • Warning: Do not attempt to disconnect the shielded (gold colored) connector as it is extremely fragile you will break it. It runs between the two boards.

    • De-solder the shielded cable from the lower board instead of attempting to disconnect the connector. De-solder using micro soldering techniquest.

    FixBot'a Sor
  11. Xbox One Wireless Controller Potentiometer Replacement, 3.5 mm Audio Port: adım 11, 2 resimden 1. Xbox One Wireless Controller Potentiometer Replacement, 3.5 mm Audio Port: adım 11, 2 resimden 2.
    • Remove the audio port from the bottom mother board.

    FixBot'a Sor
  12. Xbox One Wireless Controller Potentiometer Replacement, Bottom Motherboard: adım 12, 3 resimden 1. Xbox One Wireless Controller Potentiometer Replacement, Bottom Motherboard: adım 12, 3 resimden 2. Xbox One Wireless Controller Potentiometer Replacement, Bottom Motherboard: adım 12, 3 resimden 3.
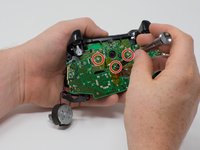
    • Remove the three 70mm torx-6 screws from the center of the bottom motherboard.

    • Remove the two 70mm torx-6 screws next to the rumble motors on the bottom motherboard.

    • Remove the one 70mm torx-6 screw located on the left side of the bottom motherboard.

    FixBot'a Sor
  13. Xbox One Wireless Controller Potentiometer Replacement: adım 13, 1 resimden 1.
    • Use a plastic spudger to lift the plastic clip off the front pegs.

    • Remove the plastic clip by sliding it upwards.

    FixBot'a Sor
  14. Xbox One Wireless Controller Potentiometer Replacement: adım 14, 2 resimden 1. Xbox One Wireless Controller Potentiometer Replacement: adım 14, 2 resimden 2.
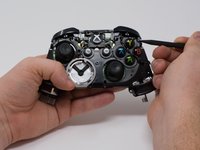
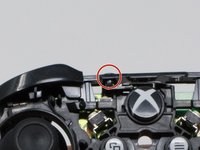
    • Use a spudger to release the small hooks at each end of the left and right bumper.

    • After you release these hooks, be careful as you separate the face plate from the back of the controller. The connect/sync button (see second image) is held in by this face plate and will come loose as you perform this step.

    FixBot'a Sor
  15. Xbox One Wireless Controller Potentiometer Replacement: adım 15, 1 resimden 1.
    • To avoid disconnecting the wires connected to the motherboard, lift the mother board away from the plastic frame as if opening a laptop.

    FixBot'a Sor
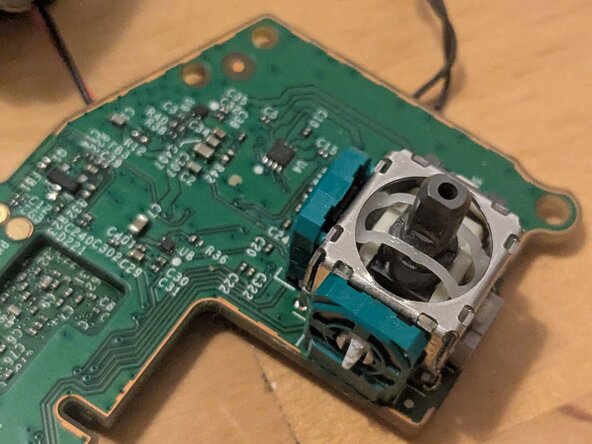
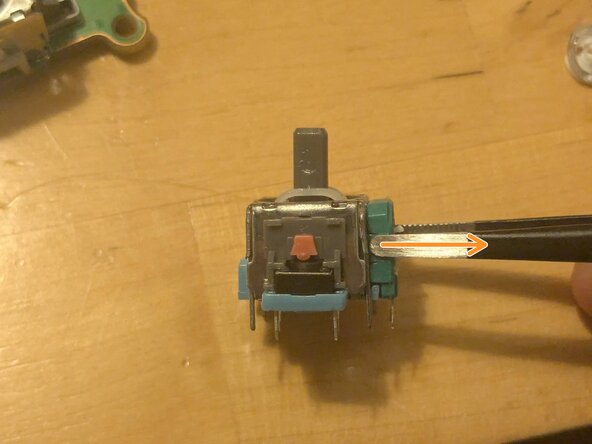
  16. Xbox One Wireless Controller Potentiometer Replacement, Open the potentiometer housing: adım 16, 3 resimden 1. Xbox One Wireless Controller Potentiometer Replacement, Open the potentiometer housing: adım 16, 3 resimden 2. Xbox One Wireless Controller Potentiometer Replacement, Open the potentiometer housing: adım 16, 3 resimden 3.
    • Use the iFixit Precision Tweesers to gently pry open the potentiometer housing by slowly levering the top edge of the plastic.

    • Bend the housing so that there is 2–3 millimeters of space at the top.

    • If you bend it too much, you risk damaging the module's solder joints.

    FixBot'a Sor
  17. Xbox One Wireless Controller Potentiometer Replacement, Remove the damaged potentiometer: adım 17, 2 resimden 1. Xbox One Wireless Controller Potentiometer Replacement, Remove the damaged potentiometer: adım 17, 2 resimden 2.
    • Pull the potentiometer out of its housing.

    FixBot'a Sor
  18. Xbox One Wireless Controller Potentiometer Replacement, Take the new potentiometer: adım 18, 3 resimden 1. Xbox One Wireless Controller Potentiometer Replacement, Take the new potentiometer: adım 18, 3 resimden 2. Xbox One Wireless Controller Potentiometer Replacement, Take the new potentiometer: adım 18, 3 resimden 3.
    • From the replacement module, slowly separate the potentiometer housing from the module.

    • Gently press the small plastic tabs that secure the potentiometer to the center of the housing.

    • Remove the potentiometer.

    FixBot'a Sor
  19. Xbox One Wireless Controller Potentiometer Replacement, Install the new potentiometer: adım 19, 3 resimden 1. Xbox One Wireless Controller Potentiometer Replacement, Install the new potentiometer: adım 19, 3 resimden 2. Xbox One Wireless Controller Potentiometer Replacement, Install the new potentiometer: adım 19, 3 resimden 3.
    • Insert the new potentiometer into the housing.

    • Gently press down with the iFixit Precision Tweezers to secure the plastic tabs in the center of the housing.

    • Make sure the plastic tabs extend all the way out of the housing and are properly aligned before securing the potentiometer.

    FixBot'a Sor
  20. Xbox One Wireless Controller Potentiometer Replacement, Secure evetything: adım 20, 1 resimden 1.
    • Push down on the top edge of the potentiometer housing to close the gap created in step 16.

    • You should hear the plastic clips on the module click into place.

    FixBot'a Sor
Sonuç

To reassemble your device, follow these instructions in reverse order from step 15.

Bir başkası bu kılavuzu tamamladı.

Emanuele Artusi

Üyelik tarihi: 10/23/24

776 İtibar

5 adet Kılavuz yazıldı

0Kılavuz Yorumları

Yorum Ekle

İstatistikleri Görüntüle:

Son 24 Saat: 10

Son 7 gün: 86

Son 30 gün: 314

Her zaman: 314