Ana içeriğe geç

Xelio P1001A-BK DC Power Socket Replacement

Neye ihtiyacın var

  1. Xelio P1001A-BK DC Power Socket Replacement, Back Cover: adım 1, 2 resimden 1. Xelio P1001A-BK DC Power Socket Replacement, Back Cover: adım 1, 2 resimden 2.
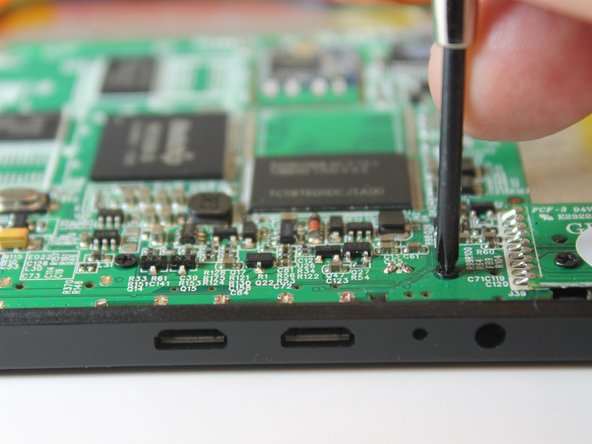
    • Remove the two 3 mm retaining screws from the side of the tablet with a Phillips #0 screwdriver.

  2. Xelio P1001A-BK DC Power Socket Replacement: adım 2, 2 resimden 1. Xelio P1001A-BK DC Power Socket Replacement: adım 2, 2 resimden 2.
    • Insert the plastic opening tool in between the shelf halves and lift the top shelf half to detach the securing tabs.

    • There are four securing tabs located on each long side.

    • Before fully separating the shell halves, observe if the speakers are separated from the shell half. If they are still in their sockets, gently pry them loose with the plastic opening tool.

  3. Xelio P1001A-BK DC Power Socket Replacement, DC Power Socket: adım 3, 1 resimden 1.
    • Remove the micro-SD card from the card slot if a card is in the slot

  4. Xelio P1001A-BK DC Power Socket Replacement: adım 4, 2 resimden 1. Xelio P1001A-BK DC Power Socket Replacement: adım 4, 2 resimden 2.
    • Remove the motherboard to screen ribbon cable

    • Pry the ribbon cable retaining tab loose with plastic opening tool.

    • Slide the ribbon cable out from the connector.

  5. Xelio P1001A-BK DC Power Socket Replacement: adım 5, 1 resimden 1.
    • Remove the camera from its socket. Do not remove the camera ribbon cable.

  6. Xelio P1001A-BK DC Power Socket Replacement: adım 6, 2 resimden 1. Xelio P1001A-BK DC Power Socket Replacement: adım 6, 2 resimden 2.
    • Remove the two motherboard retaining clip screws with a No. 0 Philips head screwdriver

    • Remove the retaining clip from the board.

  7. Xelio P1001A-BK DC Power Socket Replacement: adım 7, 1 resimden 1.
    • With the No. 0 Phillips head screwdriver, remove the two screw that hold the function and volume control switch assembly to the tablet.

  8. Xelio P1001A-BK DC Power Socket Replacement: adım 8, 1 resimden 1.
    • Remove the two screws that secure the micro-SD card reader to the tablet frame

  9. Xelio P1001A-BK DC Power Socket Replacement: adım 9, 2 resimden 1. Xelio P1001A-BK DC Power Socket Replacement: adım 9, 2 resimden 2.
    • Remove the three screws that secure the motherboard to the tablet frame

  10. Xelio P1001A-BK DC Power Socket Replacement: adım 10, 2 resimden 1. Xelio P1001A-BK DC Power Socket Replacement: adım 10, 2 resimden 2.
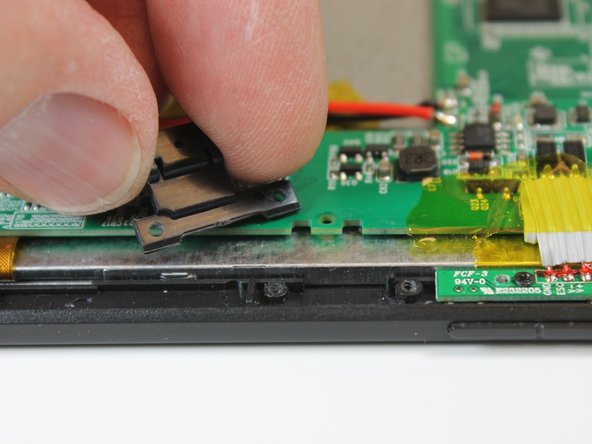
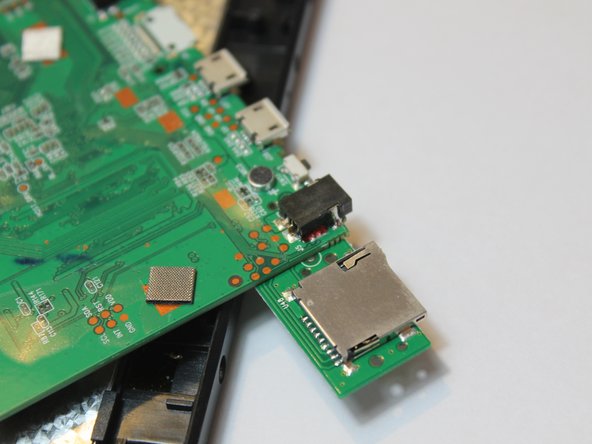
    • Gently lift the motherboard free from the tablet frame and turn it over to expose the opposite side. This will expose the power socket solder pins.

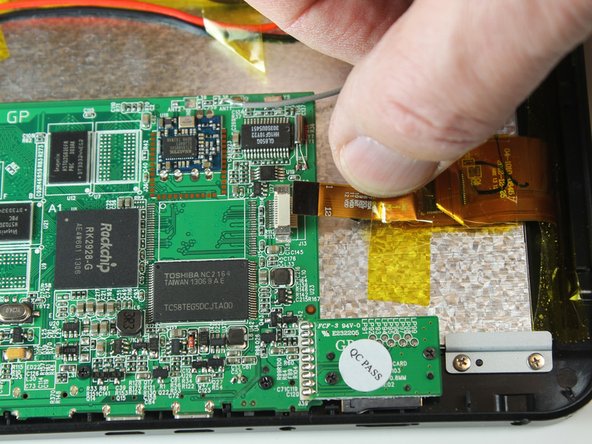
    • Be cautious when turning the board over as another ribbon cable, the speaker wires, battery wires, and Wi-Fi antenna wire as still connected to the motherboard.

  11. Xelio P1001A-BK DC Power Socket Replacement: adım 11, 1 resimden 1.
    • De-solder each of the solder points.

  12. Xelio P1001A-BK DC Power Socket Replacement: adım 12, 1 resimden 1.
    • Remove the damaged power socket.

    • Use a needle nose pliers or pair of tweezers to hold the power socket as it is a small part and may be difficult to hold.

    • Be careful to avoid touching the solder pins as they may still be hot

  13. Xelio P1001A-BK DC Power Socket Replacement: adım 13, 1 resimden 1.
    • Place the new part on the board

    • Solder the new part into place

  14. Xelio P1001A-BK DC Power Socket Replacement: adım 14, 1 resimden 1.
    • Place the motherboard back into its proper position but do not reinstall the securing screws yet.

  15. Xelio P1001A-BK DC Power Socket Replacement: adım 15, 1 resimden 1.
    • Plug the tablet power supply into the power socket

    • Using a volt-ohm meter, touch the meter probes to the battery wire points on the motherboard to ensure voltage is getting to the battery.

Sonuç

To reassemble your device, follow these instructions in reverse order.

Michael Case

Üyelik tarihi: 03/11/15

110 İtibar

2 adet Kılavuz yazıldı

Ekip

Colorado Springs, Team 4-2, Panko Spring 2015 Colorado Springs, Team 4-2, Panko Spring 2015 üyesi

UCCS-PANKO-S15S4G2

3 Üyeler

12 adet Kılavuz yazıldı

0 Yorum

Yorum Ekle

İstatistikleri Görüntüle:

Son 24 Saat: 0

Son 7 gün: 0

Son 30 gün: 0

Her zaman: 286