Giriş
INFORMATION ABOUT THE COAXIAL WIRE:
- The wire that connects the Wi-Fi antenna to the motherboard is a coaxial wire.
- The coaxial wire consists of a wire insulator (plastic), wire braid shield (middle layer), and center conductor (inner layer) surrounded by an insulator.
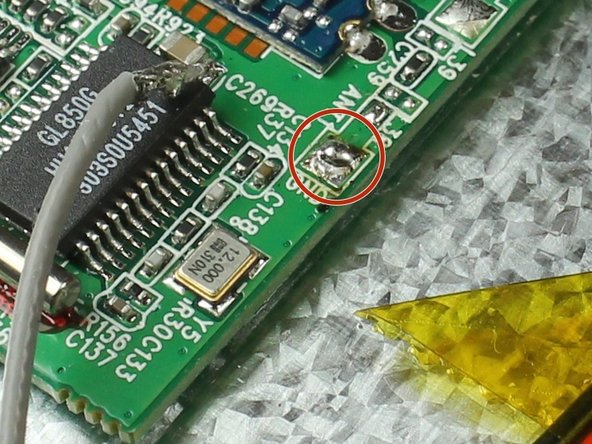
The connecting points of the coaxial wire to the motherboard are very small and may require a magnifying glass to see clearly.
Neye ihtiyacın var
-
-
Remove the two 3 mm retaining screws from the side of the tablet with a Phillips #0 screwdriver.
-
-
-
-
Desolder the connection on the motherboard.
-
Use a soldering vacuum to remove any excess solder.
-


Neredeyse bitti!
To reassemble your device, follow these instructions in reverse order.
Sonuç
To reassemble your device, follow these instructions in reverse order.
Ekip

Colorado Springs, Team 4-2, Panko Spring 2015 Colorado Springs, Team 4-2, Panko Spring 2015 üyesi
UCCS-PANKO-S15S4G2
3 Üyeler
12 adet Kılavuz yazıldı