Bu sürüm, hatalı düzenlemeler içerebilir. En son doğrulanmış bellek kopyası dönün.
Neye ihtiyacın var
-
Bu adım çevrilmemiş. Çevrilmesine yardım edin
-
Remove the two 3 mm retaining screws from the side of the tablet with a Phillips #0 screwdriver.
-
-
Bu adım çevrilmemiş. Çevrilmesine yardım edin
-
Insert the plastic opening tool in between the shelf halves and lift the top shelf half to detach the securing tabs.
-
-
-
Bu adım çevrilmemiş. Çevrilmesine yardım edin
-
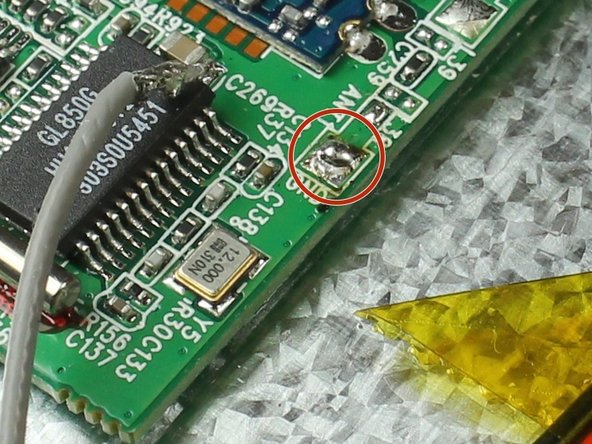
Desolder the connection on the motherboard.
-
Use a soldering vacuum to remove any excess solder.
-
-
Bu adım çevrilmemiş. Çevrilmesine yardım edin
-
Use wire strippers to strip off at least 2 mm of wire insulation from each wire.
-
-
Bu adım çevrilmemiş. Çevrilmesine yardım edin
-
Solder the outer wire braid shield to the ground point.
-


Ekip

Colorado Springs, Team 4-2, Panko Spring 2015 Colorado Springs, Team 4-2, Panko Spring 2015 üyesi
UCCS-PANKO-S15S4G2
3 Üyeler
12 adet Kılavuz yazıldı