Ana içeriğe geç

Xiaomi Mi 3 Rear Facing Camera Replacement

Neye ihtiyacın var

  1. Xiaomi Mi 3 Rear Facing Camera Replacement, Battery: adım 1, 3 resimden 1. Xiaomi Mi 3 Rear Facing Camera Replacement, Battery: adım 1, 3 resimden 2. Xiaomi Mi 3 Rear Facing Camera Replacement, Battery: adım 1, 3 resimden 3.
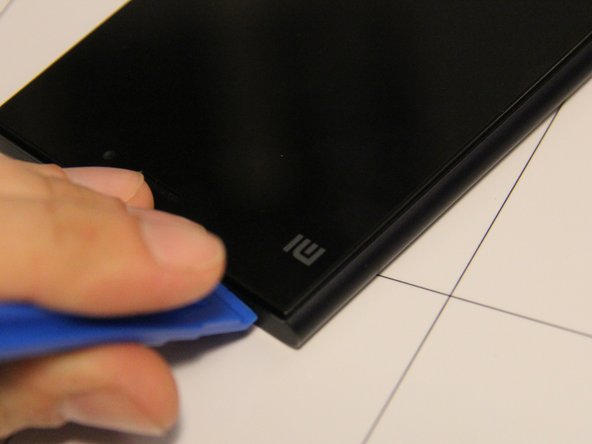
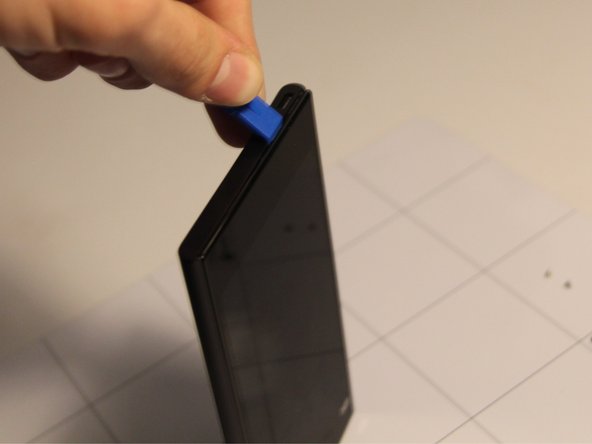
    • Firmly press the SIM card removal tool into the hole located at the top of the phone to eject the SIM card tray from the slot.

  2. Xiaomi Mi 3 Rear Facing Camera Replacement: adım 2, 2 resimden 1. Xiaomi Mi 3 Rear Facing Camera Replacement: adım 2, 2 resimden 2.
    • Remove the two Phillips head screws located at the top of the phone on either side where the SIM card was ejected.

    • One screw is located under an orange sticker which would serve as your warranty for the camera were this practice not illegal as per the Magnuson–Moss Warranty Act of 1975.

  3. Xiaomi Mi 3 Rear Facing Camera Replacement: adım 3, 3 resimden 1. Xiaomi Mi 3 Rear Facing Camera Replacement: adım 3, 3 resimden 2. Xiaomi Mi 3 Rear Facing Camera Replacement: adım 3, 3 resimden 3.
    • Insert a pry tool into the upper edge of the phone, where there is a small gap between screen and frame of the phone to begin separating the screen from the rest of the phone.

    • Be careful when using the pry tool as it can damage the phone's screen or other components.

  4. Xiaomi Mi 3 Rear Facing Camera Replacement: adım 4, 3 resimden 1. Xiaomi Mi 3 Rear Facing Camera Replacement: adım 4, 3 resimden 2. Xiaomi Mi 3 Rear Facing Camera Replacement: adım 4, 3 resimden 3.
    • Once the pry tool has been inserted into the phone, slide it around the perimeter of the phone while gently lifting until the screen panel and back panel of the phone separate.

    • Be careful when using the pry tool as it can damage the phone's screen or other components.

  5. Xiaomi Mi 3 Rear Facing Camera Replacement: adım 5, 2 resimden 1. Xiaomi Mi 3 Rear Facing Camera Replacement: adım 5, 2 resimden 2.
    • The back of the phone should now be separated from the screen.

  6. Xiaomi Mi 3 Rear Facing Camera Replacement: adım 6, 3 resimden 1. Xiaomi Mi 3 Rear Facing Camera Replacement: adım 6, 3 resimden 2. Xiaomi Mi 3 Rear Facing Camera Replacement: adım 6, 3 resimden 3.
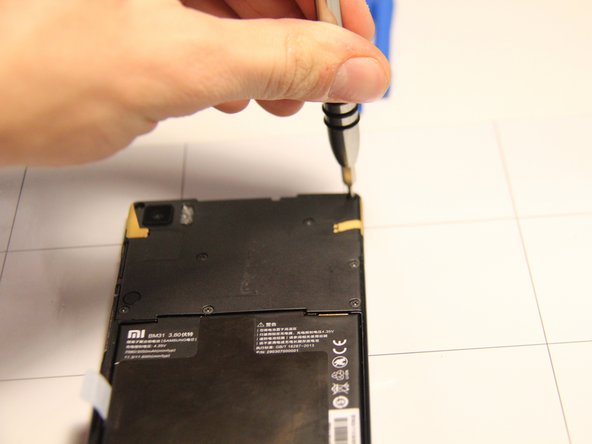
    • Place the front panel screen side down with the camera at the top.

    • Remove these six Phillips head screws located at the upper half of the phone.

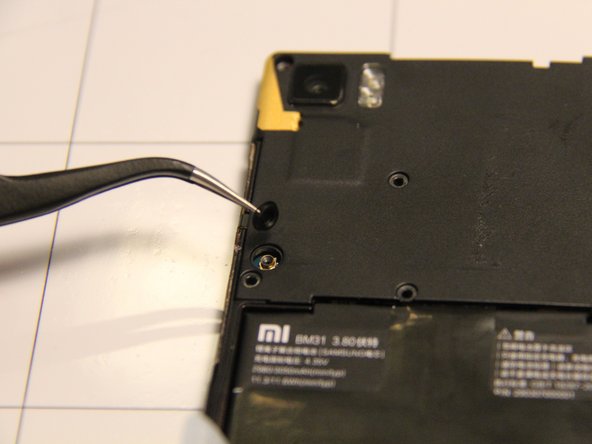
    • This screw is located under an orange sticker at the top right corner of the panel. The sticker can be removed with a pair of tweezers, then remove that Phillips head screw.

    You miss circle mark that bolt top left you are loosening. total 8 bolt.

    ary - Yanıt

  7. Xiaomi Mi 3 Rear Facing Camera Replacement: adım 7, 1 resimden 1.
    • Next, remove these three screws located at the bottom of the back panel.

    Why do you need to remove lower cover ?

    Marcel Robert - Yanıt

  8. Xiaomi Mi 3 Rear Facing Camera Replacement: adım 8, 2 resimden 1. Xiaomi Mi 3 Rear Facing Camera Replacement: adım 8, 2 resimden 2.
    • Using tweezers, remove the rubber dust cover on the back panel of the phone.

    Why do you need to remove that ?

    Marcel Robert - Yanıt

    This step is 100% unnecessary.

    Tengku Elzafir Habsjah - Yanıt

  9. Xiaomi Mi 3 Rear Facing Camera Replacement: adım 9, 3 resimden 1. Xiaomi Mi 3 Rear Facing Camera Replacement: adım 9, 3 resimden 2. Xiaomi Mi 3 Rear Facing Camera Replacement: adım 9, 3 resimden 3.
    • Remove the plastic cover on the bottom of the back panel by inserting the pry tool at the edge and gently lifting.

    Really needed ?

    Marcel Robert - Yanıt

    This step and step 9 are totally not needed

    leehanb - Yanıt

  10. Xiaomi Mi 3 Rear Facing Camera Replacement: adım 10, 3 resimden 1. Xiaomi Mi 3 Rear Facing Camera Replacement: adım 10, 3 resimden 2. Xiaomi Mi 3 Rear Facing Camera Replacement: adım 10, 3 resimden 3.
    • Remove the upper plastic cover from the back panel by inserting the pry tool into the upper edge and gently lifting.

    • Some models have the NFC antenna at the back of the battery glued to the top cover. It is not possible to remove the top cover without removing the battery as well. For these models, check the touchscreen guide for instructions.

  11. Xiaomi Mi 3 Rear Facing Camera Replacement: adım 11, 3 resimden 1. Xiaomi Mi 3 Rear Facing Camera Replacement: adım 11, 3 resimden 2. Xiaomi Mi 3 Rear Facing Camera Replacement: adım 11, 3 resimden 3.
    • Using a spudger, remove the small ribbon cable that is connected to the battery.

    Thank you, i changed the battery mi3 easily. I dont need steep 9,10,11. I removed nfc stickers that stick to battery and attached to top cover carefully, make it top cover and antenna nfc still integrated. Mi3 Battery is removed Due problem "Bootloop mi logo without android, and you can enter fastboot only, no matter it sucessfully flashed via fastboot room it will stay bootloop". So, yes, if the battery not good, it will goes to bootloop automatically.

    ary - Yanıt

    I have the same problem. I think my battery also dead! Good information!

    Rukmal Ranaweera -

  12. Xiaomi Mi 3 Rear Facing Camera Replacement: adım 12, 3 resimden 1. Xiaomi Mi 3 Rear Facing Camera Replacement: adım 12, 3 resimden 2. Xiaomi Mi 3 Rear Facing Camera Replacement: adım 12, 3 resimden 3.
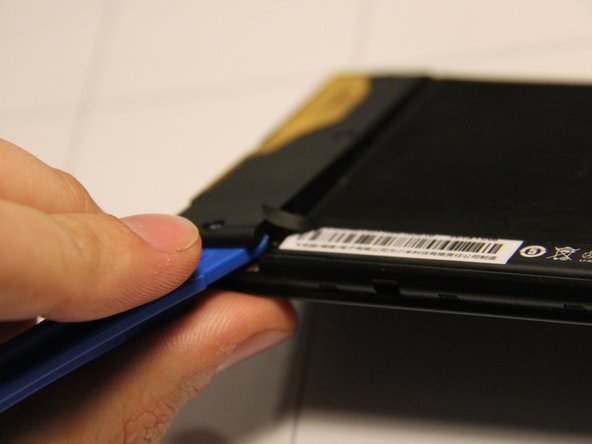
    • Remove the battery by gripping and pull up on the "Battery Removal" tab attached to the left side of the battery on the back panel.

    • Some force may be required to remove the battery since it is adhered to the phone with two pieces of double sided tape.

    Use of an old credit card to help lift the battery Is much easier.

    Marcel Robert - Yanıt

    I use iSesamo from the edge same as battery removal sticker. its safe from here, where other edge is have flexible cable near.

    ary - Yanıt

  13. Xiaomi Mi 3 Rear Facing Camera Replacement: adım 13, 1 resimden 1.
    • The battery is now removed from the panel.

  14. Xiaomi Mi 3 Rear Facing Camera Replacement, Motherboard: adım 14, 2 resimden 1. Xiaomi Mi 3 Rear Facing Camera Replacement, Motherboard: adım 14, 2 resimden 2.
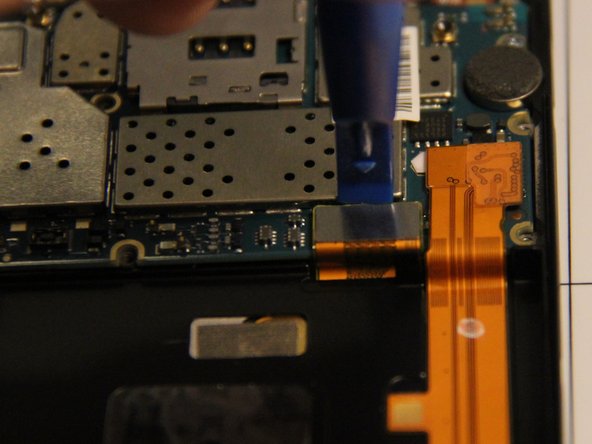
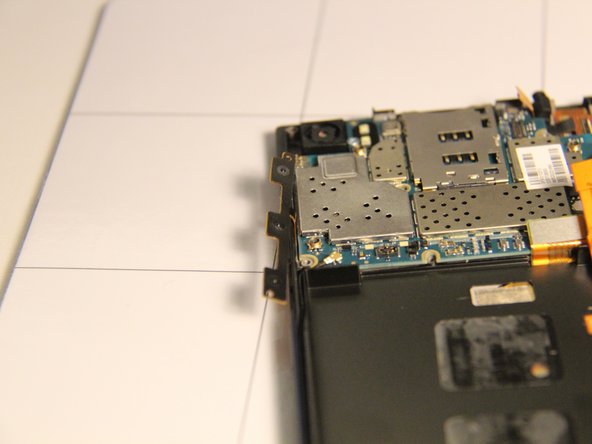
    • Disconnect the antenna wire that is attached to the lower left side of the motherboard using the pry tool.

  15. Xiaomi Mi 3 Rear Facing Camera Replacement: adım 15, 3 resimden 1. Xiaomi Mi 3 Rear Facing Camera Replacement: adım 15, 3 resimden 2. Xiaomi Mi 3 Rear Facing Camera Replacement: adım 15, 3 resimden 3.
    • Use a pry tool to separate the LCD display cable from the motherboard. The cable connects to the motherboard as a rectangular metallic piece at the bottom right of the motherboard.

  16. Xiaomi Mi 3 Rear Facing Camera Replacement: adım 16, 2 resimden 1. Xiaomi Mi 3 Rear Facing Camera Replacement: adım 16, 2 resimden 2.
    • Disconnect the gold ribbon cable for the LCD display by gently inserting the pry tool under the wide end and lifting up.

  17. Xiaomi Mi 3 Rear Facing Camera Replacement: adım 17, 3 resimden 1. Xiaomi Mi 3 Rear Facing Camera Replacement: adım 17, 3 resimden 2. Xiaomi Mi 3 Rear Facing Camera Replacement: adım 17, 3 resimden 3.
    • Separate a cable ribbon from the top right of the motherboard by gently inserting the pry tool under the rectangular metallic piece and lifting.

  18. Xiaomi Mi 3 Rear Facing Camera Replacement: adım 18, 3 resimden 1. Xiaomi Mi 3 Rear Facing Camera Replacement: adım 18, 3 resimden 2. Xiaomi Mi 3 Rear Facing Camera Replacement: adım 18, 3 resimden 3.
    • Separate a cable ribbon from the top right of the motherboard - near the cable from the previous step - by gently inserting the pry tool under the rectangular metallic piece and lifting.

  19. Xiaomi Mi 3 Rear Facing Camera Replacement: adım 19, 3 resimden 1. Xiaomi Mi 3 Rear Facing Camera Replacement: adım 19, 3 resimden 2. Xiaomi Mi 3 Rear Facing Camera Replacement: adım 19, 3 resimden 3.
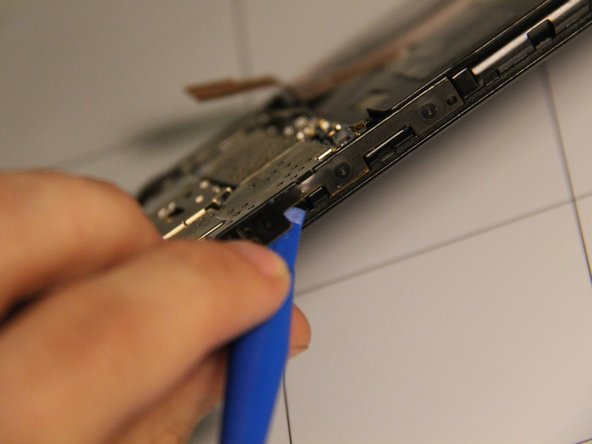
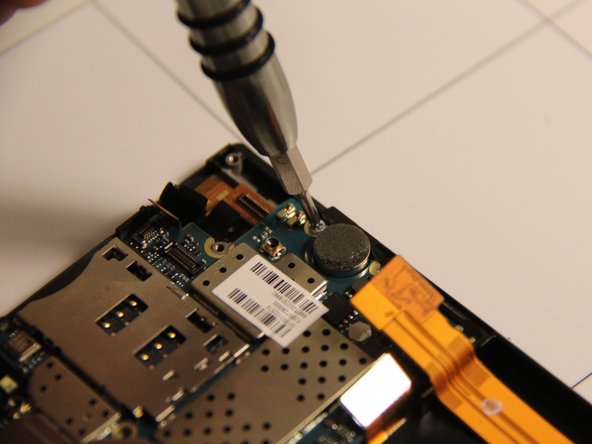
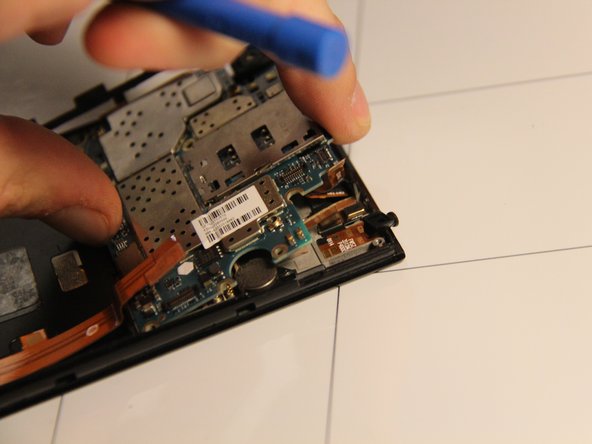
    • Using a pry tool, gently lift the side control buttons assembly away from the case. They should be loosely connected to the motherboard.

    This step Is absolutly NOT needed for motherboard removal.

    You will people brake flex doing so. Limit your guide to necessary step only!

    Marcel Robert - Yanıt

  20. Xiaomi Mi 3 Rear Facing Camera Replacement: adım 20, 2 resimden 1. Xiaomi Mi 3 Rear Facing Camera Replacement: adım 20, 2 resimden 2.
    • Remove these two screws.

  21. Xiaomi Mi 3 Rear Facing Camera Replacement: adım 21, 3 resimden 1. Xiaomi Mi 3 Rear Facing Camera Replacement: adım 21, 3 resimden 2. Xiaomi Mi 3 Rear Facing Camera Replacement: adım 21, 3 resimden 3.
    • Remove the motherboard from the panel carefully. Use the pry tool as a lever from the top of the panel and lift if from that side.

  22. Xiaomi Mi 3 Rear Facing Camera Replacement: adım 22, 1 resimden 1.
    • The motherboard has now been successfully removed.

  23. Xiaomi Mi 3 Rear Facing Camera Replacement, Rear Facing Camera: adım 23, 2 resimden 1. Xiaomi Mi 3 Rear Facing Camera Replacement, Rear Facing Camera: adım 23, 2 resimden 2.
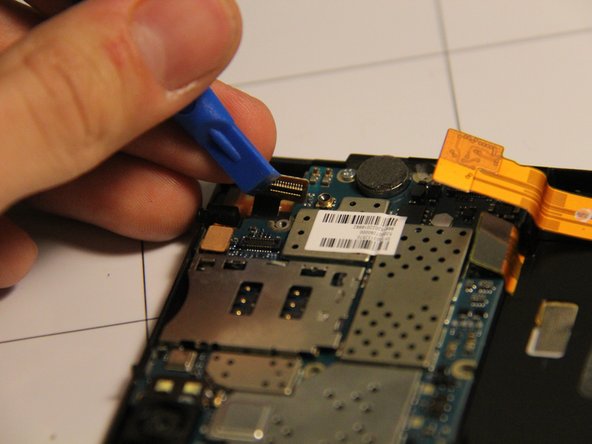
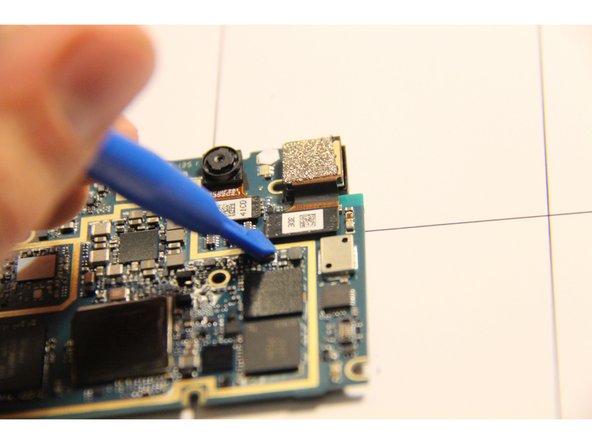
    • After removing the motherboard, use a pry tool to gently remove the camera's ribbon cable from the motherboard.

    What are the pin details? Which pin represents what?

    Sirish Kumar - Yanıt

  24. Xiaomi Mi 3 Rear Facing Camera Replacement: adım 24, 1 resimden 1.
    • The rear facing camera is now removed from the panel successfully.

Sonuç

To reassemble your device, follow these instructions in reverse order.

Bir başkası bu kılavuzu tamamladı.

Tyler Howard

Üyelik tarihi: 09/02/15

705 İtibar

4 adet Kılavuz yazıldı

Ekip

USF Tampa, Team 1-5, Remmell Fall 2015 USF Tampa, Team 1-5, Remmell Fall 2015 üyesi

USFT-REMMELL-F15S1G5

4 Üyeler

6 adet Kılavuz yazıldı

Bir Yorum

Is Possible tO charge the camera spare part with the advanced one from mi4i or newer.

ary - Yanıt

Yorum Ekle

İstatistikleri Görüntüle:

Son 24 Saat: 0

Son 7 gün: 0

Son 30 gün: 4

Her zaman: 2,149