Ana içeriğe geç

Yoga Tab 3 Pro Rear Panel Replacement

Neye ihtiyacın var

  1. Yoga Tab 3 Pro Rear Panel Replacement, Preparation: adım 1, 3 resimden 1. Yoga Tab 3 Pro Rear Panel Replacement, Preparation: adım 1, 3 resimden 2. Yoga Tab 3 Pro Rear Panel Replacement, Preparation: adım 1, 3 resimden 3.
    • Flip the tablet with the rear panel facing up.

    • Push the central button to lift the support.

    • Open the support entirely, using your hands.

    • Remember to turn off the device before doing any repair.

  2. Yoga Tab 3 Pro Rear Panel Replacement, Unscrew the rear shell: adım 2, 3 resimden 1. Yoga Tab 3 Pro Rear Panel Replacement, Unscrew the rear shell: adım 2, 3 resimden 2. Yoga Tab 3 Pro Rear Panel Replacement, Unscrew the rear shell: adım 2, 3 resimden 3.
    • You'll need to remove the adesive on the back plate before removing the screws.

    • Remove the sticker using the plastic spudger by lifting it up from one side, then you can remove it entirely by using your fingers.

    • Use the Philips #0 screwriver to remove the three screws.

  3. Yoga Tab 3 Pro Rear Panel Replacement, Separate the two halfs: adım 3, 3 resimden 1. Yoga Tab 3 Pro Rear Panel Replacement, Separate the two halfs: adım 3, 3 resimden 2. Yoga Tab 3 Pro Rear Panel Replacement, Separate the two halfs: adım 3, 3 resimden 3.
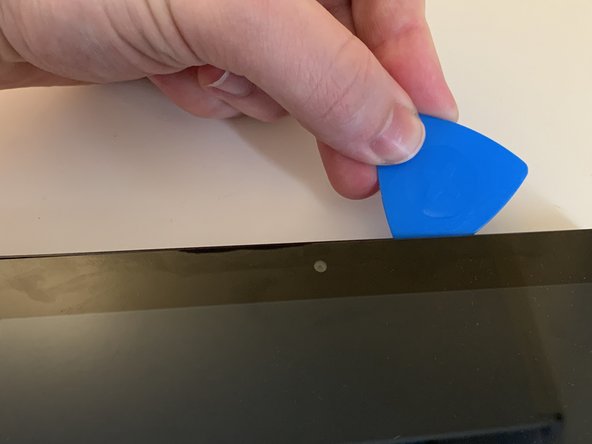
    • Divide the two halfs by inserting the spudger in the gap between the front shell and the rear one. To help you out with this job you can also use some guitar picks.

    • Do the same procedure on all three visible sides, including the two round side parts.

    • Be careful not to insert the spudger too deep into the device, to not damage the internal component.

    • You could use a little bit of force since the half is also hooked in the central portion on the tablet.

    • Important: the rear shell is the one that you remove from the front one; the internal component including the display, will stay attached to the front panel.

  4. Yoga Tab 3 Pro Rear Panel Replacement, Separation: adım 4, 3 resimden 1. Yoga Tab 3 Pro Rear Panel Replacement, Separation: adım 4, 3 resimden 2. Yoga Tab 3 Pro Rear Panel Replacement, Separation: adım 4, 3 resimden 3.
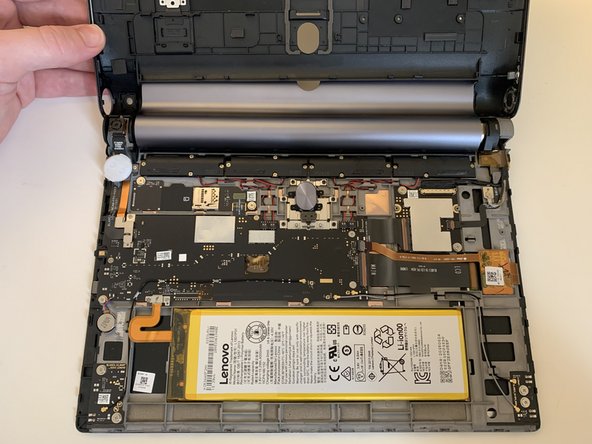
    • Once you unhook all the internal clips you can easily remove the rear panel.

    • Watch out at the two side keys and at the central one, since they'll detach form the rear shell. and You'll need to put them back during the reassembly.

Sonuç

To reassemble the device, folllow these instruction in reverse order.

Bir başkası bu kılavuzu tamamladı.

Bu çevirmenlere özel teşekkürler:

it en

100%

Domenyck Paoly dünyayı onarmamıza yardım ediyor! Katkıda bulunmak ister misiniz?
Çeviriye Başlayın ›

jacopo

Üyelik tarihi: 03/25/14

4.373 İtibar

3 adet Kılavuz yazıldı

Ekip

JappoTech JappoTech üyesi

Business

1 Üye

7 adet Kılavuz yazıldı

0 Yorum

Yorum Ekle

İstatistikleri Görüntüle:

Son 24 Saat: 1

Son 7 gün: 4

Son 30 gün: 13

Her zaman: 245