Giriş
The heat sink helps keep the processor cool and happy.
Neye ihtiyacın var
-
-
Use a coin to rotate the battery locking screw 90 degrees clockwise.
-
Lift the battery out of the computer.
-
-
-
Pull the keyboard release tabs (shown in yellow) toward you and lift up on the keyboard until it pops free.
-
If the keyboard does not come free, use a small flathead screwdriver to turn the keyboard locking screw (shown in orange) 180 degrees in either direction and try again.
-
Flip the keyboard over, away from the screen, and rest it face-down on the trackpad area.
-
-
-
Close the display and flip the computer over.
-
Remove the three hex screws using a T8 Torx screwdriver.
-
-
-
-
Remove the following 10 screws from the bottom shield:
-
Six 3 mm Phillips
-
Three 7.5 mm Phillips
-
One 14 mm Phillips
-
-
-
Remove the following 11 screws from the bottom of the computer:
-
Three 3 mm Phillips around the battery compartment.
-
Three 4.5 mm Phillips along the optical drive bezel. (a magnetic screwdriver may help to lift these screws out)
-
One 12 mm Phillips in the lower right corner.
-
Four 14.5 mm Phillips.
-
-
-
Remove the following 16 screws:
-
Thirteen 3 mm Phillips.
-
One 3 mm Phillips.
-
Two 4 mm Phillips.
-
-
-
Remove the two Phillips screws at the corners of the modem.
-
Remove the two Phillips screws at the corners of the modem.
-
-
-
Remove the three 3 mm Phillips screws securing the AirPort card bracket to the metal framework.
-
Lift the AirPort card retaining bracket up and out of the computer.
-
-
-
Remove the following 9 screws and 2 nuts from the heat sink:
-
Four 3 mm Phillips from around the fan and the heat sink bracket. The bracket can also be removed at this point.
-
One 11.5 mm (left) and one 4.5 mm (right) Phillips from the plastic fingers of the hinge grill.
-
One 4.5 mm Phillips at the top right corner of the heat sink.
-
Two 6 mm Phillips on the lower left corner and face of the heat sink.
-
Two 4 mm screw nuts with attached springs from either side of the heat sink.
-
-
-
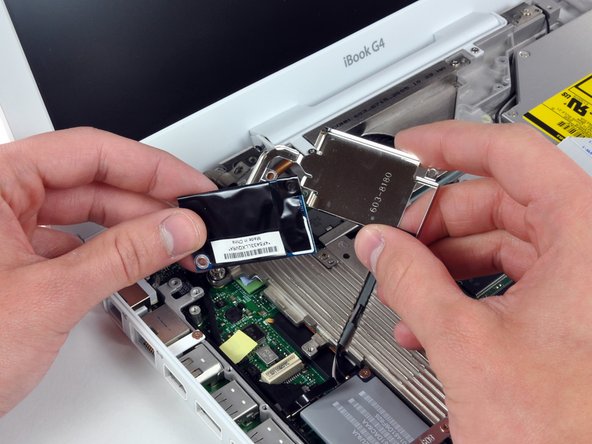
If necessary, use a spudger to pry up the heat sink from the left side near the hard drive.
-
While lifting straight up on the hinge grill with your right hand, lift the heat sink with your left hand from the end nearest the hard drive and remove the heat sink assembly from the computer.
-


To reassemble your device, follow these instructions in reverse order.
To reassemble your device, follow these instructions in reverse order.
