Giriş
Use this guide to replace the Inverter/AirPort cables in your iBook G4 14" 1.42 GHz.
Neye ihtiyacın var
-
-
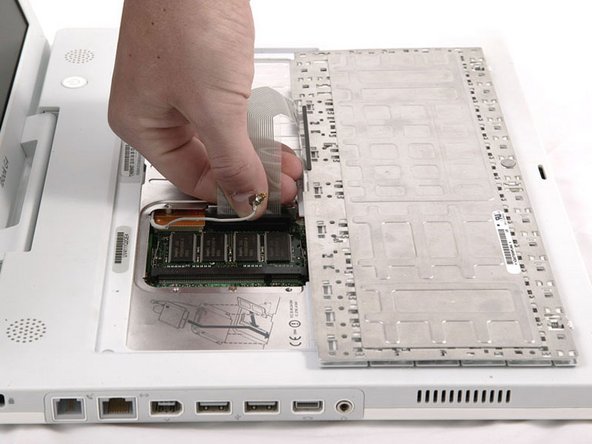
Pull the keyboard release tabs toward you and lift up on the keyboard until it pops free.
-
Flip the keyboard over, away from the screen, and rest it face-down on the trackpad area.
-
-
-
Use a pin (or anything you like) to remove the three rubber feet from the lower case.
-
-
-
-
Remove the following 10 screws from the bottom shield:
-
Six 3 mm Phillips
-
Three 7.5 mm Phillips
-
One 14 mm Phillips
-
-
-
Remove the following 11 screws from the bottom of the computer:
-
Three 3 mm Phillips around the battery compartment. (Some models may only have two screws.)
-
Three 4.5 mm Phillips along the optical drive bezel. (a magnetic screwdriver may help to lift these screws out)
-
One 11 mm Phillips in the lower right corner. (if present)
-
Four 14.5 mm Phillips.
-
-
-
Remove the following 16 screws:
-
Thirteen 3 mm Phillips.
-
One 3 mm Phillips. (actual screw not present in image)
-
Two 4 mm Phillips.
-
-
-
Lift the top shield up from the right side, minding the upper left corner, which may catch on the metal framework.
-
If your iBook has Bluetooth, as discussed in the previous step, you will need to slide the antenna through the lower I-shaped hole in the shield before completely removing the shield.
-
-
-
Turn the computer over.
-
Disconnect the inverter cable from the logic board and deroute it from the metal framework, removing tape as necessary.
-
-
-
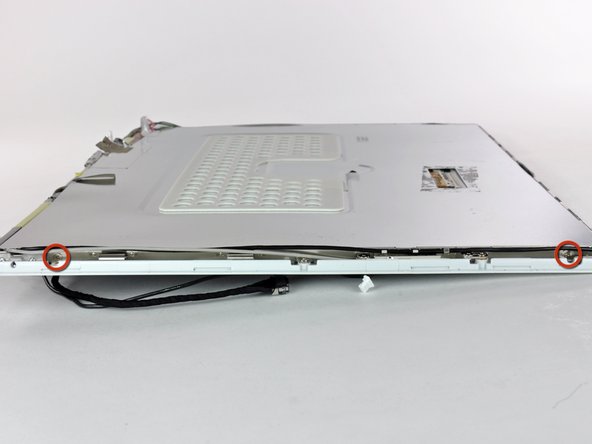
Use a 1.5 mm hex screwdriver to remove the two hex screws on either side of the display (four screws total).
-
-
-
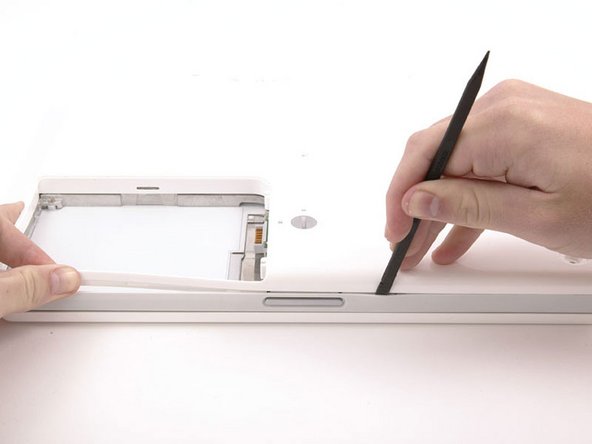
Remove the pieces of readily removable tape from around the perimeter of the display.
-
Carefully remove the aluminum tape covering the display data cable connection.
-
-
-
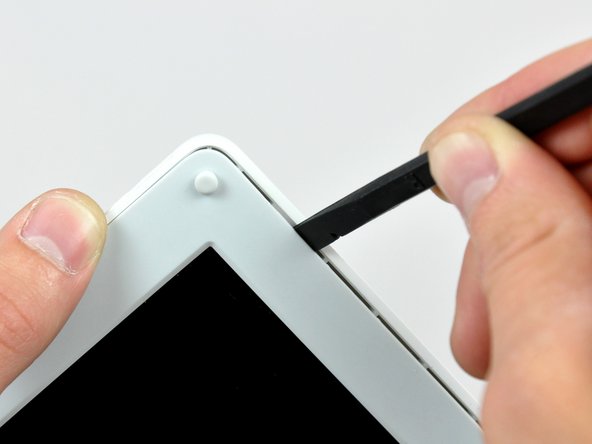
Remove the second of the two Phillips screws securing the clutch cover to the cast aluminum frame of the clutch hinges.
-
-
-
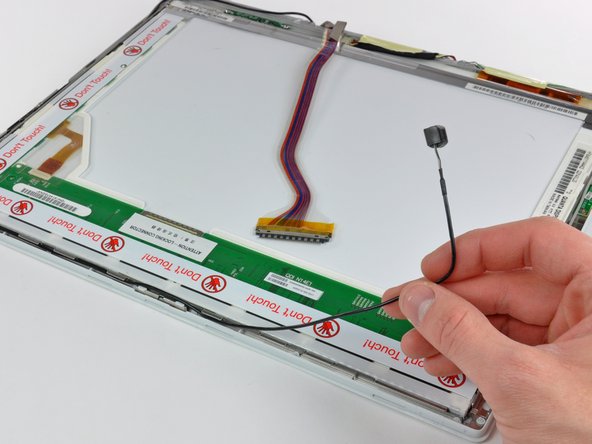
Remove the pieces of tape covering the display data and microphone cables near the bottom edge of the display.
-


To reassemble your device, follow these instructions in reverse order.
To reassemble your device, follow these instructions in reverse order.
İptal et: Bu kılavuzu tamamlamadım.
Bir başkası bu kılavuzu tamamladı.

3 Yorum
Somehow the pdf’s here have been messed with. The quality of the photography leaves much to be desired. I have been using iFixit for a decade and my older pdf’s are of superior quality, easy to follow. The photographer doesn’t seem to understand this isn’t about showing wide shots all the time but rather close-ups to help us understand the process. I am very perplexed at why the “if it ain’t broke don’t fix it” logic did not apply here.
Some of my older pdf’s even have parts layout sheets to be printed and used during the work.
Are any of the older pdf’s available?
A good example is step 38. Why do we have to see half of a man’s arm instead of a closeup on the inverter cable?? Do you get it? A part smaller then the size of a dime and we must look at huge hands and wide shots of unnecessary acreage of the computer??? Like in 41-43. I’ve never been so concerned at using iFixit as I am today. I just ordered an inverter cable off ebay to help with my screen going black after 30 seconds of being on and now I am wondering if I am going to be able to do it?? :-(