Ana içeriğe geç

Bu sürüm, hatalı düzenlemeler içerebilir. En son doğrulanmış bellek kopyası dönün.

Salt Önkoşul
Bu kılavuz yalnızca diğer kılavuzlar için bir ön koşul olarak kullanılmak üzere tasarlanmıştır. Tek başına eksiktir.

Neye ihtiyacın var

  1. Bu adım çevrilmemiş. Çevrilmesine yardım edin

    : adım 1, 1 resimden 1.
    • Use a 1.5 mm hex screwdriver to remove the two hex screws on either side of the display (four screws total).

    • If you don't have a 1.5 mm hex driver, you can probably get these screws out with a T6 Torx screwdriver. However, if you use a T6 Torx driver you'll be more likely to strip the screws.

  2. Bu adım çevrilmemiş. Çevrilmesine yardım edin

    : adım 2, 1 resimden 1.
    • Use your thumbs to slightly separate the rear bezel from the front bezel.

    • It is helpful to hold the opposing corner of the display stationary to aid in flexing the rear bezel away from the display.

  3. Bu adım çevrilmemiş. Çevrilmesine yardım edin

    : adım 3, 3 resimden 1. : adım 3, 3 resimden 2. : adım 3, 3 resimden 3.
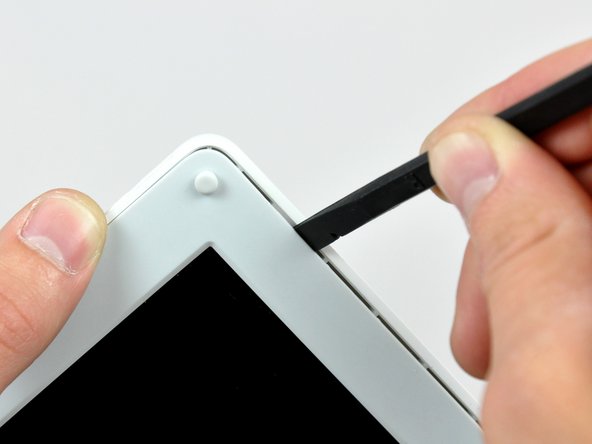
    • Insert the flat end of a spudger into the gap between the front and rear bezels.

    • Rotate your spudger until it is parallel to the front face of the display.

    • Run the spudger around the perimeter of the display to separate the rear bezel from its retaining clips.

  4. Bu adım çevrilmemiş. Çevrilmesine yardım edin

    : adım 4, 1 resimden 1.
    • Lift the rear bezel off the display.

Bitiş Çizgisi

0 Yorum

Yorum Ekle

İstatistikleri Görüntüle:

Son 24 Saat: 3

Son 7 gün: 4

Son 30 gün: 8

Her zaman: 260