Giriş
This guide will show how to install new control buttons. For help troubleshooting click the link to our troubleshooting page iHome IH11 Troubleshooting.
Neye ihtiyacın var
-
-
Unscrew the two 9.0 mm screws with the Phillips #1 screwdriver.
-
Remove the translucent bottom case.
 FixBot'a Sor
-
-
-
Remove the two 9.0mm screws on the back of the iHome with the Phillips #1 screwdriver.
-
Repeat the previous step for the two screws on the bottom.
-
-
-
-
Remove the two 9mm screws from the top of the iHome with a Phillips #1 Screwdriver.
-
-
-
Pop the dock connector out of the iHome and gently pull the white plastic plug from the dock connector.
-
-
-
Carefully pull apart the device.
-
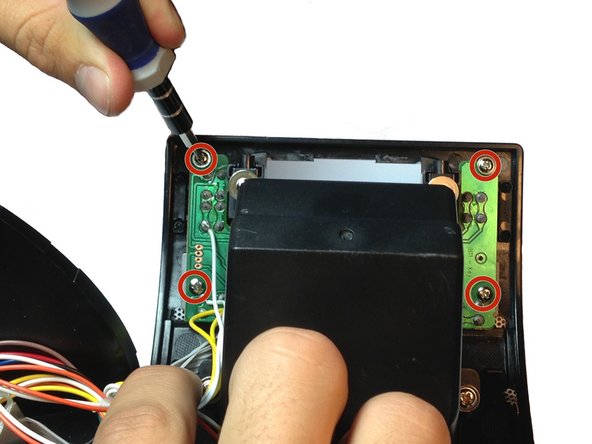
Remove the four screws that hold the circuit board for the buttons.
-
-
-
Desolder the four connections for the broken button.
-
Solder the new button in the place of the old one.
-


To reassemble your device, follow these instructions in reverse order.
İptal et: Bu kılavuzu tamamlamadım.
Bir başkası bu kılavuzu tamamladı.
Ekip

Cal Poly, Team 14-9, Maness Spring 2013 Cal Poly, Team 14-9, Maness Spring 2013 üyesi
CPSU-MANESS-S13S14G9
4 Üyeler
5 adet Kılavuz yazıldı