Ana içeriğe geç

iHome IH11 Main Motherboard Replacement

Neye ihtiyacın var

  1. iHome IH11 Main Motherboard Replacement, Outer Case: adım 1, 1 resimden 1.
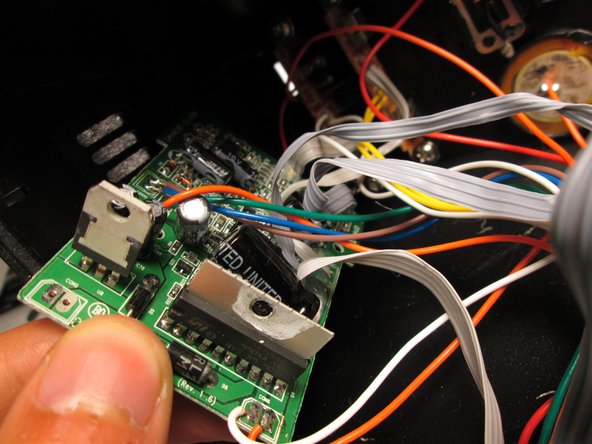
    • Unscrew the two 9.0 mm screws with a Phillips #1 screwdriver.

    • Remove the translucent bottom case.

  2. iHome IH11 Main Motherboard Replacement: adım 2, 2 resimden 1. iHome IH11 Main Motherboard Replacement: adım 2, 2 resimden 2.
    • Remove the two Phillips #1 9.0mm screws on the back of the iHome.

    • Repeat the previous step for the two 9.0mm screws on the bottom.

    • Carefully slide the back cover off. There are wires connected to the back cover.

  3. iHome IH11 Main Motherboard Replacement: adım 3, 1 resimden 1.
    • Remove the aluminum bracket by loosening the two nuts and removing the 8.0 mm bolts.

    • Pull the bracket out.

  4. iHome IH11 Main Motherboard Replacement: adım 4, 2 resimden 1. iHome IH11 Main Motherboard Replacement: adım 4, 2 resimden 2.
    • Remove the two 12.0mm screws that hold the motherboard with a Phillips #1 screwdriver.

    • Slide the motherboard gently out.

  5. iHome IH11 Main Motherboard Replacement: adım 5, 1 resimden 1.
    • Solder each wire to corresponding input on the motherboard.

Sonuç

To reassemble your device, follow these instructions in reverse order.

Bir başkası bu kılavuzu tamamladı.

Courtney Steinberg

Üyelik tarihi: 04/19/13

35 İtibar

3 adet Kılavuz yazıldı

Ekip

Cal Poly, Team 14-9, Maness Spring 2013 Cal Poly, Team 14-9, Maness Spring 2013 üyesi

CPSU-MANESS-S13S14G9

5 Üyeler

5 adet Kılavuz yazıldı

0 Yorum

Yorum Ekle

İstatistikleri Görüntüle:

Son 24 Saat: 0

Son 7 gün: 0

Son 30 gün: 2

Her zaman: 369