Bu sürüm, hatalı düzenlemeler içerebilir. En son doğrulanmış bellek kopyası dönün.
Neye ihtiyacın var
-
Bu adım çevrilmemiş. Çevrilmesine yardım edin
-
On the opposite side of the speaker should be a sticker, remove it with your fingers or the flat plastic iFIxit tool.
-
Use a Philip's screwdriver to take the screws out of the cover.
-
-
Bu adım çevrilmemiş. Çevrilmesine yardım edin
-
Once the screws are all out, the cover should come off revealing the motherboard.
-
-
-
Bu adım çevrilmemiş. Çevrilmesine yardım edin
-
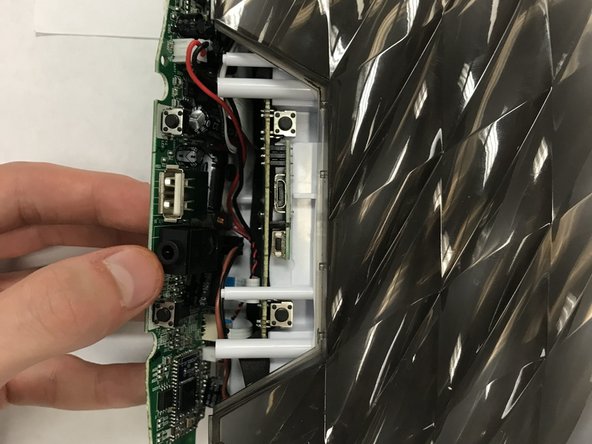
You will notice that the triangular black volume piece is loose, make sure to take that off revealing the buttons.
-
Once that is done, the motherboard can be taken out. May require some wiggling.
-
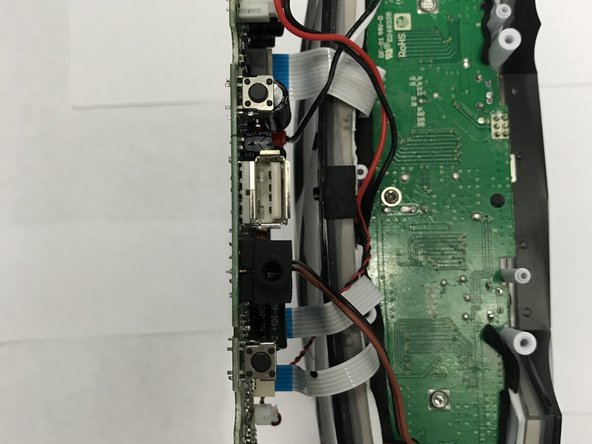
Make sure none of the wires are damaged and that they are all connected.
-
-
Bu adım çevrilmemiş. Çevrilmesine yardım edin
-
The connections shown here can be taken off by pulling on the white plastic connector piece.
-
The same can be said about the white, paper like, connectors. Pull on them gently.
-
Once all connections are apart, the motherboard is safe to be replaced.
-


İptal et: Bu kılavuzu tamamlamadım.
Bir başkası bu kılavuzu tamamladı.

Ekip

University of North Texas, Team S1-G3, Thompson Fall 2017 University of North Texas, Team S1-G3, Thompson Fall 2017 üyesi
UNT-THOMPSON-F17S1G3
4 Üyeler
2 adet Kılavuz yazıldı