Giriş
This guide gives step-by-step directions for reaching the inner-workings of the display screen of the iMac G4.
Neye ihtiyacın var
-
-
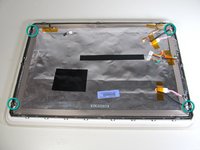
Position the computer so that all three screws on the underside of the display are accessible. This may be upright or laid flat with the screen face down on a soft surface.
-
-
-
-
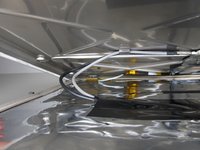
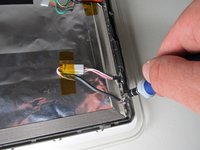
The next cord to unplug between the two panels of the display is the inverter cable. This will be located under the inverter closer to the bottom of the screen and will have only two cables connecting at a smaller white connection.
-
Like the inverter cable, grasp each side of the white connection and gently unplug the inverter cable.
-
-
-
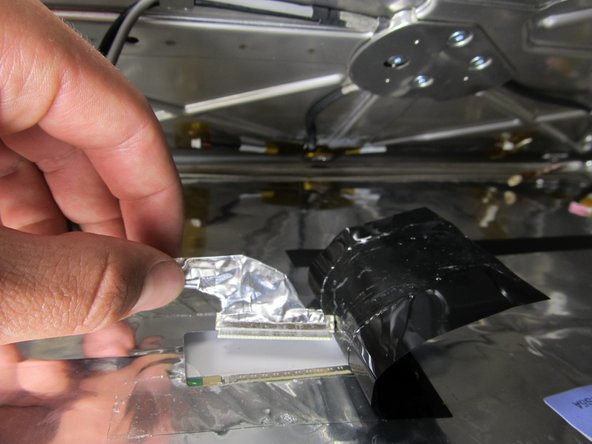
The third, and final, cable you will need to unplug is the TMDS connector. This is located under a rectangular strip of black tape that has a gray and black cord coming out of one end.
-
Peel back the black tape, starting at the end with the cords protruding out.
-
Under the black tape, you will see the gray and black cords going into a connection that looks like it is wrapped in aluminum foil. Grasp that connection and pull carefully in the downward direction toward the bottom of the display.
-


To reassemble your device, follow these instructions in reverse order.
To reassemble your device, follow these instructions in reverse order.
İptal et: Bu kılavuzu tamamlamadım.
8 farklı kişi bu kılavuzu tamamladı.
Ekip

Cal Poly, Team 21-22, Maness Fall 2011 Cal Poly, Team 21-22, Maness Fall 2011 üyesi
CPSU-MANESS-F11S21G22
4 Üyeler
13 adet Kılavuz yazıldı
3Kılavuz Yorumları
For every step we need to have an action. Step 4 of dissasembling the screen does not have this.
In step 5 we remove the inverter cable, but in step 6 we say inverter cable... again . Is this true?
It should say Status LED, not inverter.
Very informative, just fished following this guide. my replacement LCD came with the bracket that is normally attached to the bezel, so i had one extra (no brainer) step