Giriş
Power your iMac by replacing the power supply.
Neye ihtiyacın var
Videoya Genel Bakış
-
-
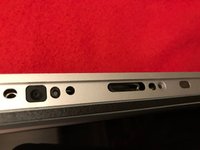
Loosen the single Phillips screw in the center of the access door.
-
Remove the access door from your iMac.
-
-
Bu adımda kullanılan alet:Heavy-Duty Suction Cups (Pair)$14.95
-
Stick two suction cups to opposing corners of the glass panel.
-
-
-
Remove the following 12 screws securing the front bezel to the rear case:
-
Eight 13 mm T8 Torx.
-
Four 25 mm T8 Torx.
-
-
-
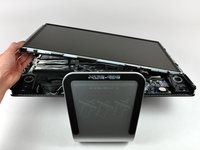
Place your hands at the top corners of the bezel (to the side) and lift the bezel 2-3cm from the body by working from the top. After this you can also disengage the bottom of the bezel (the memory modules will prevent the bottom of the bezel to detach first). When reassembling, start with the bottom of the bezel.
-
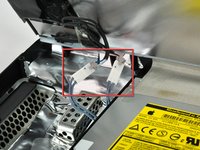
To fully detach the bezel: disconnect the microphone cable connector, removing tape as necessary.
-
To keep it attached, leave the microphone cable attached to the logic board, and place the bezel 'above' the chassis, with the microphone cable forming a hinge.
-
-
-
-
be sure to tuck the microphone cable and connector into the void next to the camera board.
-
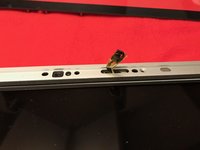
Gently guide the microphone connector and cables through the ±1in long slot at the right of the iSight camera. Once the bezel is properly assembled, gently push the microphone connector and cable into the bezel through that slot.
-
-
-
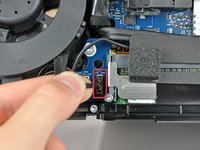
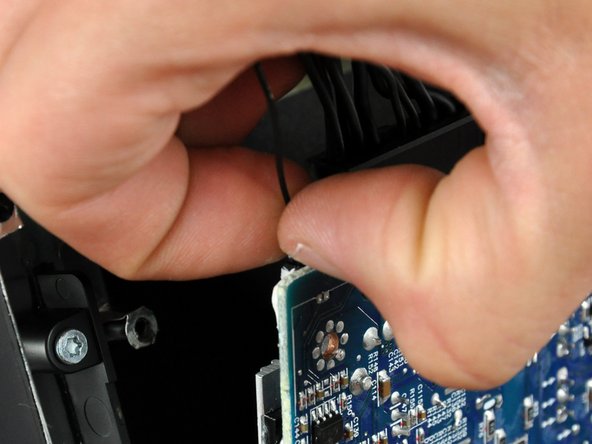
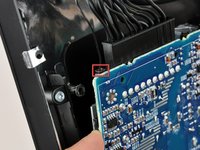
Pull the LCD temperature sensor connector straight up out of its socket on the logic board.
-
If necessary, de-route the LCD temperature sensor cable from behind the logic board.
-
-
-
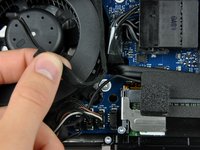
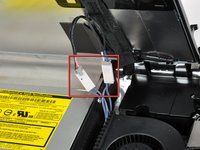
With the display panel still lifted, disconnect the four inverter cables.
-
If you are replacing a hard drive and have an extra set of hands, it is possible to reach in and remove the drive without disconnecting anything but the LCD temp and display connector in the previous step with the LCD in its propped position.
-
-
-
Remove four T10 Torx screws securing the power supply to the rear case.
-
Two fine-thread 7 mm T10 Torx
-
Two coarse-thread 7 mm T10 Torx
-


To reassemble your device, follow these instructions in reverse order.
To reassemble your device, follow these instructions in reverse order.
İptal et: Bu kılavuzu tamamlamadım.
100 farklı kişi bu kılavuzu tamamladı.

12Kılavuz Yorumları
Thank you thank you thank you--I fixed replaced the power supply and my computer works again!
The instructions were just on the dot--It only took me around 30 min. from start to finish.
Well it worked! But I have to say pulling out the temperature sensor wire requires harder nails than I have. My son ripped the wire out. But thankfully I got the answer I needed from the forum. My iMac is working great! Although there a couple missin & a couple unaccounted screws, the Mac doesn't care.
I have ordered a MacBook Pro to add mobility. When the times comes I will learn the repairs from this website. Thank you so much for all the help & wok you do for us!
I was able to replace the power supply, but it appears there is something else wrong with my iMac. It started normally, but slower. After I entered my password, it loaded very slowly. When the progress bar completed, it went to a pure white screen. I left it for an hour or so and decided to shut it down with the power button. This time nothing happened when the progress bar finished. I left it and went to bed. The next morning, I woke it up and it was asking for my password again. Screensaver. My computer had the pages I was viewing when the power supply gave out. Everything was slow to respond, but I eventually got the pages closed. The computer won’t respond to my commands for the most part. I’m not able to open any of the programs. Safari, mail, etc… I left a question in the forum.