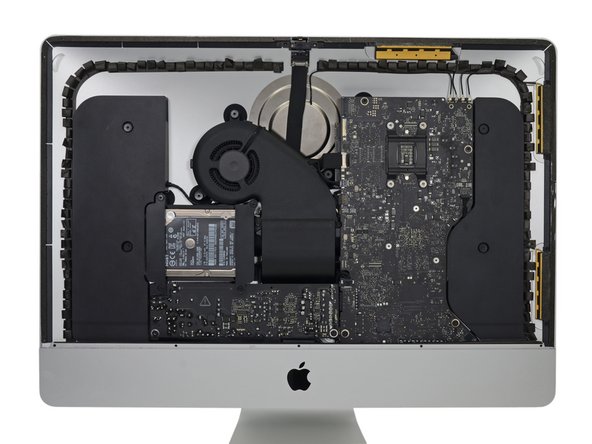
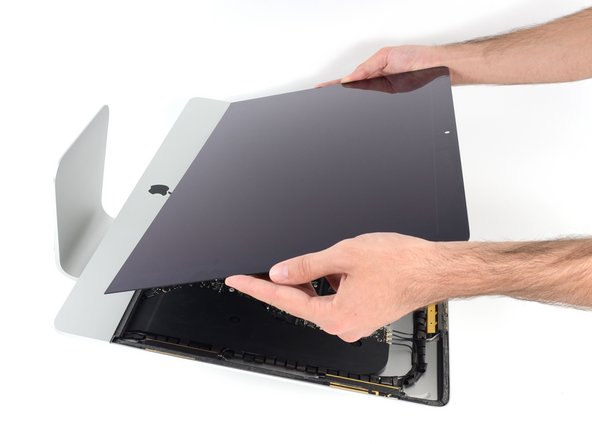
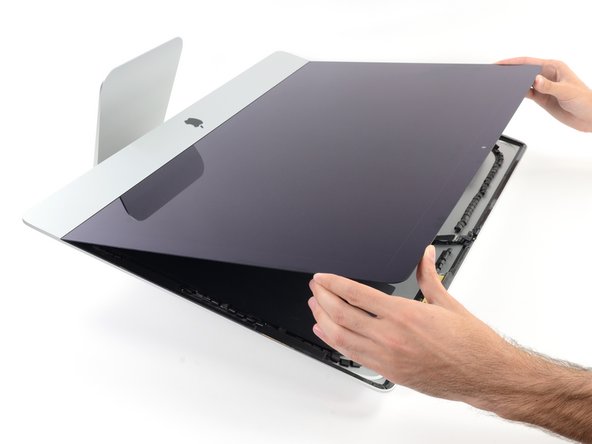
Ana içeriğe geç

iMac Intel 21.5" EMC 2544 Adhesive Strips Replacement

Arşivlenmiş Kılavuz
Bu kılavuz sadece arşivsel amaçlarla muhafaza edilmiştir. Onarımınızı gerçekleştirmek için kılavuzun güncel halini kullanın.

Neye ihtiyacın var

  1. iMac Intel 21.5" EMC 2544 Adhesive Strips Replacement, Adhesive Strips: adım 1, 3 resimden 1. iMac Intel 21.5" EMC 2544 Adhesive Strips Replacement, Adhesive Strips: adım 1, 3 resimden 2. iMac Intel 21.5" EMC 2544 Adhesive Strips Replacement, Adhesive Strips: adım 1, 3 resimden 3.
    • Before you start placing strips, you should remove all of the old adhesive around the perimeter of the rear enclosure.

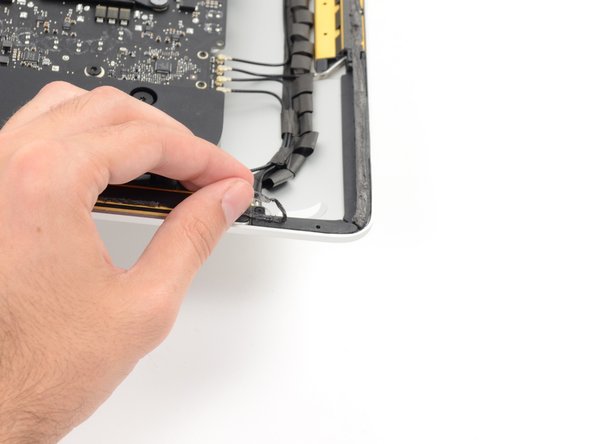
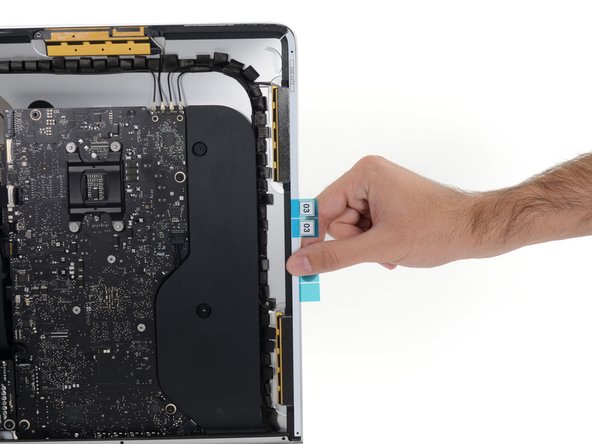
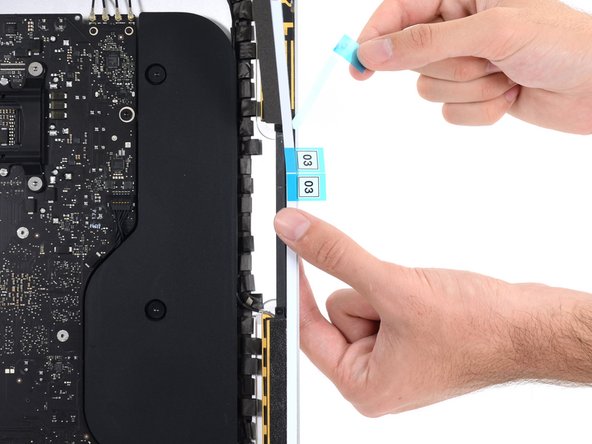
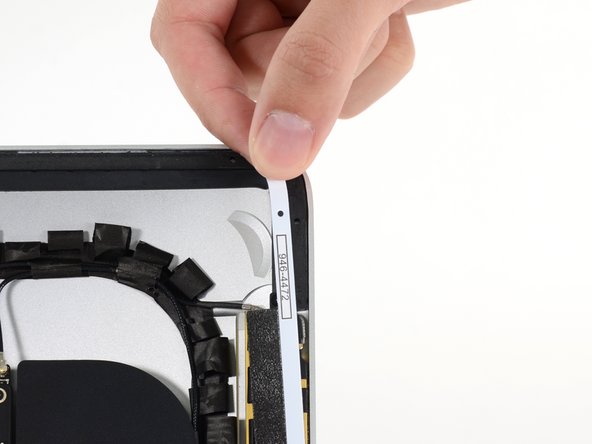
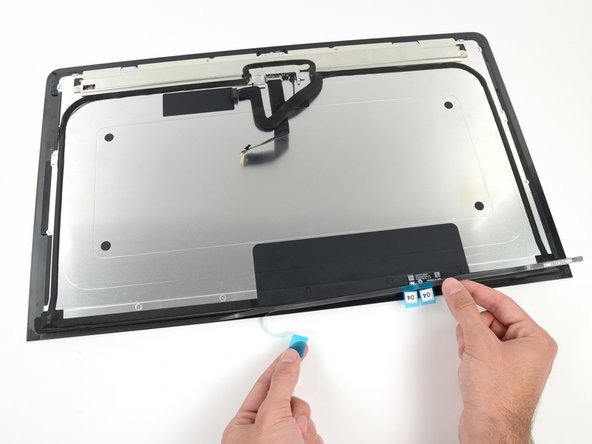
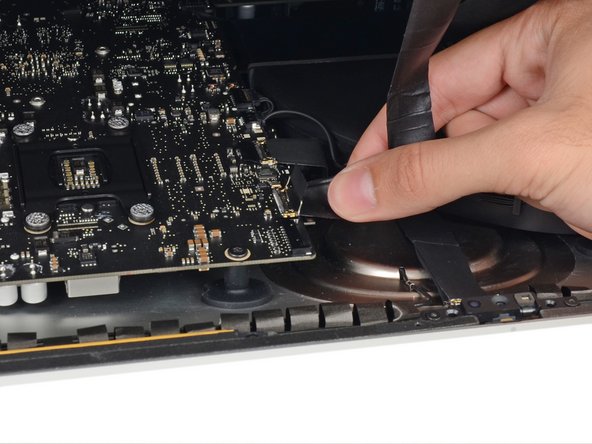
    • Use a spudger to scrape up the edge of each strip of adhesive, then peel it off with your fingers.

    • Repeat this process as necessary to remove all of the old adhesive from the rear enclosure, as well as the display.

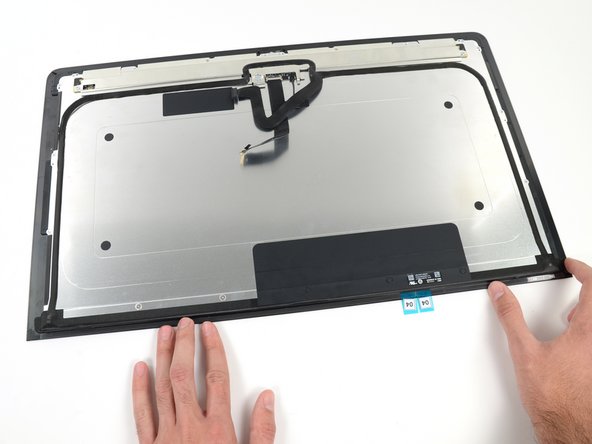
    • For best results, after all the adhesive is removed, carefully clean the area under the adhesive with 90% (or greater) isopropyl alcohol and a lint-free cloth. Wipe in one direction, not back and forth.

    • This helps prep the surface so that the new adhesive bonds properly (and your display won't fall out).

  2. iMac Intel 21.5" EMC 2544 Adhesive Strips Replacement: adım 2, 3 resimden 1. iMac Intel 21.5" EMC 2544 Adhesive Strips Replacement: adım 2, 3 resimden 2. iMac Intel 21.5" EMC 2544 Adhesive Strips Replacement: adım 2, 3 resimden 3.
    • Start with the strip labeled 03, which goes on the right vertical side of the rear enclosure.

    • Before peeling off any backing, line it up against the frame of the iMac to get an idea of where it goes.

    • Peel the short piece of backing off the back of the strip.

  3. iMac Intel 21.5" EMC 2544 Adhesive Strips Replacement: adım 3, 2 resimden 1. iMac Intel 21.5" EMC 2544 Adhesive Strips Replacement: adım 3, 2 resimden 2.
    • Insert the tip of a spudger into the hole at the top of the strip from the side that still has a backing on it.

  4. iMac Intel 21.5" EMC 2544 Adhesive Strips Replacement: adım 4, 3 resimden 1. iMac Intel 21.5" EMC 2544 Adhesive Strips Replacement: adım 4, 3 resimden 2. iMac Intel 21.5" EMC 2544 Adhesive Strips Replacement: adım 4, 3 resimden 3.
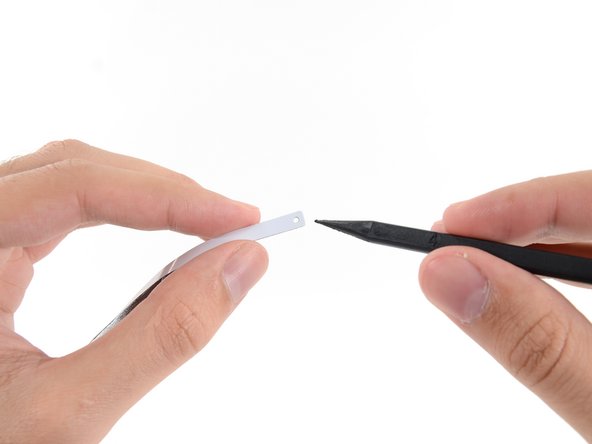
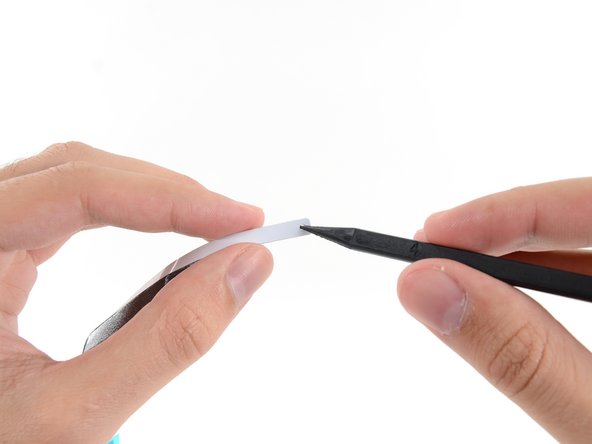
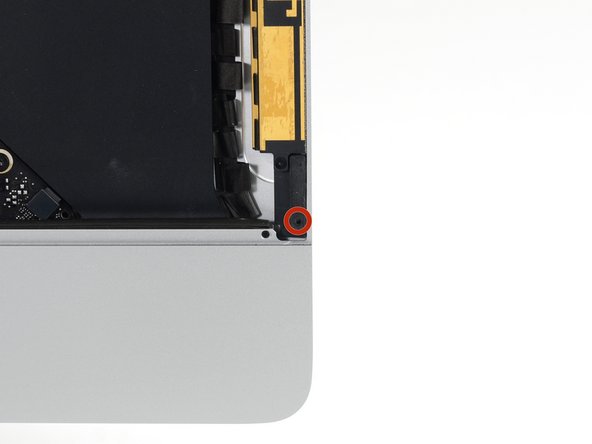
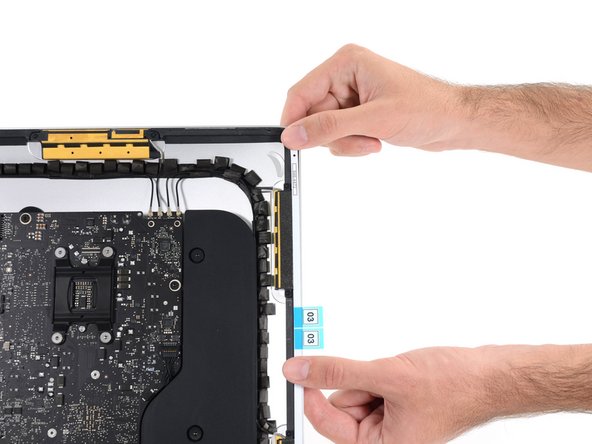
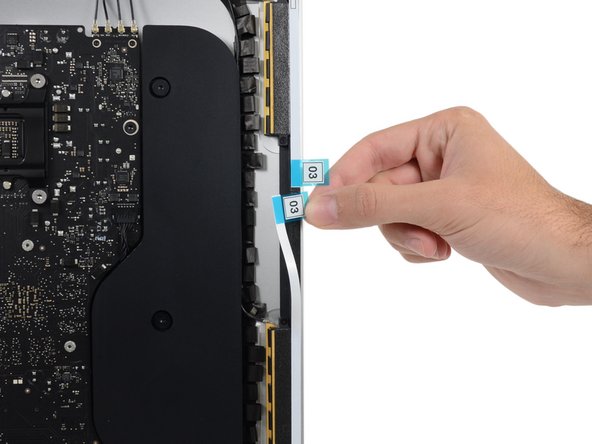
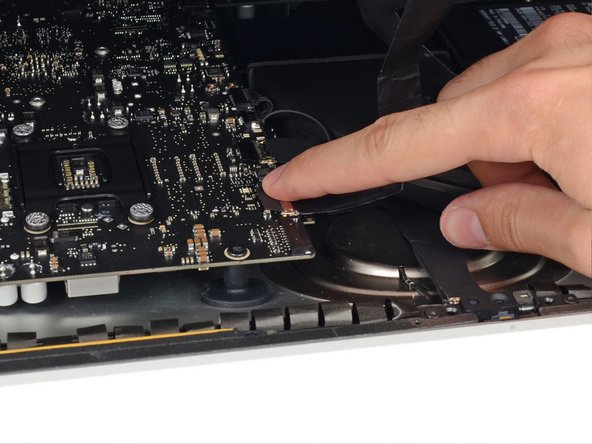
    • With the spudger still poking through the hole in the adhesive strip, push the spudger tip into the corresponding hole in the frame of the iMac.

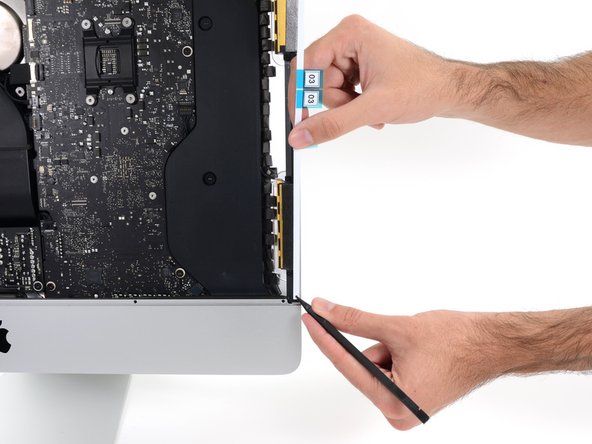
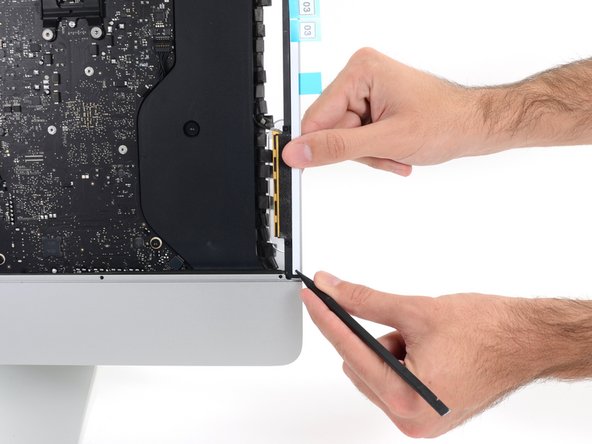
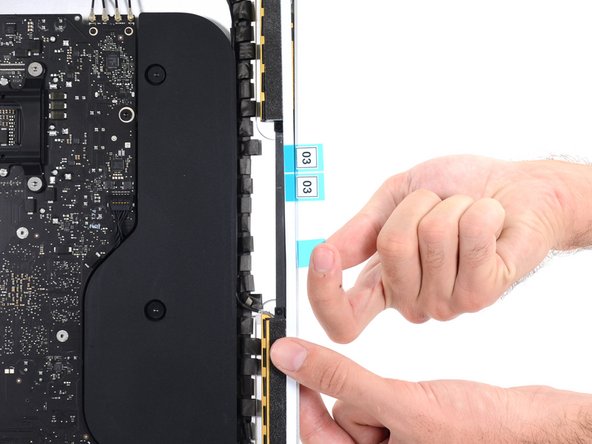
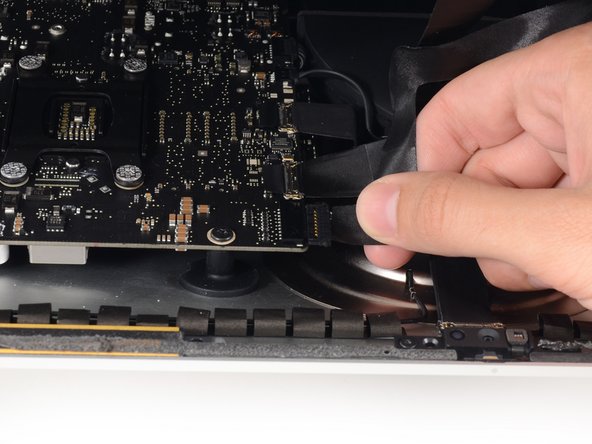
    • Using the hole and spudger to anchor the position of the adhesive strip, line the strip up against the right edge, gently pulling up against the spudger to ensure the strip is taut, and stick it onto the frame.

  5. iMac Intel 21.5" EMC 2544 Adhesive Strips Replacement: adım 5, 2 resimden 1. iMac Intel 21.5" EMC 2544 Adhesive Strips Replacement: adım 5, 2 resimden 2.
    • Once you've aligned the bottom half of the adhesive strip, peel the longer piece of backing out from behind the strip.

    • If the bottom half isn't aligned properly, you can carefully peel it up and re-stick it before peeling off the lower backing strip. Be sure to use the spudger tip to anchor the top.

  6. iMac Intel 21.5" EMC 2544 Adhesive Strips Replacement: adım 6, 2 resimden 1. iMac Intel 21.5" EMC 2544 Adhesive Strips Replacement: adım 6, 2 resimden 2.
    • Align the upper half of the strip with the right edge of the rear enclosure, and stick it down.

  7. iMac Intel 21.5" EMC 2544 Adhesive Strips Replacement: adım 7, 2 resimden 1. iMac Intel 21.5" EMC 2544 Adhesive Strips Replacement: adım 7, 2 resimden 2.
    • Use your finger to smooth the strip labeled 03 along the right edge. Make sure it is neatly aligned with the right side of the frame and that it sits flat.

    • Do not peel off the front adhesive backing yet.

  8. iMac Intel 21.5" EMC 2544 Adhesive Strips Replacement: adım 8, 1 resimden 1.
    • Work your way around the perimeter of the iMac, adding three more adhesive strips in the same manner.

    • Working counter-clockwise from strip 03, place:

    • Strip 02 on the top right

    • Strip 01 on the top left

    • Strip 05 on the left vertical

  9. iMac Intel 21.5" EMC 2544 Adhesive Strips Replacement: adım 9, 3 resimden 1. iMac Intel 21.5" EMC 2544 Adhesive Strips Replacement: adım 9, 3 resimden 2. iMac Intel 21.5" EMC 2544 Adhesive Strips Replacement: adım 9, 3 resimden 3.
    • In some kits, the 04 strip may be split into a 4R, to be placed on the right half of the display, and a 4L to be placed on the left half.

    • Remove the leftmost backing of the strip labeled 04 and align it with the bottom left edge of the rear enclosure, about a 1/4 inch away from the edge of the display glass.

    • Repeat the process for the longer, rightmost backing.

    • Smooth out the strip from the center to ensure a good seal with no bubbles or wrinkles.

  10. iMac Intel 21.5" EMC 2544 Adhesive Strips Replacement: adım 10, 2 resimden 1. iMac Intel 21.5" EMC 2544 Adhesive Strips Replacement: adım 10, 2 resimden 2.
    • Peel up and remove the remaining backings from all of the strips around the frame.

  11. iMac Intel 21.5" EMC 2544 Adhesive Strips Replacement: adım 11, 2 resimden 1. iMac Intel 21.5" EMC 2544 Adhesive Strips Replacement: adım 11, 2 resimden 2.
    • Lay the bottom edge of the display glass against the top of the lower bezel. Be sure to align the edges of the display with the edges of the rear case.

    • Do not fully lower the display; there are still two cables that must be attached. Once you've set the display down, you won't be able to lift it again without damaging the adhesive.

    • Old techs put the display on and test the repair before they glue it down.

  12. iMac Intel 21.5" EMC 2544 Adhesive Strips Replacement: adım 12, 2 resimden 1. iMac Intel 21.5" EMC 2544 Adhesive Strips Replacement: adım 12, 2 resimden 2.
    • While holding the display up with one hand, use the other hand to gently insert the display data cable connector into its socket on the logic board.

    • Be sure to press it straight into the socket, and insert it completely.

    • Secure the metal retaining bracket on the display data cable downwards towards the logic board.

  13. iMac Intel 21.5" EMC 2544 Adhesive Strips Replacement: adım 13, 2 resimden 1. iMac Intel 21.5" EMC 2544 Adhesive Strips Replacement: adım 13, 2 resimden 2.
    • Insert the display power cable into its socket on the logic board.

  14. iMac Intel 21.5" EMC 2544 Adhesive Strips Replacement: adım 14, 2 resimden 1. iMac Intel 21.5" EMC 2544 Adhesive Strips Replacement: adım 14, 2 resimden 2.
    • Before sealing the screen in place, you may want to test powering on your iMac to ensure you reconnected everything correctly. Be careful not to touch anything inside while the machine is powered on.

    • While pressing the display against its ledge on the lower bezel, carefully lower it down towards the rear enclosure.

Bitiş Çizgisi

Sam Goldheart

Üyelik tarihi: 10/18/12

465.647 İtibar

538 adet Kılavuz yazıldı

Ekip

iFixit iFixit üyesi

Staff

135 Üyeler

16.732 adet Kılavuz yazıldı

0 Yorum

Yorum Ekle

İstatistikleri Görüntüle:

Son 24 Saat: 0

Son 7 gün: 0

Son 30 gün: 0

Her zaman: 360