Bu sürüm, hatalı düzenlemeler içerebilir. En son doğrulanmış bellek kopyası dönün.
Neye ihtiyacın var
-
Bu adım çevrilmemiş. Çevrilmesine yardım edin
-
Loosen the single Phillips screw in the center of the access door.
-
Remove the access door from your iMac.
-
-
Bu adım çevrilmemiş. Çevrilmesine yardım edin
-
Stick two suction cups to opposing corners of the glass panel.
-
-
Bu adım çevrilmemiş. Çevrilmesine yardım edin
-
Remove the following 12 screws securing the front bezel to the rear case:
-
Eight 13 mm T8 Torx screws
-
Four 25 mm T8 Torx screws
-
Six 13 mm T8 Torx screws
-
Four 25 mm T8 Torx screws
-
Two 35 mm T8 Torx screws
-
-
Bu adım çevrilmemiş. Çevrilmesine yardım edin
-
Gently lift the front bezel from its top edge off the rear case. It helps to use your thumbs to push down very gently on the corners of the display.
-
Once the top edge of the front bezel has cleared the rear case, rotate the front bezel toward the stand and lift it off the rear case.
-
-
Bu adım çevrilmemiş. Çevrilmesine yardım edin
-
Disconnect the microphone cable connector, removing tape as necessary.
-
-
Bu adım çevrilmemiş. Çevrilmesine yardım edin
-
Disconnect the LCD temperature sensor by pulling the connector straight out of its socket on the logic board.
-
-
Bu adım çevrilmemiş. Çevrilmesine yardım edin
-
Remove the two 5.3 mm T6 Torx screws securing the display data cable to the logic board.
-
-
-
Bu adım çevrilmemiş. Çevrilmesine yardım edin
-
Disconnect the display data cable connector from its socket on the logic board by pulling the attached plastic tab towards you and away from the iMac.
-
-
Bu adım çevrilmemiş. Çevrilmesine yardım edin
-
Remove the eight 12 mm T8 Torx screws securing the display panel to the rear case.
-
Lift the right side of the display panel a few inches up from the iMac.
-
-
Bu adım çevrilmemiş. Çevrilmesine yardım edin
-
With the LCD lifted, disconnect the LCD cable by pulling down.
-
Alternatively, the LCD power cable can be disconnected from the LCD, rather than the power supply.
-
-
Bu adım çevrilmemiş. Çevrilmesine yardım edin
-
Continue to lift the LCD from the right side.
-
Remove the LCD.
-
-
Bu adım çevrilmemiş. Çevrilmesine yardım edin
-
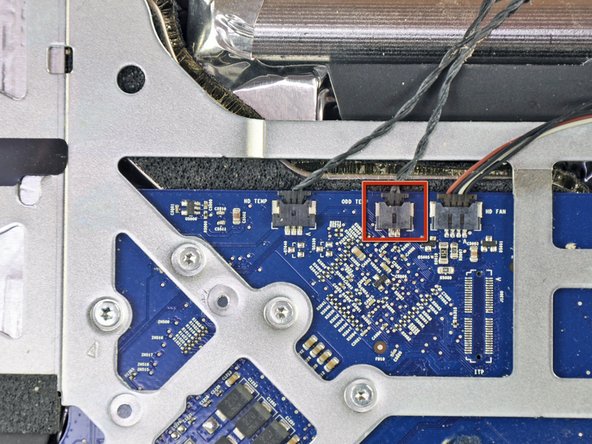
If necessary, remove the pieces of tape securing the hard drive/optical drive thermal sensor cables to your iMac.
-
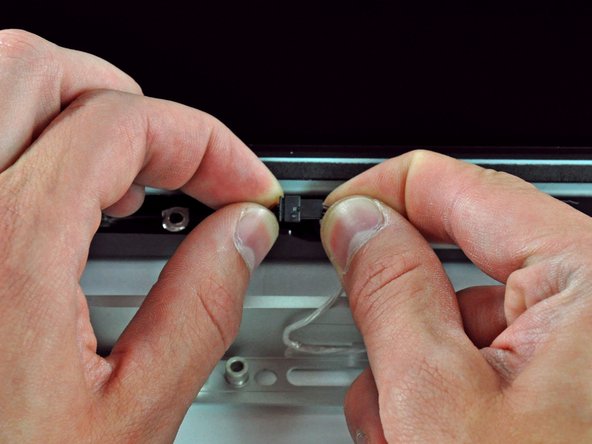
Disconnect the optical drive thermal sensor connector from the logic board by pulling its connector toward the top of your iMac.
-
-
Bu adım çevrilmemiş. Çevrilmesine yardım edin
-
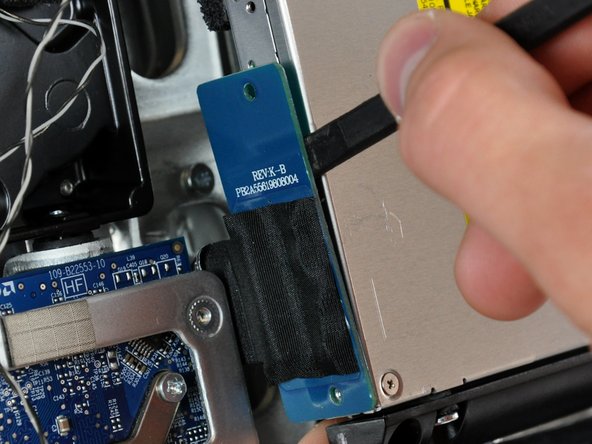
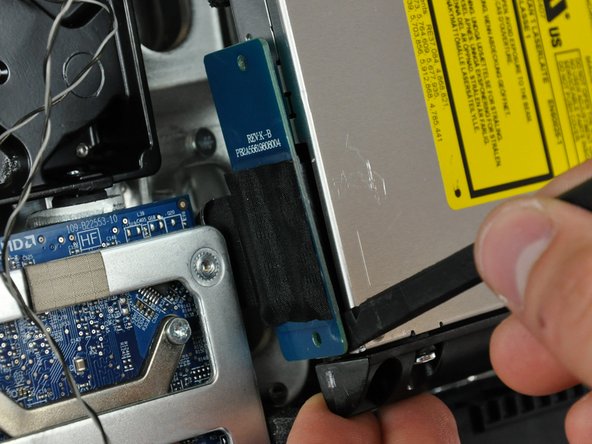
Remove the two fine-thread 7 mm T10 Torx screws securing the optical drive to the rear case.
-
-
Bu adım çevrilmemiş. Çevrilmesine yardım edin
-
Lift the free end of the optical drive slightly out of the rear case.
-
Remove the two 3.5 mm T6 Torx screws securing the optical drive connector to the optical drive.
-
-
Bu adım çevrilmemiş. Çevrilmesine yardım edin
-
Insert the flat end of a spudger between the optical drive connector and the body of the optical drive.
-
Twist the spudger to separate the connector from the optical drive.
-
-
Bu adım çevrilmemiş. Çevrilmesine yardım edin
-
Lift the optical drive out of the rear case and pull it away from the side of the rear case to release the strip of EMI tape attached to its surface.
-
-
Bu adım çevrilmemiş. Çevrilmesine yardım edin
-
If necessary, remove the piece of foam tape covering the optical drive thermal sensor.
-
To remove the optical drive thermal sensor, use the tip of a spudger to lift the center finger of the thermal sensor bracket while applying slight tension to the thermal sensor cable.
-
-
Bu adım çevrilmemiş. Çevrilmesine yardım edin
-
Use the flat end of a spudger to pry the optical drive thermal sensor bracket up off the adhesive securing it to the optical drive.
-
-
Bu adım çevrilmemiş. Çevrilmesine yardım edin
-
Use a spudger to remove the small piece of EMI foam from the bottom of the optical drive.
-
-
Bu adım çevrilmemiş. Çevrilmesine yardım edin
-
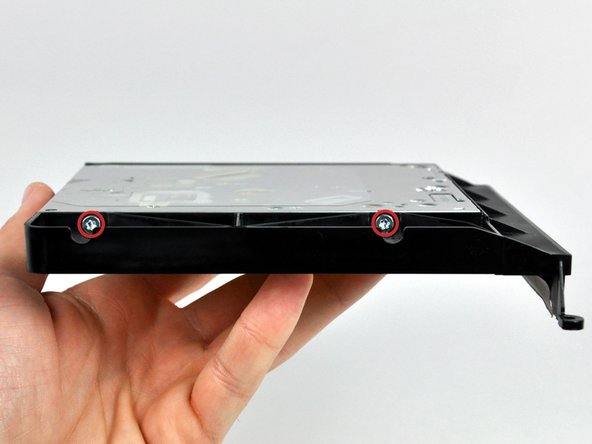
Remove the two 6.5 mm T10 Torx screws from both sides of the optical drive (four screws total).
-
-
Bu adım çevrilmemiş. Çevrilmesine yardım edin
-
Slightly rotate the optical drive bracket away from the optical drive.
-
Pull the optical drive bracket away from the open end of the optical drive, minding any tabs that may get caught.
-


İptal et: Bu kılavuzu tamamlamadım.
15 farklı kişi bu kılavuzu tamamladı.

