Ana içeriğe geç

Bu sürüm, hatalı düzenlemeler içerebilir. En son doğrulanmış bellek kopyası dönün.

Salt Önkoşul
Bu kılavuz yalnızca diğer kılavuzlar için bir ön koşul olarak kullanılmak üzere tasarlanmıştır. Tek başına eksiktir.

Neye ihtiyacın var

  1. Bu adım çevrilmemiş. Çevrilmesine yardım edin

    : adım 1, 3 resimden 1. : adım 1, 3 resimden 2. : adım 1, 3 resimden 3.
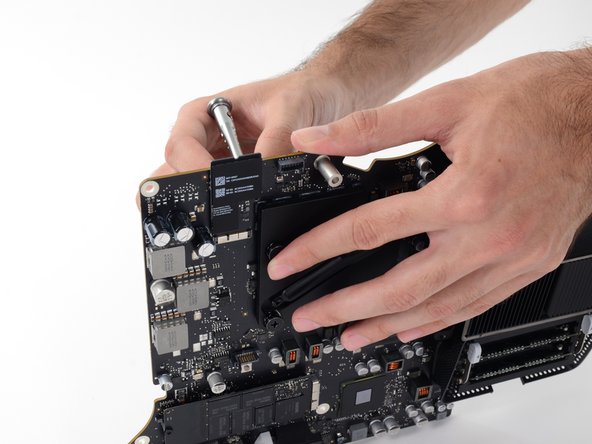
    • Remove the four 7.5 mm T8 screws from behind the GPU on the logic board.

    • These screws are set inside large, spring-loaded Phillips #2 screws. To prevent the larger screws from spinning when you loosen the T8 screws, hold them with a fingertip or Phillips #2 screwdriver.

  2. Bu adım çevrilmemiş. Çevrilmesine yardım edin

    : adım 2, 1 resimden 1.
    • Remove the bracket from behind the GPU heat sink.

  3. Bu adım çevrilmemiş. Çevrilmesine yardım edin

    : adım 3, 1 resimden 1.
    • Remove four black stickers from the back of the CPU heat sink.

  4. Bu adım çevrilmemiş. Çevrilmesine yardım edin

    : adım 4, 1 resimden 1.
    • Remove four 12.3 mm T10 screws from the back of the CPU heat sink.

  5. Bu adım çevrilmemiş. Çevrilmesine yardım edin

    : adım 5, 3 resimden 1. : adım 5, 3 resimden 2. : adım 5, 3 resimden 3.
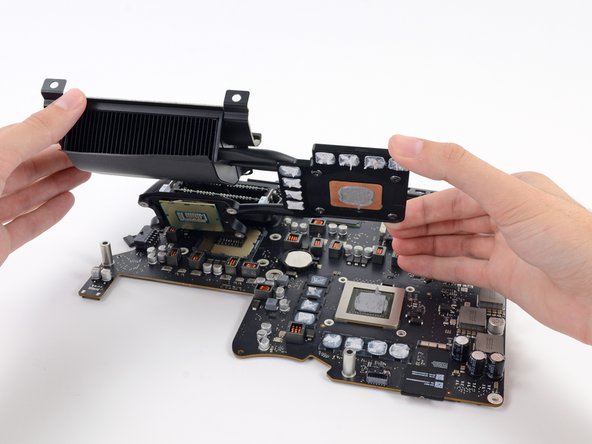
    • Remove the spring plate from behind the CPU heat sink.

    • Lift and remove the backing plate from behind the CPU heat sink. The backing plate has two posts that fit into alignment holes in the logic board.

  6. Bu adım çevrilmemiş. Çevrilmesine yardım edin

    : adım 6, 3 resimden 1. : adım 6, 3 resimden 2. : adım 6, 3 resimden 3.
    • Lift the heat sink up from the logic board.

    • The CPU will most likely stick to the heat sink, so be careful about where you put it down.

Bitiş Çizgisi

Andrew Optimus Goldheart

Üyelik tarihi: 10/17/09

502.950 İtibar

407 adet Kılavuz yazıldı

Ekip

iFixit iFixit üyesi

Staff

135 Üyeler

17.125 adet Kılavuz yazıldı

0 Yorum

Yorum Ekle

İstatistikleri Görüntüle:

Son 24 Saat: 2

Son 7 gün: 7

Son 30 gün: 7

Her zaman: 203