Bu sürüm, hatalı düzenlemeler içerebilir. En son doğrulanmış bellek kopyası dönün.
Neye ihtiyacın var
-
Bu adım çevrilmemiş. Çevrilmesine yardım edin
-
Insert a SIM card eject tool or a paperclip into the small hole in the SIM card tray, located on the volume button edge of the iPhone.
-
Press firmly to eject the tray.
-
-
Bu adım çevrilmemiş. Çevrilmesine yardım edin
-
Power off your iPhone before beginning disassembly.
-
Remove the two 6.75 mm long pentalobe P2 screws at the bottom edge of the iPhone.
-
-
Bu adım çevrilmemiş. Çevrilmesine yardım edin
-
Measure 3 mm from the tip and mark the opening pick with a permanent marker.
-
-
Bu adım çevrilmemiş. Çevrilmesine yardım edin
-
Lay overlapping strips of clear packing tape over the iPhone's screen until the whole face is covered.
-
If you can't get the suction cup to stick in the next few steps, fold a strong piece of tape (such as duct tape) into a handle and lift the screen with that instead.
-
-
Bu adım çevrilmemiş. Çevrilmesine yardım edin
-
Pull the blue handle backwards to unlock the Anti-Clamp's arms.
-
Slide the arms over either the left or right edge of your iPhone.
-
Position the suction cups near the bottom edge of the iPhone—one on the front, and one on the back.
-
Squeeze the cups together to apply suction to the desired area.
-
-
Bu adım çevrilmemiş. Çevrilmesine yardım edin
-
Pull the blue handle forwards to lock the arms.
-
Turn the handle clockwise 360 degrees or until the cups start to stretch.
-
Make sure the suction cups remain aligned with each other. If they begin to slip out of alignment, loosen the suction cups slightly and realign the arms.
-
-
Bu adım çevrilmemiş. Çevrilmesine yardım edin
-
Support your iPhone on something sturdy such as a hardcover book so it rests hands-free and parallel to the ground; this makes it easier to work with in the following steps.
-
Use a hair dryer to heat along the bottom edge of the iPhone. The screen should feel slightly too hot to touch.
-
Wait one minute to give the adhesive a chance to release and present an opening gap.
-
Insert an opening pick under the screen's plastic bezel when the Anti-Clamp creates a large enough gap.
-
Skip the next three steps.
-
-
Bu adım çevrilmemiş. Çevrilmesine yardım edin
-
Use a hair dryer or a heat gun to heat the bottom edge of the iPhone for 90 seconds or until the screen is slightly too hot to touch.
-
-
Bu adım çevrilmemiş. Çevrilmesine yardım edin
-
If you're using a single suction handle, apply it to the bottom edge of the phone, while avoiding the very edge of the glass.
-
-
Bu adım çevrilmemiş. Çevrilmesine yardım edin
-
Pull up on the suction cup with firm, constant pressure to create a slight gap between the screen and the frame.
-
Insert an opening pick into the gap under the screen's plastic bezel.
-
-
Bu adım çevrilmemiş. Çevrilmesine yardım edin
-
Use a hair dryer to heat the right edge of the iPhone (the edge with the power button) for 90 seconds or until the screen is slightly too hot to touch.
-
-
Bu adım çevrilmemiş. Çevrilmesine yardım edin
-
Slide the opening pick around the bottom right corner of the iPhone to separate its adhesive.
-
Continue sliding up the right edge of the iPhone until you reach the top right corner.
-
Leave the pick in the top right corner before continuing.
-
-
Bu adım çevrilmemiş. Çevrilmesine yardım edin
-
Use a hair dryer to heat the top edge of the iPhone for 90 seconds or until the screen is slightly too hot to touch.
-
-
Bu adım çevrilmemiş. Çevrilmesine yardım edin
-
Slide the opening pick around the top right corner of the iPhone to separate the top adhesive.
-
Leave the pick in the top left corner before continuing.
-
-
Bu adım çevrilmemiş. Çevrilmesine yardım edin
-
Use a hair dryer to heat the left edge of the iPhone for 90 seconds or until the screen is slightly too hot to touch.
-
-
-
Bu adım çevrilmemiş. Çevrilmesine yardım edin
-
Insert a second opening pick in the bottom left corner of the iPhone.
-
Twist both picks simultaneously until the left edge clips release.
-
-
Bu adım çevrilmemiş. Çevrilmesine yardım edin
-
Rotate your iPhone so the right edge faces you.
-
Open the iPhone by swinging the display up from the right side, like the front cover of a book.
-
Lean the display against something to keep it propped up while you're working on the phone.
-
-
Bu adım çevrilmemiş. Çevrilmesine yardım edin
-
Remove two 1.1 mm long Y000 screws securing the battery and display connector cover.
-
-
Bu adım çevrilmemiş. Çevrilmesine yardım edin
-
Use a spudger or a clean fingernail to pry the battery connector up from its socket on the logic board.
-
Bend the connector slightly away from the logic board to prevent it from accidentally making contact with the socket and providing power to the phone during your repair.
-
-
Bu adım çevrilmemiş. Çevrilmesine yardım edin
-
Use a spudger or a fingernail to disconnect the display cable connector.
-
-
Bu adım çevrilmemiş. Çevrilmesine yardım edin
-
Use a spudger or a fingernail to disconnect the digitizer cable connector.
-
-
Bu adım çevrilmemiş. Çevrilmesine yardım edin
-
Use a Y000 driver to remove four screws securing the front sensor connector cover.
-
Three 1.1 mm long screws
-
One 1.4 mm long screw
-
-
Bu adım çevrilmemiş. Çevrilmesine yardım edin
-
Swing the cover up from the left until the small clip on the right unhooks.
-
Remove the cover.
-
-
Bu adım çevrilmemiş. Çevrilmesine yardım edin
-
Use a spudger or a fingernail to disconnect the front sensor assembly cable connector.
-
-
Bu adım çevrilmemiş. Çevrilmesine yardım edin
-
Use a Phillips driver to remove the four 1.6 mm screws securing the loudspeaker.
-
-
Bu adım çevrilmemiş. Çevrilmesine yardım edin
-
Use a Y000 driver to remove the two 1.4 mm long screws securing the SIM card reader connector cover.
-
-
Bu adım çevrilmemiş. Çevrilmesine yardım edin
-
Use the point of a spudger to pry the SIM card reader cable connector straight up and out of its socket on the logic board.
-
-
Bu adım çevrilmemiş. Çevrilmesine yardım edin
-
Use a Y000 driver to remove the three screws securing the SIM card reader.
-
Two 1.4 mm screws
-
One 1.1 mm screw
-
-
Bu adım çevrilmemiş. Çevrilmesine yardım edin
-
Use a standoff or a small flathead driver to remove the 2.82 mm long standoff screw securing the SIM card reader.
-
-
Bu adım çevrilmemiş. Çevrilmesine yardım edin
-
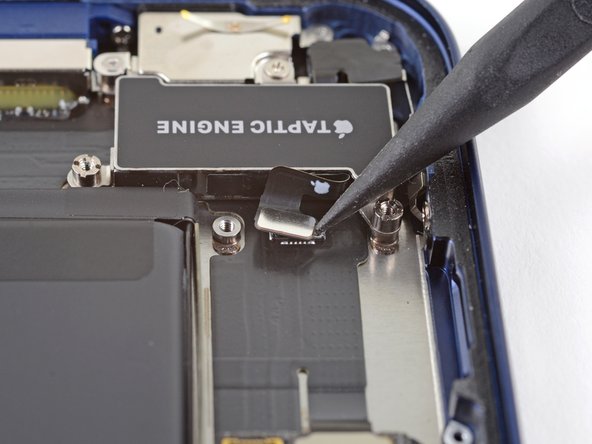
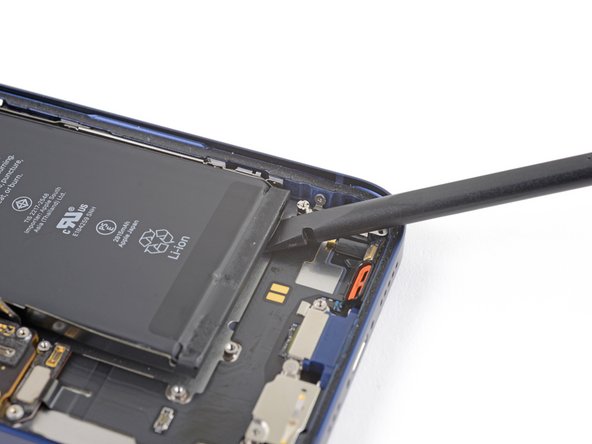
Use the point of a spudger to pry the Taptic Engine cable connector straight up and out of its socket on the logic board.
-
-
Bu adım çevrilmemiş. Çevrilmesine yardım edin
-
Remove the three screws securing the Taptic Engine.
-
Two 2.8 mm long standoff screws
-
One 1.8 mm Phillips screw
-
-
Bu adım çevrilmemiş. Çevrilmesine yardım edin
-
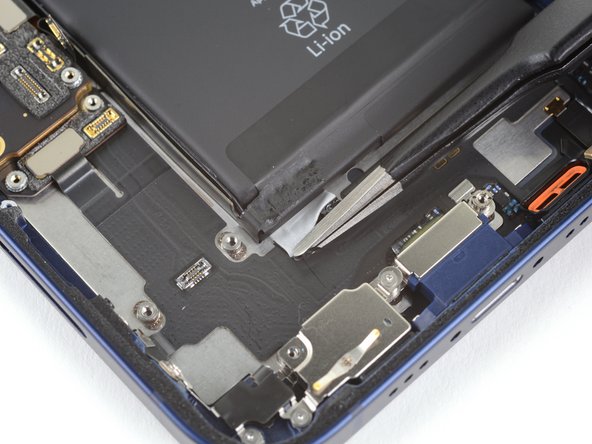
Each piece of adhesive has a black pull-tab at the end, which is lightly adhered to the edge of the battery.
-
-
Bu adım çevrilmemiş. Çevrilmesine yardım edin
-
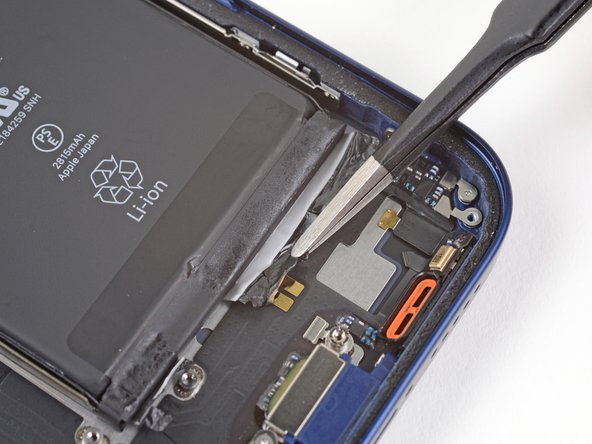
Peel down the first battery adhesive pull-tab to un-stick it from the bottom edge of the battery.
-
-
Bu adım çevrilmemiş. Çevrilmesine yardım edin
-
Peel down the second battery adhesive pull-tab to un-stick it from the bottom edge of the battery.
-
-
Bu adım çevrilmemiş. Çevrilmesine yardım edin
-
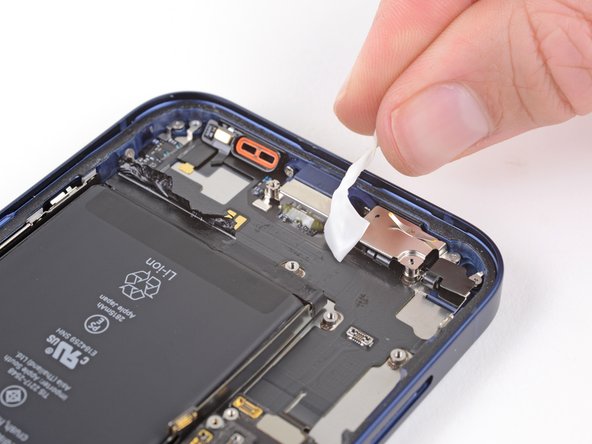
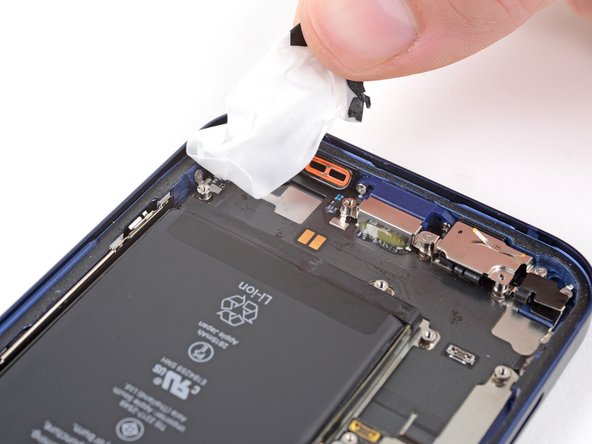
Grab the first pull-tab with your fingers and slowly pull it away from the battery, toward the bottom of the iPhone.
-
Pull hard enough to maintain tension on the strip, but don't force it. Give it plenty of time to stretch and un-stick from under the battery.
-
Don't press down on the battery. Hold the iPhone firmly by its sides.
-
Keep the strip flat and unwrinkled. Try to pull evenly on the whole strip, rather than pulling mainly in the middle or on one side.
-
Pull at a low angle so the strip doesn't snag on the edge of the battery.
-
If the adhesive strip breaks off, try to retrieve it using your fingers or blunt tweezers, and continue pulling—but do not pry under the battery.
-
-
Bu adım çevrilmemiş. Çevrilmesine yardım edin
-
Grab the second pull-tab with your fingers and pull it away from the battery, toward the bottom of the iPhone.
-
Follow the same procedure as with the previous strip: don't press down on the battery, keep the strip flat and unwrinkled, and pull at a low angle.
-
If the adhesive strip breaks off, try to retrieve it using your fingers or blunt tweezers, and continue pulling—but do not pry under the battery.
-
-
Bu adım çevrilmemiş. Çevrilmesine yardım edin
-
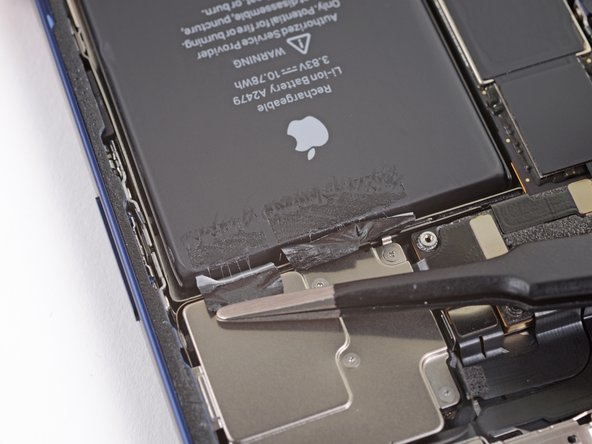
Peel up the two remaining battery adhesive pull-tabs to un-stick them from the top edge of the battery.
-
-
Bu adım çevrilmemiş. Çevrilmesine yardım edin
-
Using the same procedure as before, pull the remaining two tabs, one at a time, to stretch and remove the remaining adhesive strip holding the battery in place. Try not to snag the adhesive on anything.
-
If you removed all the adhesive strips successfully, skip the next step.
-
Otherwise, continue with the next step below.
-
-
Bu adım çevrilmemiş. Çevrilmesine yardım edin
-
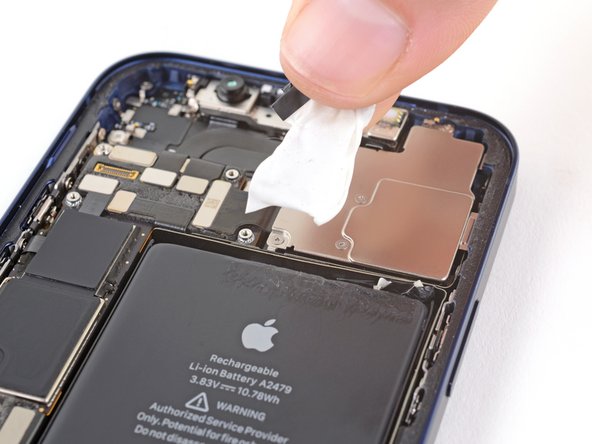
If you're still having trouble removing the battery, apply a few drops of high concentration (over 90%) isopropyl alcohol under the edge of the battery in the area of the broken adhesive strip(s).
-
Wait about one minute for the alcohol solution to weaken the adhesive.
-
Use an opening pick or the flat end of a spudger to gently lift the battery.
-
-
Bu adım çevrilmemiş. Çevrilmesine yardım edin
-
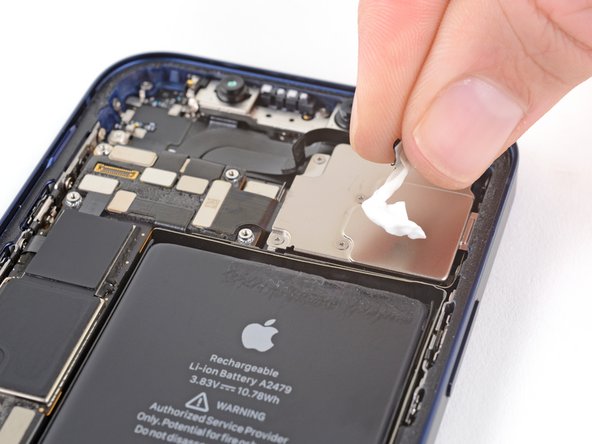
Remove the battery.
-
If there's any alcohol solution remaining in the phone, carefully wipe it off or allow it to air dry before installing your new battery.
-


İptal et: Bu kılavuzu tamamlamadım.
51 farklı kişi bu kılavuzu tamamladı.
