Ana içeriğe geç

iPhone 16 Pro Max Screen Installation

Salt Önkoşul
Bu kılavuz yalnızca diğer kılavuzlar için bir ön koşul olarak kullanılmak üzere tasarlanmıştır. Tek başına eksiktir.

Neye ihtiyacın var

  1. iPhone 16 Pro Max Screen Installation, Remove the adhesive and its residue: adım 1, 2 resimden 1. iPhone 16 Pro Max Screen Installation, Remove the adhesive and its residue: adım 1, 2 resimden 2.
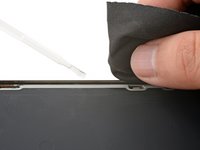
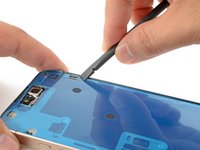
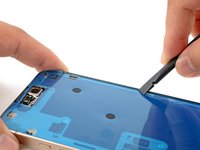
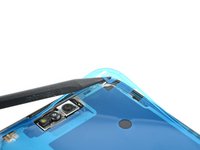
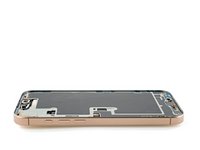
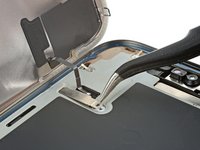
    • Use a spudger or tweezers to remove the adhesive chunks from the iPhone's frame.

    • Work around the fragile grounding clips. If you bend one out of place, gently bend it back with your fingers or tweezers.

  2. iPhone 16 Pro Max Screen Installation: adım 2, 1 resimden 1.
    • If you're reinstalling your existing screen, be sure to remove any remaining adhesive from the back of your screen as well.

  3. iPhone 16 Pro Max Screen Installation: adım 3, 2 resimden 1. iPhone 16 Pro Max Screen Installation: adım 3, 2 resimden 2.
    • Using a lint-free cloth (or coffee filter) and some high concentration (>90%) isopropyl alcohol, clean the areas of the frame and screen where you removed the old adhesive.

    • For best results, swipe your cleaning cloth in one direction, not back and forth.

    • Work around the fragile grounding clips. If you bend one out of place, gently bend it back with your fingers or tweezers.

    • Take your time doing this. A clean frame allows replacement adhesive to lay evenly, ensuring a better bond.

  4. iPhone 16 Pro Max Screen Installation, Apply the replacement adhesive: adım 4, 1 resimden 1.
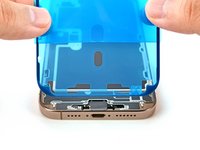
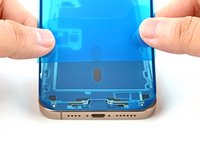
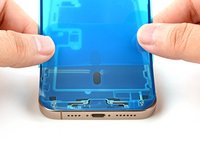
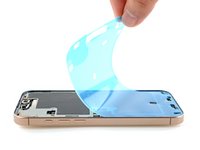
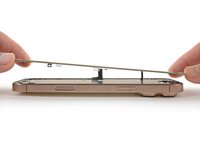
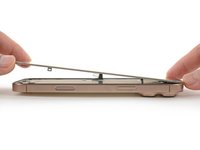
    • Lay the adhesive sheet over the frame to determine its proper orientation.

    • Use features such as the camera cutout to visualize how the adhesive will lay in the frame.

  5. iPhone 16 Pro Max Screen Installation: adım 5, 1 resimden 1.
    • Grasp the tab in the corner of the adhesive sheet and peel the liner to expose a third of the adhesive.

    • The exposed adhesive is very sticky. Don't let it touch anything until you're ready to apply it to the frame.

    • If your adhesive has multiple liners, peel the liner that exposes the side that sticks to the frame.

  6. iPhone 16 Pro Max Screen Installation: adım 6, 3 resimden 1. iPhone 16 Pro Max Screen Installation: adım 6, 3 resimden 2. iPhone 16 Pro Max Screen Installation: adım 6, 3 resimden 3.
    • Carefully align the exposed edge of the adhesive strip with the corresponding edge of your iPhone's frame.

    • Once the adhesive is pressed into place, you can't reposition it—you'll have to remove it and start over with new adhesive.

    • When it's correctly aligned, gently press the exposed adhesive strip into place.

  7. iPhone 16 Pro Max Screen Installation: adım 7, 3 resimden 1. iPhone 16 Pro Max Screen Installation: adım 7, 3 resimden 2. iPhone 16 Pro Max Screen Installation: adım 7, 3 resimden 3.
    • Continue peeling away the liner from the adhesive, gently pressing the adhesive into place.

    • If you've correctly aligned the adhesive, the edges will fall perfectly into place.

    • If your adhesive is slightly misaligned, pull the long edges into alignment with the frame.

    • If the adhesive begins to crease or wrinkle, remove it and start over with fresh adhesive.

    • If you don't have another set of adhesive strips handy, it's okay to temporarily put your iPhone back together and use it normally without any adhesive. Just keep in mind that your iPhone's water resistance will be compromised until you replace the adhesive.

  8. iPhone 16 Pro Max Screen Installation: adım 8, 2 resimden 1. iPhone 16 Pro Max Screen Installation: adım 8, 2 resimden 2.
    • Use a spudger to press the adhesive around the entire perimeter of your iPhone.

    • Work around the fragile grounding clips. If you bend one out of place, gently bend it back with your fingers or tweezers.

    • Don't press too hard, or you'll stretch and deform the adhesive.

  9. iPhone 16 Pro Max Screen Installation: adım 9, 3 resimden 1. iPhone 16 Pro Max Screen Installation: adım 9, 3 resimden 2. iPhone 16 Pro Max Screen Installation: adım 9, 3 resimden 3.
    • Use a spudger or your fingers to lift the pull tab connected to the large front liner—the pull tab is often in a corner of the liner.

    • Use the pull tab to peel off the large front liner from the adhesive.

    • At this point, you may still have liners covering the perimeter, which prevent the adhesive from accidentally sticking to anything while you're reassembling your iPhone. Don't remove these small release liners just yet.

  10. iPhone 16 Pro Max Screen Installation, Reconnect the screen: adım 10, 2 resimden 1. iPhone 16 Pro Max Screen Installation, Reconnect the screen: adım 10, 2 resimden 2.
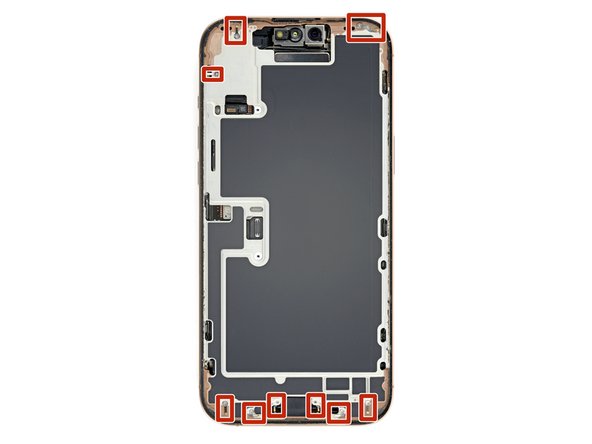
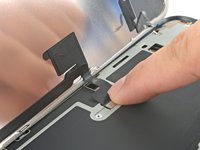
    • Use your finger to press down and connect the display connector.

    • To re-attach wide press connectors like this one, carefully align and press down on one side until it clicks into place, then repeat on the other side. Don't press down in the middle. If the connector is misaligned, the pins can bend, causing permanent damage.

    • Press down and connect the front sensor connector.

    • Align the connector carefully over its socket and press down with your fingertip until it clicks into place. Don't try to force the connector into place. If you're having trouble, reposition it and try again.

    • This is a good time to power on your iPhone and test all functions before you seal it up. Be sure to power your iPhone back down completely before you continue.

    • If your iPhone doesn't turn on, connect it to a power source and try again.

  11. iPhone 16 Pro Max Screen Installation, Install the connector covers: adım 11, 2 resimden 1. iPhone 16 Pro Max Screen Installation, Install the connector covers: adım 11, 2 resimden 2.
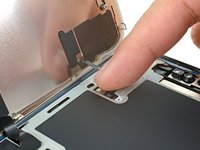
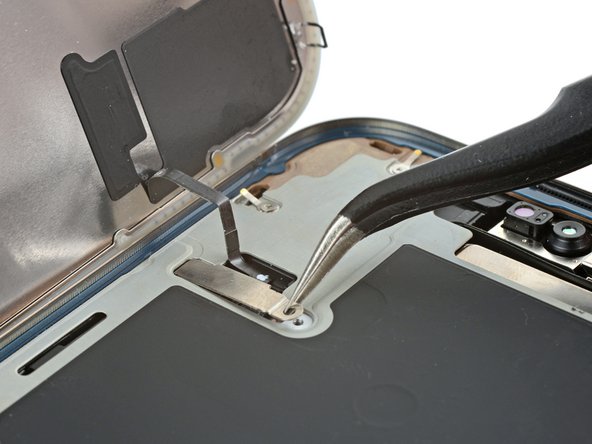
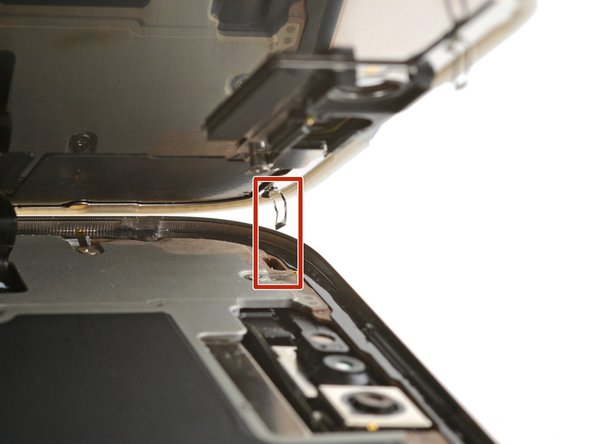
    • Tuck the display connector cover's tab into its frame cutout and lay the cover in place.

    • Repeat with the front sensor connector cover.

  12. iPhone 16 Pro Max Screen Installation: adım 12, 1 resimden 1.
    • Use a tri-point Y000 driver to install the two 1.3 mm‑long screws securing the two connector covers.

  13. iPhone 16 Pro Max Screen Installation, Remove the final liners: adım 13, 3 resimden 1. iPhone 16 Pro Max Screen Installation, Remove the final liners: adım 13, 3 resimden 2. iPhone 16 Pro Max Screen Installation, Remove the final liners: adım 13, 3 resimden 3.
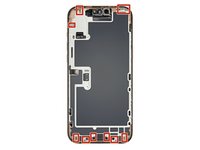
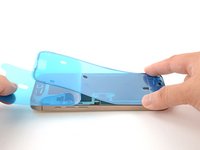
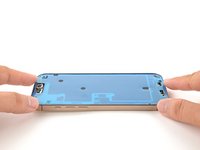
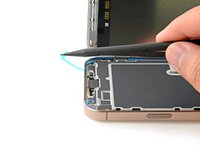
    • While supporting the screen, use your fingers or a spudger to peel away all perimeter liners, exposing the adhesive.

    • Be careful not to touch the exposed adhesive.

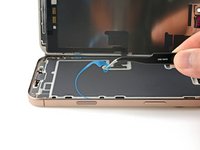
    • Check the frame and screen for any stray liners and remove them. There should be no liners remaining.

  14. iPhone 16 Pro Max Screen Installation, Install the screen onto the frame: adım 14, 2 resimden 1. iPhone 16 Pro Max Screen Installation, Install the screen onto the frame: adım 14, 2 resimden 2.
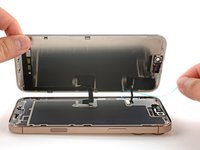
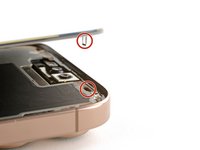
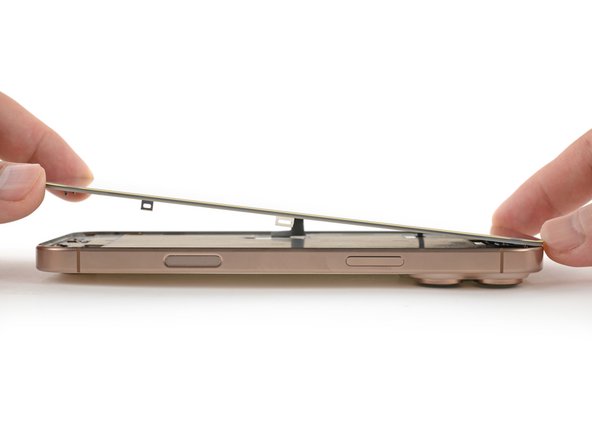
    • Carefully align the screen's top clips with their frame cutouts.

  15. iPhone 16 Pro Max Screen Installation: adım 15, 3 resimden 1. iPhone 16 Pro Max Screen Installation: adım 15, 3 resimden 2. iPhone 16 Pro Max Screen Installation: adım 15, 3 resimden 3.
    • Lower the screen onto the frame, beginning with the top edge.

    • If you feel resistance, a perimeter clip may have bent out of place and is being crushed by the frame. Look at the point of resistance and gently straighten any bent clips.

    • Make sure the screen edge isn't pinching any cables.

  16. iPhone 16 Pro Max Screen Installation, Apply heat to the perimeter: adım 16, 1 resimden 1.
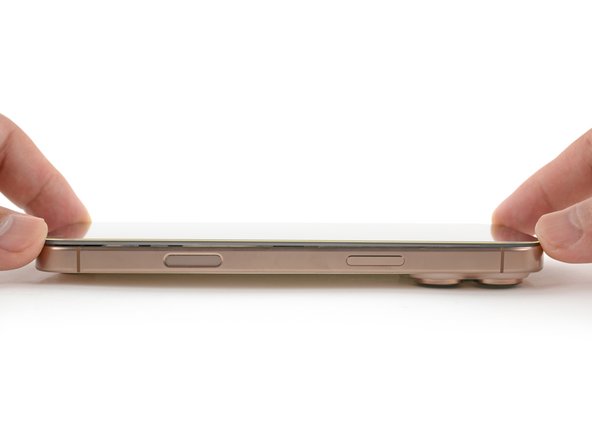
    • Use a hair dryer, heat gun, or an iOpener to heat the screen perimeter until it's slightly too hot to touch.

    • The heat softens the adhesive and helps create a better bond.

Bitiş Çizgisi

Arthur Shi

Üyelik tarihi: 01/03/18

281.997 İtibar

585 adet Kılavuz yazıldı

Ekip

iFixit iFixit üyesi

Staff

118 Üyeler

19.425 adet Kılavuz yazıldı

0 Yorum

Yorum Ekle

İstatistikleri Görüntüle:

Son 24 Saat: 6

Son 7 gün: 13

Son 30 gün: 14

Her zaman: 71