Neye ihtiyacın var
-
-
The first step is simple, First, remove the two screws that are on both sides of the connector at the base of the iPhone. Be careful to take a separate container that will host the screws to prevent losing them.
-
Screen bought on https://www.distriphone.com/
-
-
-
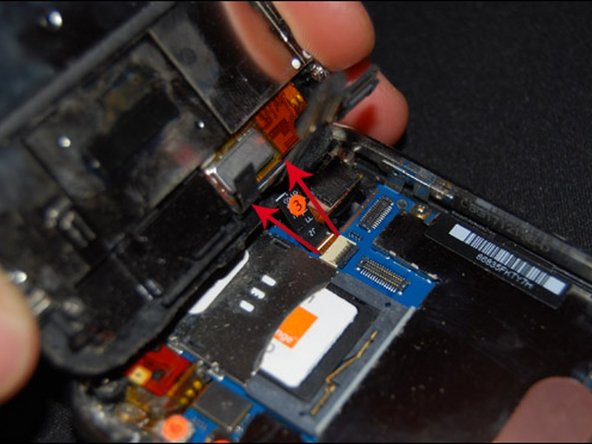
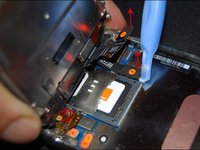
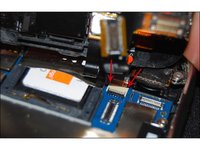
The glass is gently lifted, the connectors are numbered. The first is removed by itself, the second is easily disengaged using the plastic lever tool.
-
The third connector is a flat sheet that must be removed by sliding it to the top of the phone.
-
-
-
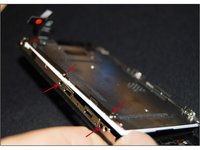
On one side, we see two screws to remove and a third to the top of the iPhone
-
On the other side of the frame the screws are hidden by a scotch "snitch" that will blow the warranty
-
-
-
-
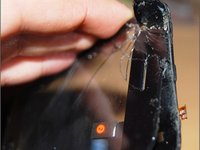
Here is the first step a little tricky: disassemble the chassis of the LCD. I managed by spreading it very slightly by sliding a thin blade ... especially without sliding on the surface of the LCD, very fragile of course.
-
-
-
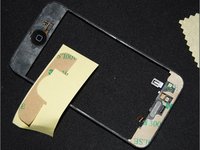
We must now take off the glass frame. With a flat screwdriver you will also take care to remove the pieces of tape double-sided. This is a long but important step because a surplus of double-face would create a gap between the screen and the silver turn of the iphone.
-
-
-
I hold a corner of the glass on one side to be sure of my shot. Scotch glue strongly, not the right to the error. Also be careful to place the plies of connectors correctly, without trapping them between the glass and its support, they must pass inside the chassis.
-
-
-
There are six screws to put back, three on each side. The tablecloth is really not easy to put back in place, there is little space for handling but we can help a plastic tool with a rubber end which will not slide on the connector.
-


To reassemble your device, follow the instructions in reverse order.
To reassemble your device, follow the instructions in reverse order.
Bu çevirmenlere özel teşekkürler:
100%


Bu çevirmenler dünyayı onarmamıza yardım ediyor! Katkıda bulunmak ister misiniz?
Çeviriye Başlayın ›