Bu çeviri, kaynak kılavuzdaki en son güncellemeleri yansıtmayabilir. Çeviriyi güncellemeye yardımcı olun veya kaynak kılavuzunu görüntüleyin.
Giriş
Bu kılavuzu iPhone 7'ine yeniden hayat vermek için kullan.
Bu kılavuz sana ekran düzeneğini tamamen sökmeyi gösterir; böylelikle ekran kablolarına gelebilecek hasar önlenir. Eğer pili sökerken ekran kablolarına, kabloları gereksiz yere gerdirecek bir kuvvet uygulamayacağına güveniyorsan; ekran söküm adımlarını atlayabilirsin.
En iyi performansı yakalamak için, yeni yüklenen pili kalibre et: Pil %100'e geldikten sonra en az iki saat daha şarj etmeye devam et. Daha sonra iPhone'u, şarj tamamen bitip kapanana kadar kullan. Son olarak da telefonu kesintisiz bir şekilde %100'e kadar şarj et.
Neye ihtiyacın var
Videoya Genel Bakış
-
-
Söküme başlamadan önce iPhone'unu kapat.
-
iPhone'nun alt kenarından iki adet 3.4 mm pentalob vidayı sök.
-
-
Bu adım çevrilmemiş. Çevrilmesine yardım edin
-
Measure 3 mm from the tip and mark the opening pick with a permanent marker.
-
-
Bu adım çevrilmemiş. Çevrilmesine yardım edin
-
Pull the blue handle backwards to unlock the Anti-Clamp's arms.
-
Slide the arms over either the left or right edge of your iPhone.
-
Position the suction cups near the bottom edge of the iPhone just above the home button—one on the front, and one on the back.
-
Squeeze the cups together to apply suction to the desired area.
-
-
Bu adım çevrilmemiş. Çevrilmesine yardım edin
-
Pull the blue handle forwards to lock the arms.
-
Turn the handle clockwise 360 degrees or until the cups start to stretch.
-
Make sure the suction cups remain aligned with each other. If they begin to slip out of alignment, loosen the suction cups slightly and realign the arms.
-
-
Bu adım çevrilmemiş. Çevrilmesine yardım edin
-
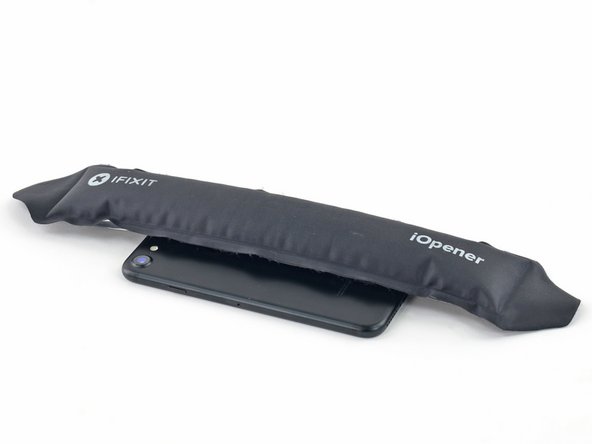
Heat an iOpener and thread it through the arms of the Anti-Clamp.
-
Fold the iOpener so it lays on the bottom edge of the iPhone.
-
Wait one minute to give the adhesive a chance to release and present an opening gap.
-
Insert an opening pick into the gap.
-
Skip the next three steps.
-
-
Bu adım çevrilmemiş. Çevrilmesine yardım edin
-
Heating the lower edge of the iPhone will help soften the adhesive securing the display, making it easier to open.
-
Use a hairdryer or prepare an iOpener and apply it to the lower edge of the phone for about 90 seconds in order to soften up the adhesive underneath.
-
-
Bu adım çevrilmemiş. Çevrilmesine yardım edin
-
Apply a suction cup to the lower half of the front panel, just above the home button.
-
-
Bu adım çevrilmemiş. Çevrilmesine yardım edin
-
Pull up on the suction cup with firm, constant pressure to create a slight gap between the screen and the frame.
-
Insert an opening pick into the gap.
-
-
Bu adım çevrilmemiş. Çevrilmesine yardım edin
-
Slide the opening pick up the left edge of the phone starting at the lower edge and moving towards the volume control buttons and silent switch, breaking up the adhesive holding the display in place.
-
Stop near the top left corner of the display.
-
-
Bu adım çevrilmemiş. Çevrilmesine yardım edin
-
Re-insert your tool at the lower right corner of the iPhone, and slide it around the corner and up the right side of the phone to separate the adhesive.
-
-
-
Bu adım çevrilmemiş. Çevrilmesine yardım edin
-
Gently pull up on the suction cup to lift up the bottom edge of the display.
-
Pull on the small nub on the suction cup to remove it from the front panel.
-
-
Bu adım çevrilmemiş. Çevrilmesine yardım edin
-
Slide an opening pick underneath the display around the top left corner and along the top edge of the phone to loosen the last of the adhesive.
-
-
Bu adım çevrilmemiş. Çevrilmesine yardım edin
-
Slide the display assembly slightly down (away from the top edge of the phone) to disengage the clips holding it to the rear case.
-
-
Bu adım çevrilmemiş. Çevrilmesine yardım edin
-
Open the iPhone by swinging the display up from the left side, like the back cover of a book.
-
Lean the display against something to keep it propped up while you're working on the phone.
-
-
Bu adım çevrilmemiş. Çevrilmesine yardım edin
-
Remove four tri-point Y000 screws securing the lower connector bracket, of the following lengths:
-
Three 1.2 mm screws
-
One 2.4 mm screw
-
-
Bu adım çevrilmemiş. Çevrilmesine yardım edin
-
Use the point of a spudger to lift the battery connector out of its socket on the logic board.
-
-
Bu adım çevrilmemiş. Çevrilmesine yardım edin
-
Use a spudger or a fingernail to disconnect the two lower display connectors by prying them straight up from their sockets on the logic board.
-
-
Bu adım çevrilmemiş. Çevrilmesine yardım edin
-
Disconnect the front panel sensor assembly connector from its socket on the logic board.
-
-
Bu adım çevrilmemiş. Çevrilmesine yardım edin
-
Remove the two 1.9 mm Phillips screws securing the barometric vent to the rear case.
-
-
Bu adım çevrilmemiş. Çevrilmesine yardım edin
-
Use the flat end of a spudger to disconnect the Taptic Engine connector from its socket on the logic board.
-
-
Bu adım çevrilmemiş. Çevrilmesine yardım edin
-
Remove the three 1.6 mm Phillips screws securing the Taptic Engine to the rear case.
-
-
-
Pil yapışkan şeritlerinden bir tanesini yavaşça, iPhone'un aşağısına ve pilden uzağa doğru çekin.
-
Şerit pil ve arka kasanın arasından sıyrılana kadar, aralıksız bir şekilde sabit bir kuvvet uygulayarak şeridi çekmeyi sürdürün. En iyi sonucu elde etmek için, şeridi 60º ya da daha küçük bir açıyla çekin.
-
-
-
Tam olarak pilin üzerine denk gelen yerinden, arka kasaya uygulamak için iOpener'ı hazırlayın. iOpener'a alternatif olarak, ısı tabancası ya da saç kurutma makinesi de kullanabilirsiniz.
-
Yaklaşık bir dakika sonra, iOpener'ı iPhone'dan ayırın, telefonu ters çevirin ve varsa pilin arkasında kalan yapışkanları ayırmak için plastik bir kart kullanın.
-
-
-
Pili arka kasadan ayırın.
-
Cihazınızı tekrar birleştirdikten sonra, cihazınızı manüel olarak yeniden başlatın. Bu işlem, meydana gelebilecek bir takım sorunları engelleyebilir ve sorun tespitini kolaylaştırır.
-


Değişim parçasını orijinal parçayla karşılaştır; bazı bileşenleri yeni parçaya aktarmak ya da yeni parçayı takmadan önce parçanın üstünden yapıştırıcıları ayırmak gerekebilir.
Cihazını tekrar birleştirmek için, bu talimatları sondan başa doğru uygula.
E-atığını sertifikalı geri dönüşümcülere götür.
Tamir istediğin gibi olmadı mı? Cevaplar topluluğundan sorun tespiti için yardım alabilirsin.
İptal et: Bu kılavuzu tamamlamadım.
906 farklı kişi bu kılavuzu tamamladı.
Bu çevirmenlere özel teşekkürler:
90%

Gözde dünyayı onarmamıza yardım ediyor! Katkıda bulunmak ister misiniz?
Çeviriye Başlayın ›

120 Yorum
yes , unless it is sealed back with new waterproof tape, which almost no one has yet
Atronx -
No you can buy the replacement. See the above guide for a link on how to do that and iFixIt sells them. Recommend buying more than one because installation is tricky - must get it aligned perfectly though the spluger and pointy tweezers can help reposition minor slipups.
The back adhesive is available on ifixit. So you can make it water proof-ish again.
Recall, an original iPhone is far from waterproof after only a month usage.
Guenter -