Ana içeriğe geç

iPod Touch 1st Generation Display Replacement

Neye ihtiyacın var

  1. iPod Touch 1st Generation Display Replacement, Case: adım 1, 1 resimden 1.
    • Opening the case is a tough and potentially dangerous task. A good amount of force is required to wedge the plastic opening tool in between the case seams. The case may be damaged if this step is not done properly. Make sure not to hurt yourself while opening your iPod.

    • Insert the small plastic opening tool into the seam in between plastic display panel and the metal back panel. The angled edge should point towards the metal back panel.

    • Hold the tool in place once it is wedged inside and the two panels are separated.

  2. iPod Touch 1st Generation Display Replacement: adım 2, 3 resimden 1. iPod Touch 1st Generation Display Replacement: adım 2, 3 resimden 2. iPod Touch 1st Generation Display Replacement: adım 2, 3 resimden 3.
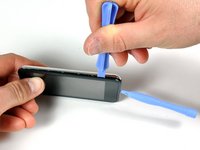
    • There are seven interlocking retaining clips on each side of the iPod. The large plastic opening tool will be used to separate the front panel from the metal back of the iPod.

    • Insert the large opening tool into the right side of the iPod, with the edge of the tool pointing towards the metal back.

    • Gently enlarge the existing crevice by wiggling the large opening tool and moving it to the right.

    • Continue doing so until the right side of the iPod is loose.

  3. iPod Touch 1st Generation Display Replacement: adım 3, 3 resimden 1. iPod Touch 1st Generation Display Replacement: adım 3, 3 resimden 2. iPod Touch 1st Generation Display Replacement: adım 3, 3 resimden 3.
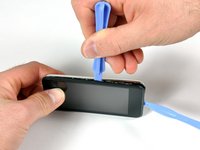
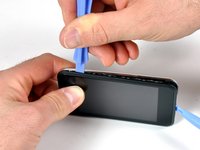
    • Switch to the other side of the iPod.

    • Follow the same procedure as in the previous step to release the seven clips holding the panels in place.

    • Once the panels are separated on this side, the back panel can be separated from the rest of the iPod.

  4. iPod Touch 1st Generation Display Replacement: adım 4, 3 resimden 1. iPod Touch 1st Generation Display Replacement: adım 4, 3 resimden 2. iPod Touch 1st Generation Display Replacement: adım 4, 3 resimden 3.
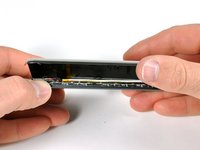
    • Gently lift the rear panel using your fingers.

    • The front and back of the iPod should now be completely separated.

    • The gold antenna (third picture) can easily fall out from its housing. Make sure that the antenna is securely in place before closing the iPod.

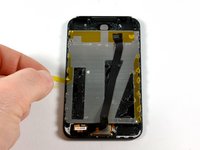
  5. iPod Touch 1st Generation Display Replacement, Logic Board: adım 5, 1 resimden 1.
    • The battery is glued to the iPod's display, but no screws hold it in place.

    • Flip the iPod 180 degrees so it matches the orientation in the picture.

    • Carefully insert the spudger in between the battery and the display. There are routing cables underneath, so make sure you slowly pry the battery loose.

  6. iPod Touch 1st Generation Display Replacement: adım 6, 3 resimden 1. iPod Touch 1st Generation Display Replacement: adım 6, 3 resimden 2. iPod Touch 1st Generation Display Replacement: adım 6, 3 resimden 3.
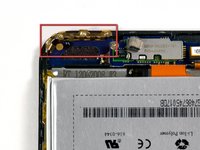
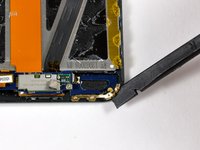
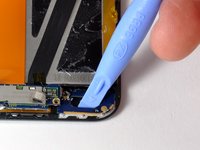
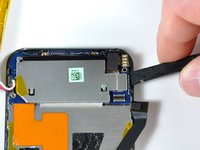
    • Use a spudger (or your fingernails) to remove the gold antenna. The antenna bends easily, so make sure not to apply too much pressure. When re-assembling, put the gold antenna in place before inserting the antenna circuit boards.

    • Use the spudger to remove the connector on the left side.

    • Remove two Phillips screws.

  7. iPod Touch 1st Generation Display Replacement: adım 7, 2 resimden 1. iPod Touch 1st Generation Display Replacement: adım 7, 2 resimden 2.
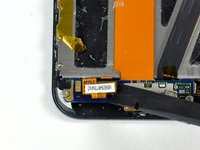
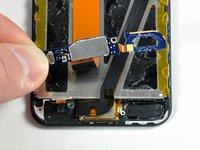
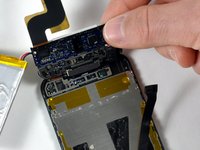
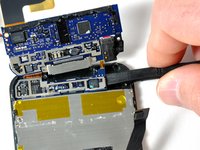
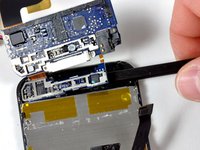
    • The antenna loop board needs to be pried up (it is glued down). Gently use a plastic opening tool or spudger, to dislodge the antenna loop board. The board is connected to the antenna electronics by a small ribbon cable. This two-board assembly is very frail.

    • The two small antenna circuit boards can now be lifted up together, and their orange cable can be peeled from the display.

  8. iPod Touch 1st Generation Display Replacement: adım 8, 2 resimden 1. iPod Touch 1st Generation Display Replacement: adım 8, 2 resimden 2.
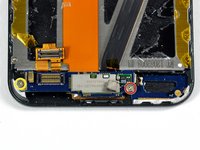
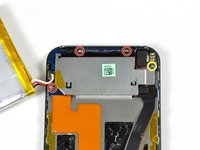
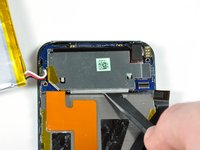
    • Use the spudger to remove the black masking tape. This will reveal the top two screws in the picture.

    • Unscrew the four Phillips screws.

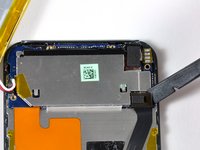
    • Use a spudger to disconnect the black connector.

    • Use a spudger to disconnect the black connector.

  9. iPod Touch 1st Generation Display Replacement: adım 9, 2 resimden 1. iPod Touch 1st Generation Display Replacement: adım 9, 2 resimden 2.
    • Use the spudger to loosen the logic board from multiple sides. It is held in place by glue and the four screws that were removed in the previous step.

  10. iPod Touch 1st Generation Display Replacement: adım 10, 3 resimden 1. iPod Touch 1st Generation Display Replacement: adım 10, 3 resimden 2. iPod Touch 1st Generation Display Replacement: adım 10, 3 resimden 3.
    • Be careful when flipping up the logic board. The headphone jack and docking port are attached to the board.

    • Gently lift the logic board (and attached components) upward.

    • The smaller portion of the logic board that resides underneath is very bendable and frail. Make sure not to pull the spudger upward when using it to detach the small board. Use only side-to-side movement.

    • Slide the spudger under the small portion of the logic board. The board should come loose once the spudger has slid almost all the way to the other side.

  11. iPod Touch 1st Generation Display Replacement: adım 11, 1 resimden 1.
    • The logic board and battery can now be fully separated from the rest of the iPod.

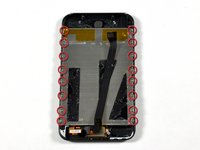
  12. iPod Touch 1st Generation Display Replacement, Display: adım 12, 2 resimden 1. iPod Touch 1st Generation Display Replacement, Display: adım 12, 2 resimden 2.
    • Peel the orange tape up covering the sixteen Phillips screws on the back of the display.

    • Use a #00 Phillips screwdriver to remove the sixteen screws.

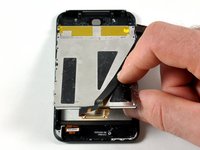
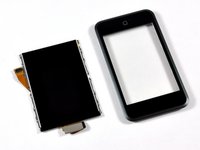
  13. iPod Touch 1st Generation Display Replacement: adım 13, 2 resimden 1. iPod Touch 1st Generation Display Replacement: adım 13, 2 resimden 2.
    • Separate the display from the front panel by gently lifting it.

    • The display and the front panel should now be completely separated.

Sonuç

To reassemble your device, follow these instructions in reverse order.

41 farklı kişi bu kılavuzu tamamladı.

Bir Yorum

where can i buy front screen and lcd display for my iPod touch 1 generation

Jason Lobelia - Yanıt
Yorum Ekle

İstatistikleri Görüntüle:

Son 24 Saat: 2

Son 7 gün: 27

Son 30 gün: 103

Her zaman: 108,883