Ana içeriğe geç

iPod Touch 4th Generation Front Panel Replacement

Neye ihtiyacın var

  1. iPod Touch 4th Generation Front Panel Replacement, Front Panel: adım 1, 1 resimden 1.
    • The iPod Touch 4th Generation front panel is attached to the rear case by adhesive. The use of a heat gun to soften the adhesive is highly recommended.

    • With the heat gun set on "low", begin heating the lower portion of the Touch near the home button.

    • It is suggested to heat the desired portion in a circular motion pattern to evenly dissipate the amount of heat throughout the device.

  2. iPod Touch 4th Generation Front Panel Replacement: adım 2, 2 resimden 1. iPod Touch 4th Generation Front Panel Replacement: adım 2, 2 resimden 2.
    • Beware, as the Touch will be very hot. It may be helpful to hold it with a towel while prying.

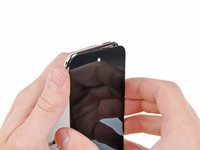
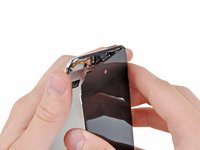
    • Insert the edge of an iPod opening tool between the front glass panel and the plastic bezel near the home button.

    • Do not try to pry between the plastic bezel and the steel rear case.

    • Pry the bottom edge of the front panel upward, being careful not to bend the glass excessively.

    • If it is too difficult to pry up the front panel assembly, reheat it and try again.

  3. iPod Touch 4th Generation Front Panel Replacement: adım 3, 1 resimden 1.
    • When there is enough room to grab the bottom edge of the front panel, lift it away from the body of the Touch to peel up the adhesive along its left and right edges.

    • If the adhesive is too difficult to separate, use a heat gun to soften it before proceeding.

  4. iPod Touch 4th Generation Front Panel Replacement: adım 4, 2 resimden 1. iPod Touch 4th Generation Front Panel Replacement: adım 4, 2 resimden 2.
    • Due to the construction of the 4th generation Touch, the digitizer cable cannot be disconnected until the logic board is removed. Use extreme caution when handling the front panel assembly, as it is attached to the rest of the Touch by the very delicate digitizer cable.

    • Also, the display data cable is very short and is connected to the logic board near the top of the front panel assembly. If it does not become disconnected while freeing the top edge of the front panel assembly, be sure to disconnect it with an iPod opening tool before rotating the front panel assembly out of the Touch.

    • Carefully pull the top of the front panel assembly away from the adhesive holding it to the Touch, minding the short digitizer cable connecting the two components.

  5. iPod Touch 4th Generation Front Panel Replacement: adım 5, 1 resimden 1.
    • Remove the following eight Phillips #00 screws:

    • One 3.5 mm Phillips screw

    • Two 3.0 mm Phillips screws

    • One 2.3 mm Phillips screw

    • One 2.4 mm Phillips screw

    • Three 2.0 mm Phillips screws

  6. iPod Touch 4th Generation Front Panel Replacement: adım 6, 1 resimden 1.
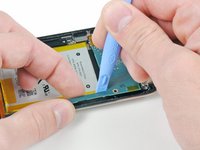
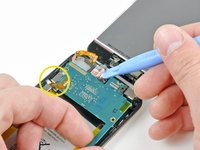
    • Use the edge of an iPod opening tool to pry the thin steel cover up from the rear-facing camera.

    • Note the small spring located near the bezel next to the camera (highlighted in yellow).

    • Remove the steel cover from the iPod.

  7. iPod Touch 4th Generation Front Panel Replacement: adım 7, 3 resimden 1. iPod Touch 4th Generation Front Panel Replacement: adım 7, 3 resimden 2. iPod Touch 4th Generation Front Panel Replacement: adım 7, 3 resimden 3.
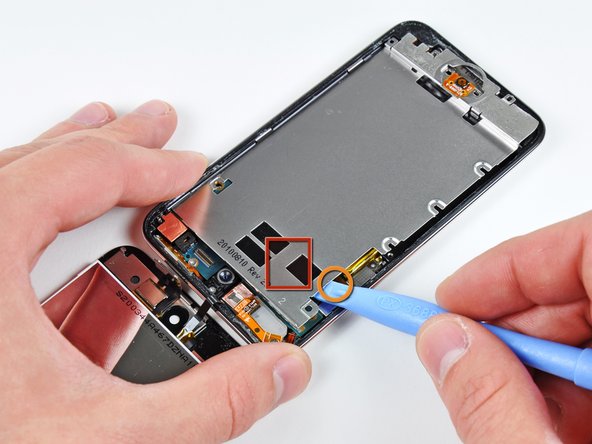
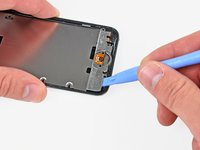
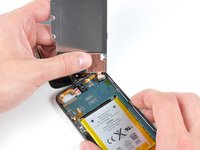
    • Insert the edge of an opening tool under the steel mid plate near the bottom left corner of the Touch.

    • Slowly pry upward to separate the plate from the adhesive securing it to the plastic inner case.

    • If the plate is still attached to the logic board, re-warm the area to loosen the adhesive, then slowly separate the plate from the logic board using the opening tool.

    • There is a thin, fragile ribbon cable underneath the plate. As you pry the plate up, be very careful not to rip the cable.

    • This cable may stick to the plate and will tear very easily if you're not careful. Work slowly and be careful not to strain the cable.

  8. iPod Touch 4th Generation Front Panel Replacement: adım 8, 2 resimden 1. iPod Touch 4th Generation Front Panel Replacement: adım 8, 2 resimden 2.
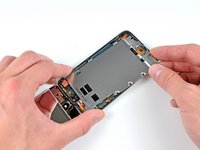
    • Slightly tilt the steel mid plane to dislodge it from the rear case.

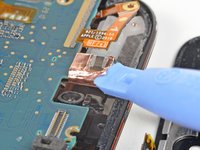
    • Be careful not to tear the piece of copper tape connecting the rear-facing camera to the steel mid plane.

    • Lift the steel mid plane up off the rear case and peel off the piece of copper tape stuck to the rear-facing camera.

  9. iPod Touch 4th Generation Front Panel Replacement, Upper Logic Board: adım 9, 1 resimden 1.
    • Remove the following three screws near the top edge of the logic board:

    • One 2.0 mm Phillips screw

    • Two 2.3 mm Phillips screws

  10. iPod Touch 4th Generation Front Panel Replacement: adım 10, 1 resimden 1.
    • Use the edge of an iPod opening tool to gently pry, but not remove, the rear-facing camera away from the rear case.

    • Do not attempt to remove the rear-facing camera yet.

  11. iPod Touch 4th Generation Front Panel Replacement: adım 11, 2 resimden 1. iPod Touch 4th Generation Front Panel Replacement: adım 11, 2 resimden 2.
    • Use an iPod opening tool to slightly lift the edge of the logic board next to the battery enough to grab it with your other hand.

    • Do not excessively bend the logic board, as it is very thin and fragile.

    • Be very careful not to lift too much as the volume control ribbon cable is still connected and will tear very easily.

    • While gently lifting the logic board with one hand, use an iPod opening tool to lift the logic board near the copper tape at the logic board's top edge.

    • The logic board will be lifted adequately when the last display assembly connector has cleared the top edge of the rear case.

  12. iPod Touch 4th Generation Front Panel Replacement, Front Panel: adım 12, 3 resimden 1. iPod Touch 4th Generation Front Panel Replacement, Front Panel: adım 12, 3 resimden 2. iPod Touch 4th Generation Front Panel Replacement, Front Panel: adım 12, 3 resimden 3.
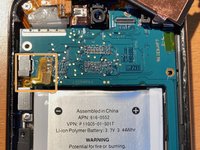
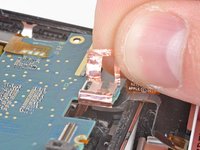
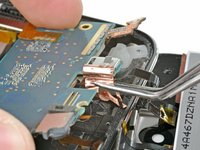
    • Use the edge of an iPod opening tool to begin peeling the loop of copper tape wrapped around the connector near the center of the top edge of the logic board.

    • Continue peeling the tape until it is free from the logic board.

    • Using a pair of tweezers to peel the tape greatly simplifies the task if you've got them.

  13. iPod Touch 4th Generation Front Panel Replacement: adım 13, 1 resimden 1.
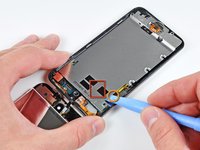
    • Use the edge of an iPod opening tool to pry the connector out of its socket on the logic board.

    • Remove the front panel assembly from the Touch.

    • If you are installing a new display assembly, you will want to replace the old adhesive with new adhesive.

    • Remove as much of the old adhesive as you can and then apply new adhesive strips to the appropriate places.

    • You will also need to transfer the metal plate that sits over the front camera and sensor windows. You can do this using a heat gun or hair dryer.

    • After you have reassembled your device, it is common to get a white screen when powering it up for the first time. All you have to do is a soft reset and that should fix it. This is accomplished by holding down the power button and the home button until it restarts, or running the battery all the way down until it turns off.

    • Double check that the ribbon cable is not pinched between the LCD and the metal plate. Fold it back on itself so that it doesn't get pinched. If the ribbon cable is pinched, you may get a white screen that cannot be fixed because the traces on the ribbon cable have been damaged.

Sonuç

To reassemble your device, follow these instructions in reverse order.

1059 farklı kişi bu kılavuzu tamamladı.

83 Yorum

When installing the new panel, it can be quite hard to get the connector onto the board with only one set of hands. You will need to use a second person to hold the iPod and the new front panel in such a way that the connector lines up, then use your tweezers to press the new connector in place. It's pretty much impossible to do with only one person...

Kevin Hulett - Yanıt

will the glass be as it was for before ones

like i heard that the glass will come out after some days

or it will not fix very easily

can u guide me please

shripadh -

ah ha, yes, a bit of practice is needed for sure on this, I have done quite a few now and that is by far the most frustrating part.

Biggest fear here is ripping the volume controller flex on the logic board, seen with the 4 pads top left of photo, i have had two rip on me and it's a real nuisance to change out the volume control flex. You can ignore step 10 really as you can still perform the operation without detaching the camera.

Dave - Yanıt

Dave - Where did you get a replacement volume controller flex? I can't seem to find much of anything on the subject.

Rosalind -

Yorum Ekle

İstatistikleri Görüntüle:

Son 24 Saat: 32

Son 7 gün: 137

Son 30 gün: 577

Her zaman: 1,260,233