Ana içeriğe geç

iPod Touch 4th Generation screen Replacement

Arşivlenmiş Kılavuz
Bu kılavuz sadece arşivsel amaçlarla muhafaza edilmiştir. Onarımınızı gerçekleştirmek için kılavuzun güncel halini kullanın.

Neye ihtiyacın var

  1. iPod Touch 4th Generation screen  Replacement, how to take off the screen: adım 1, 2 resimden 1. iPod Touch 4th Generation screen  Replacement, how to take off the screen: adım 1, 2 resimden 2.
    • with a heat gun 3 to 5 inches away on high heat up the glue the screen is held in with

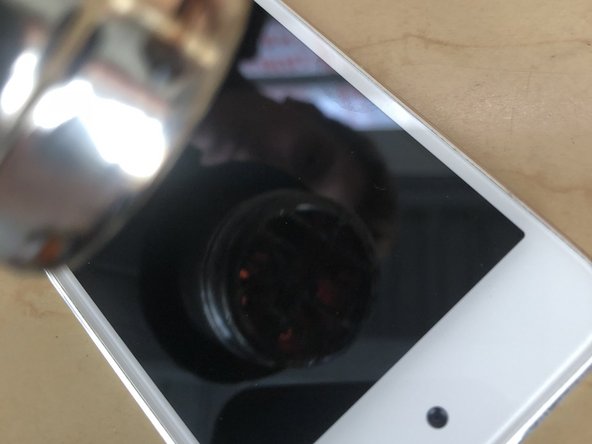
    • when holding wear gloves or a thick cloth it will be very HOT

    • use a blade to separate from the casing

  2. iPod Touch 4th Generation screen  Replacement, how to  take off the metal plate: adım 2, 2 resimden 1. iPod Touch 4th Generation screen  Replacement, how to  take off the metal plate: adım 2, 2 resimden 2.
    • with an blade slice the black strips on the metal plat from the casing

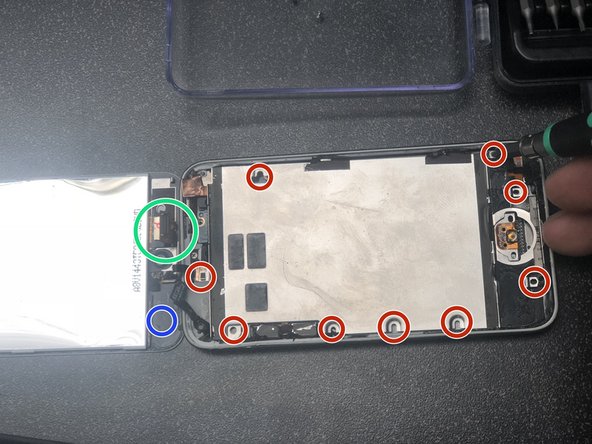
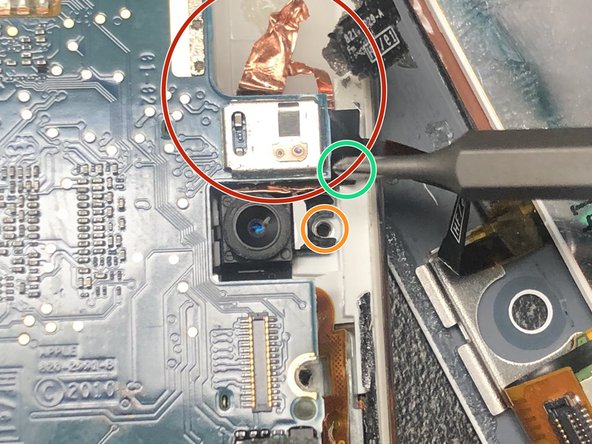
    • take off all visible screws ALL make sure you take off all screws then with a plastic tool lift up the metal plate don t be shy use some force they are circled in red

    • in blue peel off the wifi connector with a thin blade

    • in the green just pop off the connector it is similar to a lego piece

  3. iPod Touch 4th Generation screen  Replacement, how to completely take the screen off: adım 3, 3 resimden 1. iPod Touch 4th Generation screen  Replacement, how to completely take the screen off: adım 3, 3 resimden 2. iPod Touch 4th Generation screen  Replacement, how to completely take the screen off: adım 3, 3 resimden 3.
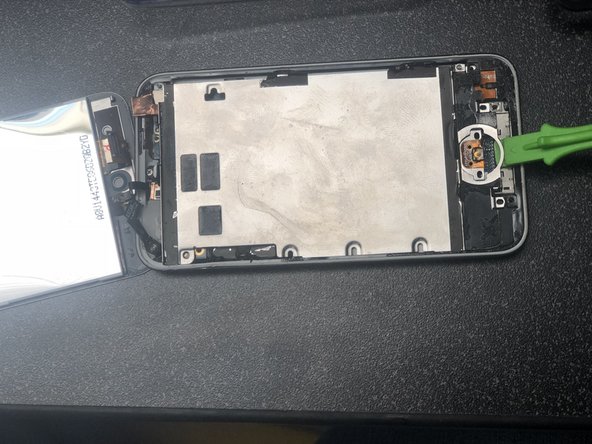
    • take off the screw shown in the first picture

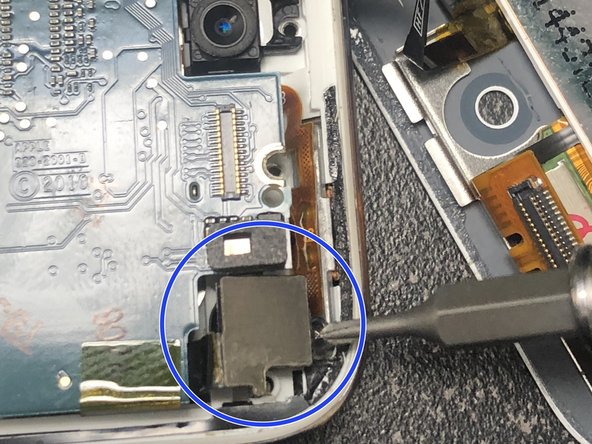
    • also take off the metal plate use you plastic tool to take it off in the blue

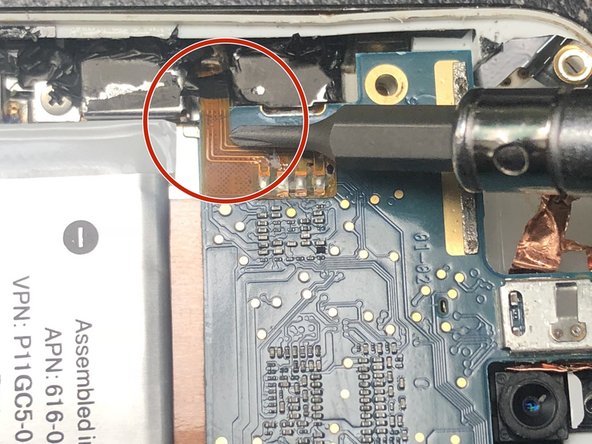
    • in the red unfold that thin foil type material

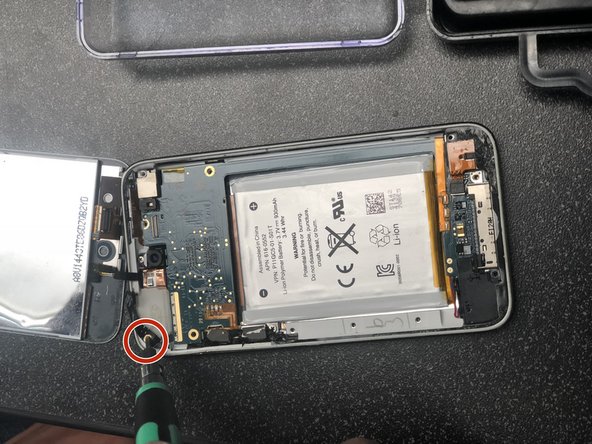
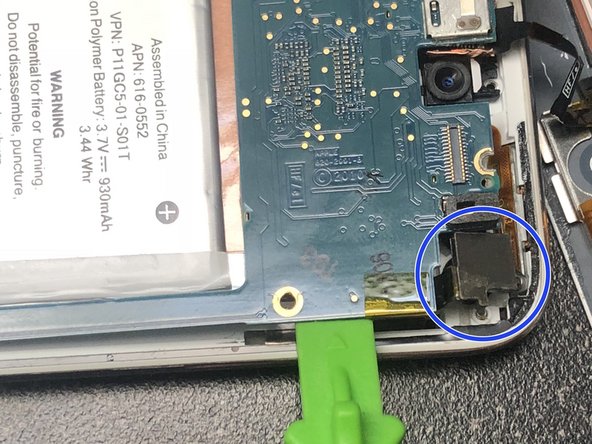
    • in the orange be to first take out the screw holding the camera in

    • in the green lift up the circuit make sure not to lift it to much as this can cause damage wait fot the next instructions to lift up

  4. iPod Touch 4th Generation screen  Replacement, more on how to take off the screen: adım 4, 2 resimden 1. iPod Touch 4th Generation screen  Replacement, more on how to take off the screen: adım 4, 2 resimden 2.
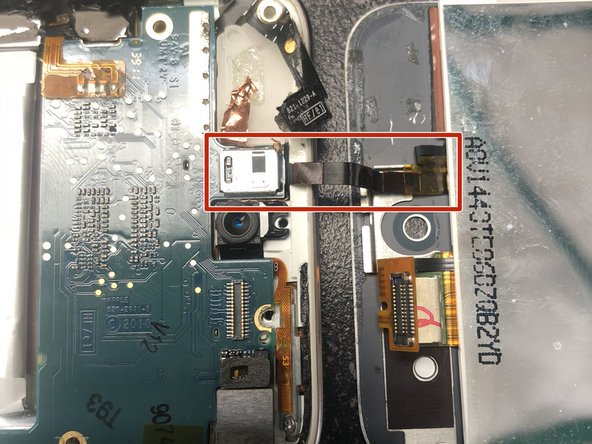
    • when you do lift up the circuit be careful with the wire in the red so not to damage it

    • in the blue is the back camera do not worried if you lift it out of place it simply pops back into place

  5. iPod Touch 4th Generation screen  Replacement: adım 5, 2 resimden 1. iPod Touch 4th Generation screen  Replacement: adım 5, 2 resimden 2.
    • in the red is what you will need to take off to fully disconnect the screen

    • lift it up as instructed and pop of the connector it will be like a lego piece as well push down with a plastic tool to pop it off

    • in the blue is what you will want yous to look like

  6. iPod Touch 4th Generation screen  Replacement: adım 6, 1 resimden 1.
    • this is what your ipod should look like as well

Sonuç

To reassemble your device, follow these instructions in reverse order.

Bir başkası bu kılavuzu tamamladı.

Jose A. Loza

Üyelik tarihi: 04/13/18

349 İtibar

2 adet Kılavuz yazıldı

0 Yorum

Yorum Ekle

İstatistikleri Görüntüle:

Son 24 Saat: 0

Son 7 gün: 0

Son 30 gün: 0

Her zaman: 402