Ana içeriğe geç

iRobot Roomba 560 Handle Replacement

Neye ihtiyacın var

  1. iRobot Roomba 560 Handle Replacement, Side Sweeper: adım 1, 1 resimden 1.
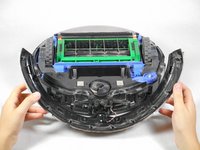
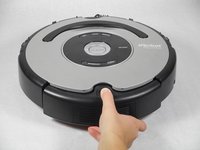
    • Flip the Roomba upside down.

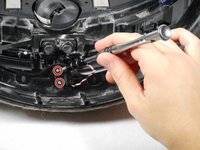
    • Unscrew the single 5 mm screw on the yellow side sweeper using the Phillips #2 driver.

  2. iRobot Roomba 560 Handle Replacement: adım 2, 1 resimden 1.
    • Lift the yellow side sweeper, removing it from the device.

  3. iRobot Roomba 560 Handle Replacement, Battery: adım 3, 1 resimden 1.
    • Using the Phillips #2 driver, remove the four 10 mm screws that hold the back panel in place.

  4. iRobot Roomba 560 Handle Replacement: adım 4, 1 resimden 1.
    • Lift up the back panel to remove it from the device.

  5. iRobot Roomba 560 Handle Replacement: adım 5, 2 resimden 1. iRobot Roomba 560 Handle Replacement: adım 5, 2 resimden 2.
    • Lift up the yellow battery by pulling up the green tabs on its side.

    • Handle the battery with care.

  6. iRobot Roomba 560 Handle Replacement, Clear Sensor Lens: adım 6, 1 resimden 1.
    • Rotate the Roomba so the bumper is in front of you.

  7. iRobot Roomba 560 Handle Replacement: adım 7, 1 resimden 1.
    • Using the Phillips #1 driver, remove the ten 10 mm screws on the bumper that run along the outer edge of the Roomba.

  8. iRobot Roomba 560 Handle Replacement: adım 8, 2 resimden 1. iRobot Roomba 560 Handle Replacement: adım 8, 2 resimden 2.
    • Lift the thin top cover that holds the bumper in place.

  9. iRobot Roomba 560 Handle Replacement: adım 9, 1 resimden 1.
    • Gently lift the device upwards from the bumper to detach these two pieces.

    • There are wires connecting the bumper to the device. Be careful while lifting the device off the bumper as to not damage these wires.

  10. iRobot Roomba 560 Handle Replacement: adım 10, 2 resimden 1. iRobot Roomba 560 Handle Replacement: adım 10, 2 resimden 2.
    • Lift the bumper upwards for easier access.

    • Unscrew the two 5 mm screws that connect the red and white wires to the device using the Phillips #1 driver.

    • The sensor can be unplugged from the motherboard so the bumper isn't hanging off the Roomba.

  11. iRobot Roomba 560 Handle Replacement: adım 11, 2 resimden 1. iRobot Roomba 560 Handle Replacement: adım 11, 2 resimden 2.
    • Lift the circular black panel off the lens.

    • Lift the clear lens that is on the other side of the bumper and replace it with a new lens.

  12. iRobot Roomba 560 Handle Replacement, Top Panels: adım 12, 2 resimden 1. iRobot Roomba 560 Handle Replacement, Top Panels: adım 12, 2 resimden 2.
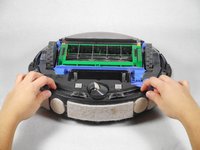
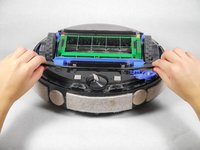
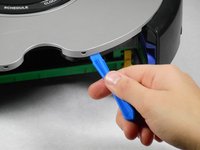
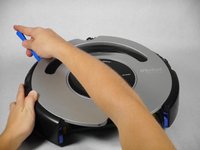
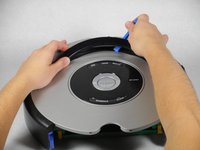
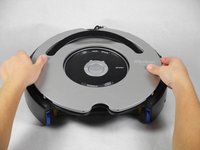
    • Turn the device over so that it is face up with the vacuum bin in front of you .

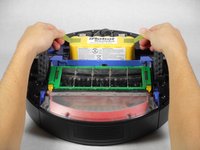
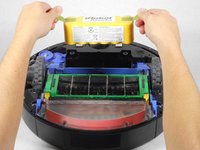
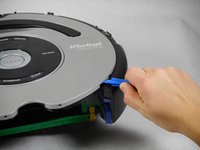
    • Press the button of the vacuum bin and pull out the bin from the device.

  13. iRobot Roomba 560 Handle Replacement: adım 13, 1 resimden 1.
    • Use your hands to unhook the snaps between the silver panel from the black panel located where the vacuum bin was.

  14. iRobot Roomba 560 Handle Replacement: adım 14, 3 resimden 1. iRobot Roomba 560 Handle Replacement: adım 14, 3 resimden 2. iRobot Roomba 560 Handle Replacement: adım 14, 3 resimden 3.
    • Using the plastic opening tool, go around the outer edges of the silver panel and unhook the snaps holding it in place.

    • When prying open the top panel from the inner casing, do so gently. Never "force" the top panel to snap off, or you could risk breaking pieces.

  15. iRobot Roomba 560 Handle Replacement: adım 15, 2 resimden 1. iRobot Roomba 560 Handle Replacement: adım 15, 2 resimden 2.
    • Lift the black handle and use the plastic opening tool to unhook the snaps underneath it.

    • Use the same tool to pry the silver cover from the black central control board.

  16. iRobot Roomba 560 Handle Replacement: adım 16, 3 resimden 1. iRobot Roomba 560 Handle Replacement: adım 16, 3 resimden 2. iRobot Roomba 560 Handle Replacement: adım 16, 3 resimden 3.
    • Lift the silver panel off of the black panel.

  17. iRobot Roomba 560 Handle Replacement: adım 17, 1 resimden 1.
    • Use a Phillips #2 screwdriver to remove the following screws:

    • Two 7.5 mm-long screws at either end of the semicircular handle

    • Ten 5 mm-long screws

    • Use a Phillips #1 screwdriver to remove the 5 mm-long screw at the bottom of the control board.

  18. iRobot Roomba 560 Handle Replacement: adım 18, 1 resimden 1.
    • Lift the black panel off the device.

    • This will provide access to the motherboard and black circular control panel.

  19. iRobot Roomba 560 Handle Replacement, Handle: adım 19, 1 resimden 1.
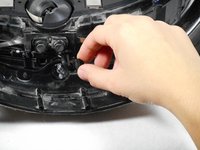
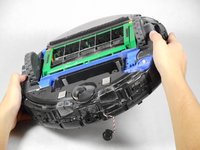
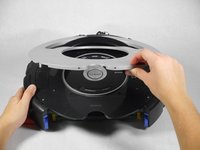
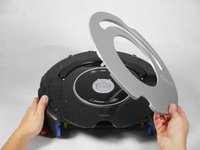
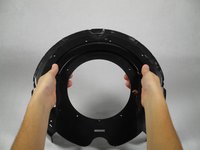
    • Hold the black panel in front of you with the handle facing the other side.

    • Locate the two hinges that will be pressed in the next step.

  20. iRobot Roomba 560 Handle Replacement: adım 20, 2 resimden 1. iRobot Roomba 560 Handle Replacement: adım 20, 2 resimden 2.
    • Rotate the black panel so that the handle is now facing you.

    • Insert your hands through the rectangular holes.

    • Using your index fingers, press the hinges that were located in the previous step.

  21. iRobot Roomba 560 Handle Replacement: adım 21, 1 resimden 1.
    • Lift the black handle for replacement.

Sonuç

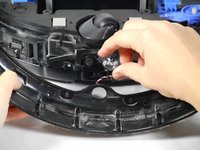
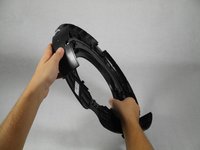
To reassemble your device, follow these instructions in reverse order.

3 farklı kişi bu kılavuzu tamamladı.

Davis Negrete

Üyelik tarihi: 10/01/15

176 İtibar

1 Kılavuz yazıldı

Ekip

Cal Poly, Team 1-22, Maness Fall 2015 Cal Poly, Team 1-22, Maness Fall 2015 üyesi

CPSU-MANESS-F15S1G22

4 Üyeler

14 adet Kılavuz yazıldı

Bir Yorum

Pour avoir terminé, je préciserai qu'il y a un sens pour remonter la lentille sinon le pare chocs ne coulisse pas.

De même, il n´est pas nécessaire de changer la lentille. Remettre celle d'origine (si elle n´est pas abîmée) convient très bien.

Excellent tutoriel !

Fabien-Antoine CHAPELLE - Yanıt

Yorum Ekle

İstatistikleri Görüntüle:

Son 24 Saat: 0

Son 7 gün: 8

Son 30 gün: 44

Her zaman: 5,677