Ana içeriğe geç

Joy-Con 卡扣更换指南

Adım 8 çevriliyor

İngilizce
Çince
Adım 8
Joy-Con Buckle Lock Replacement, Remove the buckle lock: adım 0, 3 resimden 1. Joy-Con Buckle Lock Replacement, Remove the buckle lock: adım 0, 3 resimden 2. Joy-Con Buckle Lock Replacement, Remove the buckle lock: adım 0, 3 resimden 3.
Remove the buckle lock
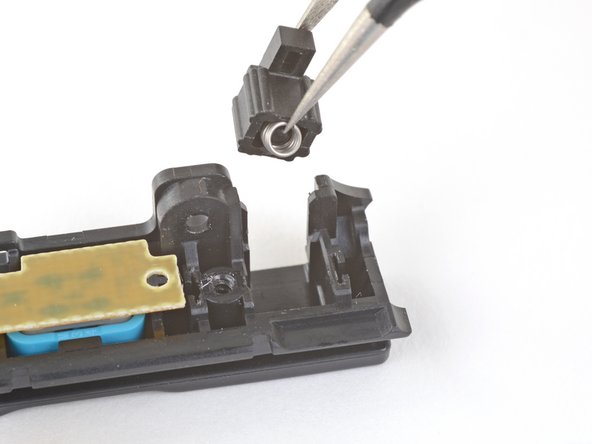
  • Lift the buckle lock slightly out of its slot in the charging rail, just until the spring is exposed enough that you can grab it with tweezers.

  • Grab the buckle lock such that the tweezers are around both sides of the lock and holding the spring inside the lock.

  • When you pull the lock out, the spring can shoot out. Make sure you have a firm grip with the tweezers.

  • Pull the buckle lock out of its slot in the charging rail.

  • During reassembly, make sure to move the spring from the old lock to the new one.

将卡扣锁从充电导轨的插槽中轻轻提起,直到弹簧足够暴露,你可以用镊子抓住它。

抓住带扣锁,使镊子围绕锁的两侧并将弹簧固定在锁内。

当你将锁拉出时,弹簧会弹出。确保你牢牢握住镊子。

将卡扣锁从充电导轨的插槽中拉出。

在重新组装过程中,确保将弹簧从旧锁移到新锁上。

Katkılarınız, açık kaynak Creative Commons lisansı altında lisanslanmaktadır.