Adım 14 çevriliyor
Adım 14


-
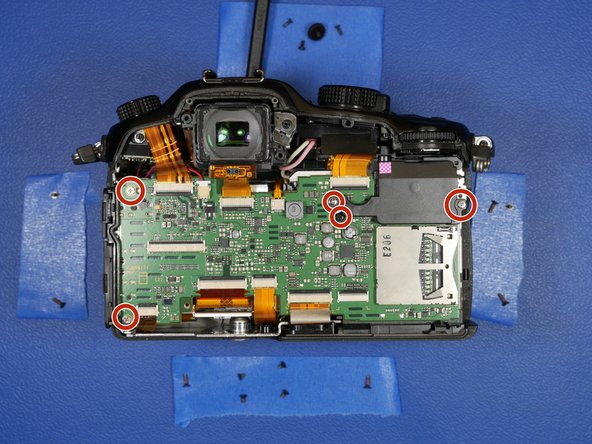
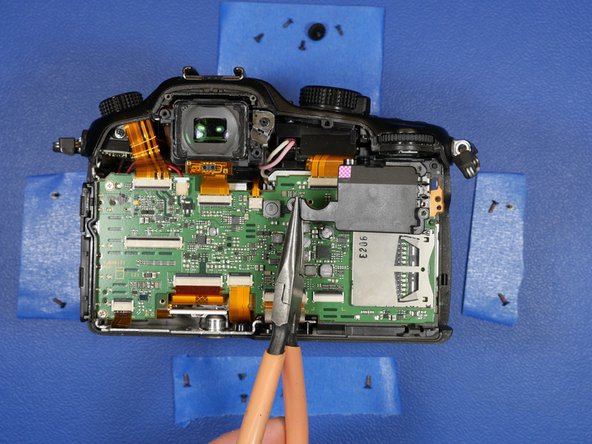
Back to the rest of the camera. With the back LCD shell assembly removed from the body of the camera, It's time to remove the main PCB.
-
Remove the 5 circled screws. There is a back plastic cover that protects the battery PCB terminals. That should come free once these screws are removed.
Katkılarınız, açık kaynak Creative Commons lisansı altında lisanslanmaktadır.