Ana içeriğe geç

Sony Cyber-shot DSC-HX400V Teardown

Adım 15 çevriliyor

İngilizce
Korece
Adım 15
Sony Cyber-shot DSC-HX400V Teardown, Sensorbackplate: adım 0, 3 resimden 1. Sony Cyber-shot DSC-HX400V Teardown, Sensorbackplate: adım 0, 3 resimden 2. Sony Cyber-shot DSC-HX400V Teardown, Sensorbackplate: adım 0, 3 resimden 3.
Sensorbackplate
  • Unscrew these 6 screws, after you have taken the optics out of the case. Note that the three motor screws where in place during the photo, but should be removed first

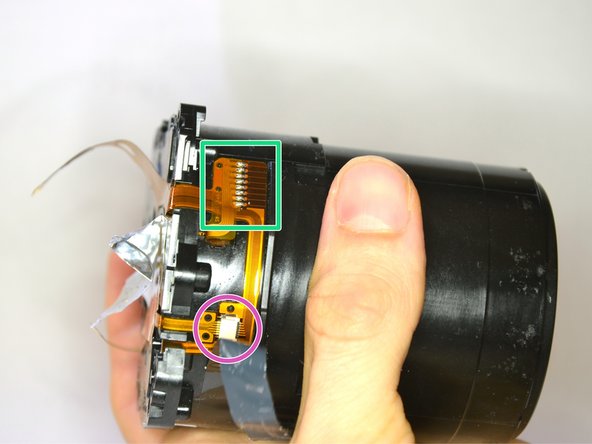
  • To be able to separate the Sensorbackplate from the rest, you have to unsolder the conenctor

  • Also disconnect this connector, as well as the connector on the opposite site

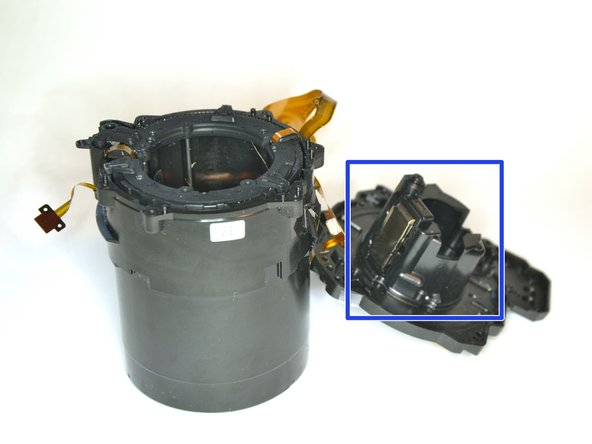
  • Finally you have the sensor with (maybe?) the auto focus lens.

  • If you have dust on your images, it is not necessarily on the sensor. It is rather unlikely because it is enclosed from the auto focus lens. Maybe you should search on other part of the optics first

Çeviri buraya girin

Çeviri buraya girin

Çeviri buraya girin

Çeviri buraya girin

Çeviri buraya girin

Katkılarınız, açık kaynak Creative Commons lisansı altında lisanslanmaktadır.