Adım 8 çevriliyor


-
Before connecting the Ethernet cable, test if the new mainboard has resolved the issue that caused the fault.
-
Connect a PS/2 keyboard and a VGA monitor to the mainboard. Plug in the power cord of the printer and turn it on. The mainboard should beep and show the BIOS logo. It may stop and report corrupted CMOS settings due to the battery replacement in Step 4.
-
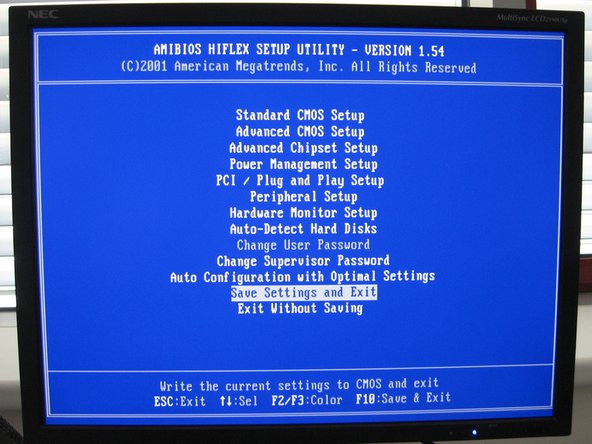
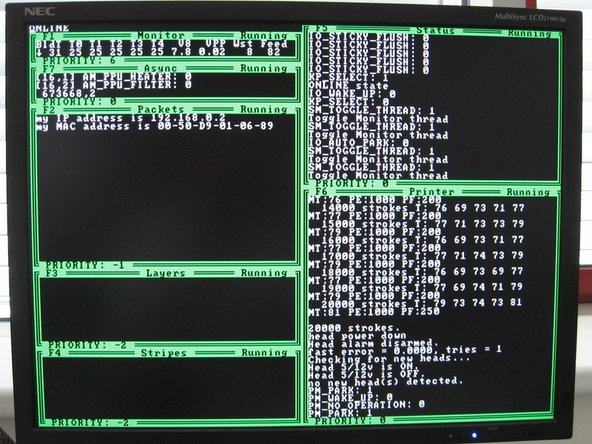
Enter the BIOS by pressing the Delete or F1 key and choose to Save settings, as shown in the second photo. This will save default CMOS settings and the mainboard will reboot itself. It should then boot into the printer firmware, with an ASCII GUI similar to the third photo. The small display at the front of the printer should also function now.
Katkılarınız, açık kaynak Creative Commons lisansı altında lisanslanmaktadır.