Adım 4 çevriliyor
Adım 4


-
Next is the hard drive. By now, it should be apparent that the only screw you'll ever deal with in this box is a Torx T10.
-
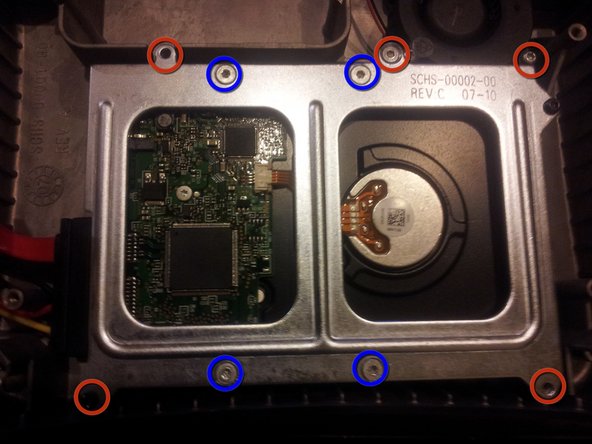
Start with the four corner screws and the one random outermost screw.
-
You should be able to lift the hard drive assembly right out of the chassis. Unscrew the remaining four screws to detach the structural plate from the drive itself.
Katkılarınız, açık kaynak Creative Commons lisansı altında lisanslanmaktadır.