Adım 6 çevriliyor
Adım 6


-
With the bezel remove, the front panel of the monitor becomes visible. There are no screws that hold the panel in. It is the front bezel that holds it in place.
-
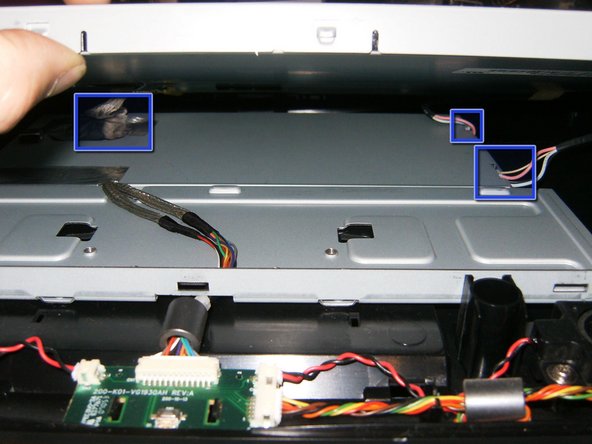
Carefully lift the panel on the front, there are three cables that need to be removed.
-
Remove the LVDS cable. It is a simple push connector, just pull the cable upward.
Katkılarınız, açık kaynak Creative Commons lisansı altında lisanslanmaktadır.