Adım 8 çevriliyor
Adım 8


-
Remove the cable from the power button board. Again, a simple push connector, remove the cable with a gentle pull.
-
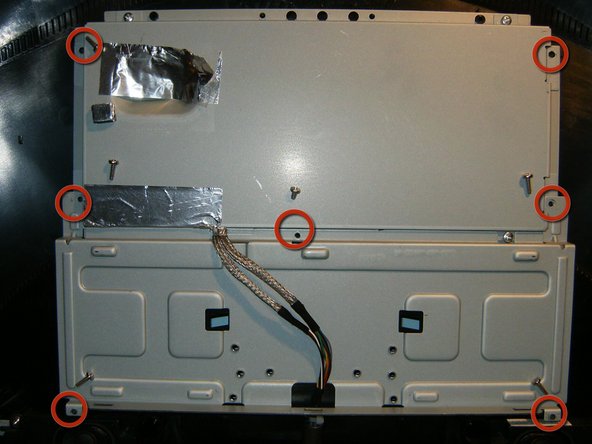
Remove the seven Phillips screws. The screws are all 1/2" with the exception of the center screws, that one is 1/4"
-
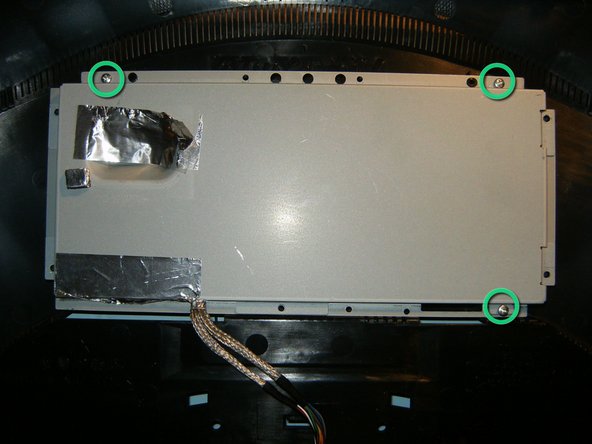
Remove the bottom sheet metal, this will leave the cage for the electronics. remove the three Phillips screws.
Katkılarınız, açık kaynak Creative Commons lisansı altında lisanslanmaktadır.