Ana içeriğe geç

MacBook Pro 13インチ Retina Display Late 2012 バッテリーの交換

Uyarı: Ön koşul olan bir kılavuzu düzenliyorsunuz. Yapacağınız herhangi bir değişiklik bu adımın yer aldığı bütün 5 kılavuzları etkileyecektir.

İngilizce
Japonca
Adım 4
MacBook Pro 13" Retina Display Late 2012 Battery Replacement: adım 0, 3 resimden 1. MacBook Pro 13" Retina Display Late 2012 Battery Replacement: adım 0, 3 resimden 2. MacBook Pro 13" Retina Display Late 2012 Battery Replacement: adım 0, 3 resimden 3.
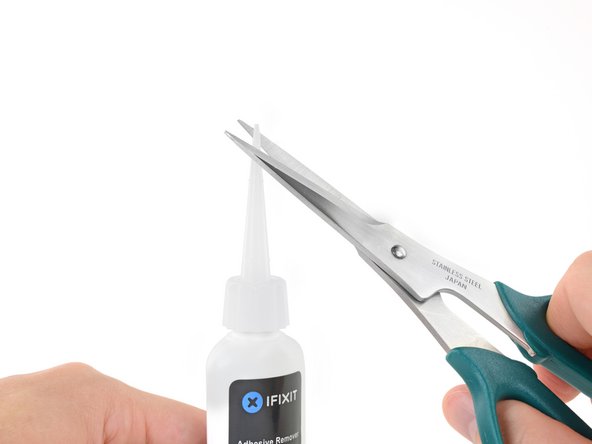
  • Pull off the black rubber stopper from your bottle of adhesive remover.

  • Twist to loosen or remove the bottle cap before you cut the applicator tip.

  • This unseals the bottle and allows the pressure to equalize before you cut the applicator tip. If you skip this step, the adhesive remover may spray out unexpectedly when the tip is cut.

  • Use scissors to cut off the sealed tip of the applicator.

  • Cutting close to the narrow tip will give you better control so you can apply the adhesive remover in small amounts.

  • Twist and close the bottle cap securely before you proceed further.

接着剤リムーバーの容器から、黒いゴム製のキャップを引き抜きます。

先端をカットする前に、ボトルキャップをひねって外すか、緩めてください。

これによりボトルが開封され、アプリケーター先端をカットする前に、内部の圧力が均等になります。この手順を省略すると、先端をカットした時に、接着剤リムーバーが当然飛び出す可能性がありますのでご注意ください。

ハサミを使ってアプリケーターの先端をカットします。

できるだけ先端近くをカットしてください。接着剤リムーバーを注入する際に、少量でコントロールしやすくなります。

次の手順に移る前に必ず、キャップをしっかりと装着してください。

Katkılarınız, açık kaynak Creative Commons lisansı altında lisanslanmaktadır.