Ana içeriğe geç

MacBook Pro 13" Retina-scherm eind 2012 Vervanging van de batterij

Uyarı: Ön koşul olan bir kılavuzu düzenliyorsunuz. Yapacağınız herhangi bir değişiklik bu adımın yer aldığı bütün 5 kılavuzları etkileyecektir.

İngilizce
Flemenkçe
Adım 4
MacBook Pro 13" Retina Display Late 2012 Battery Replacement: adım 0, 3 resimden 1. MacBook Pro 13" Retina Display Late 2012 Battery Replacement: adım 0, 3 resimden 2. MacBook Pro 13" Retina Display Late 2012 Battery Replacement: adım 0, 3 resimden 3.
  • Pull off the black rubber stopper from your bottle of adhesive remover.

  • Twist to loosen or remove the bottle cap before you cut the applicator tip.

  • This unseals the bottle and allows the pressure to equalize before you cut the applicator tip. If you skip this step, the adhesive remover may spray out unexpectedly when the tip is cut.

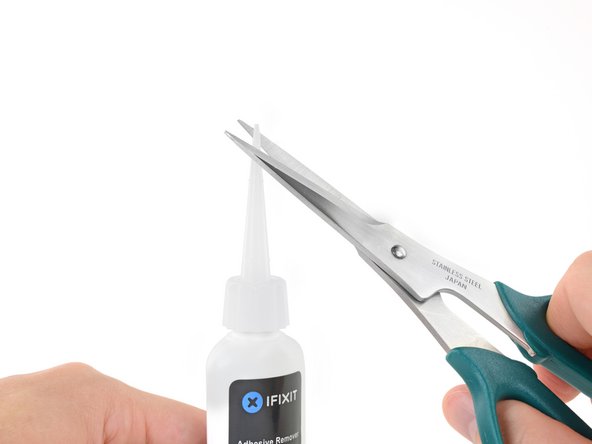
  • Use scissors to cut off the sealed tip of the applicator.

  • Cutting close to the narrow tip will give you better control so you can apply the adhesive remover in small amounts.

  • Twist and close the bottle cap securely before you proceed further.

Trek de zwarte, rubberen stopper uit het flesje met lijmverwijderaar.

Draai de dop van de fles eraf voordat je de punt om het toe te dienen afknipt.

Dit opent de fles en laat de druk in de fles zich aanpassen voordat je de punt afknipt. Als je deze stap overslaat, kan het zijn dat de lijmverwijderaar uit het flesje spuit bij het afknippen van de punt.

Gebruik een schaar om de verzegelde top van het flesje af te knippen.

Hoe dichter je bij de punt knipt, des te meer controle je hebt bij het toedienen.

Draai de dop op het flesje en sluit deze goed voordat je verdergaat.

Katkılarınız, açık kaynak Creative Commons lisansı altında lisanslanmaktadır.