Adım 6 çevriliyor
Adım 6

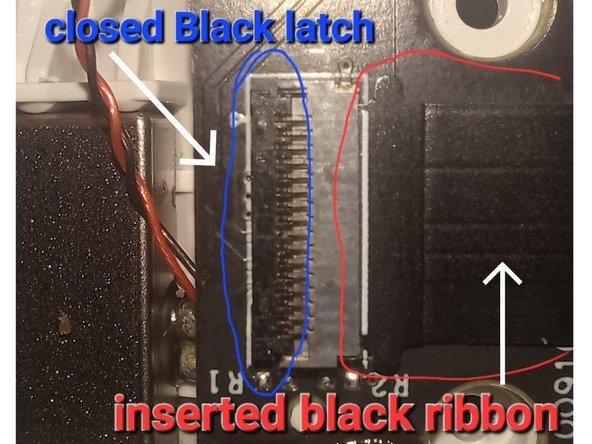
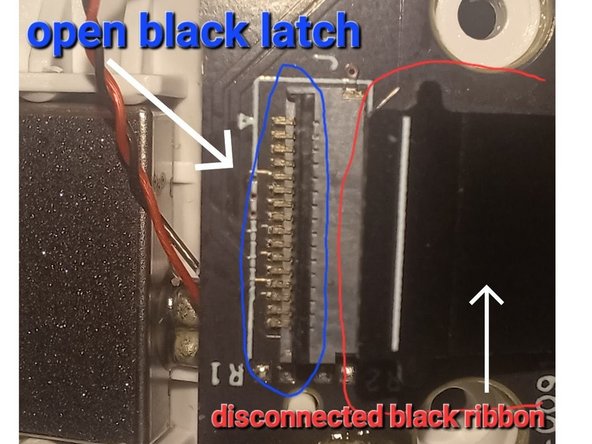


Disconnect The Ribbon from Main Circuit Board
-
Disconnect the ribbon. There is a latch (possibly black - opposite from the ribbon side of the connector) you flip up on the main circuit board (blue arrow). This is easy to take apart but a pain to put back together. Make sure you have needle-nose pliers or tweezers for this when you put it back together.
-
Blue arrow points to ribbon connector on main circuit board. White arrows on 2nd & 3rd images point to ribbon and connector latch on battery circuit board.
Katkılarınız, açık kaynak Creative Commons lisansı altında lisanslanmaktadır.