Ana içeriğe geç

1. BLV Ender 3 V2 Desmontaje

İngilizce
İspanyolca
Adım 7
1. BLV Ender 3 V2 Disassembly, Motherboard/LCD Removal: adım 0, 3 resimden 1. 1. BLV Ender 3 V2 Disassembly, Motherboard/LCD Removal: adım 0, 3 resimden 2. 1. BLV Ender 3 V2 Disassembly, Motherboard/LCD Removal: adım 0, 3 resimden 3.
Motherboard/LCD Removal
  • On the top of the electronics enclosure remove the 2x M3x6 button head screws with a 2mm allen wrench.

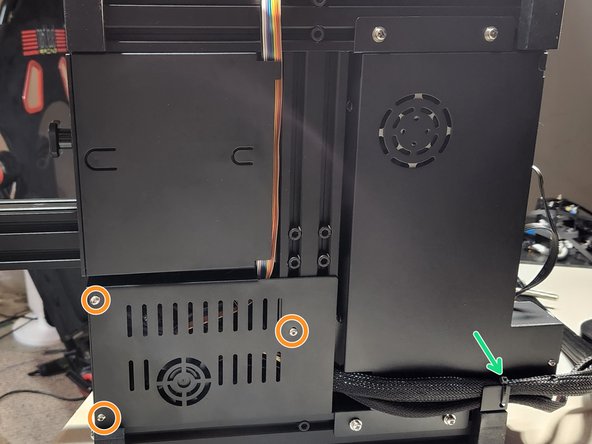
  • On the bottom remove the 3x M3x6 button head screws with a 2mm allen wrench.

  • Now is also a good time to cut that zip-tie.

  • Remove the 2x M5x12 button head screws on the front of the extrusion was a 3mm allen wrench.

  • Disconnect the wires as needed to remove the mother mounting plates.

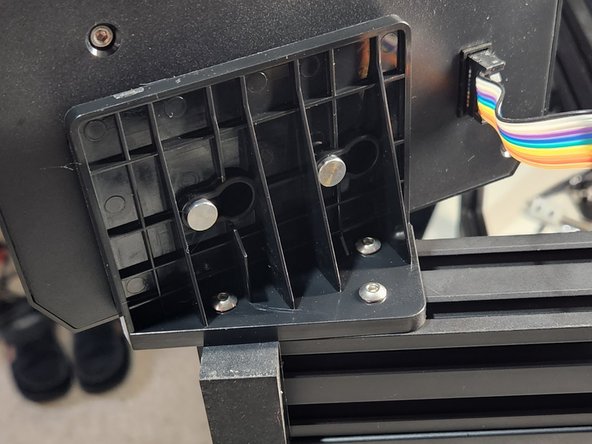
  • Remove the 3x M4x10 button head screws with a 2.5mm allen wrench removing the LCD and mounting bracket.

En la parte superior de la caja del sistema electrónico, retira los 2 tornillos de cabeza de botón M3x6 con una llave Allen de 2 mm.

En la parte inferior, retira los 3 tornillos de cabeza de botón M3x6 con una llave Allen de 2 mm.

Ahora también es un buen momento para cortar esa cremallera.

Retira los 2x M5x12 tornillos de cabeza de botón en la parte frontal de la extrusión fue una llave Allen de 3 mm.

Desconecta los cables según sea necesario para retirar las placas de montaje madre.

Retira los 3 tornillos de cabeza de botón M4x10 con una llave Allen de 2,5 mm para retirar la pantalla LCD y el soporte de montaje.

Katkılarınız, açık kaynak Creative Commons lisansı altında lisanslanmaktadır.