Ana içeriğe geç

Cómo sustituir el adhesivo de la tapa trasera (aplicado primero a la tapa trasera)

İngilizce
İspanyolca
Adım 6
How to Replace the Back Cover Adhesive (Back Cover First), Replace the microphone adhesive: adım 0, 3 resimden 1. How to Replace the Back Cover Adhesive (Back Cover First), Replace the microphone adhesive: adım 0, 3 resimden 2. How to Replace the Back Cover Adhesive (Back Cover First), Replace the microphone adhesive: adım 0, 3 resimden 3.
Replace the microphone adhesive
  • This step shows how to install a replacement microphone gasket. If your kit didn't come with this gasket, skip this step.

  • Use tweezers to remove the old microphone gasket. It may be attached to the back cover or the phone.

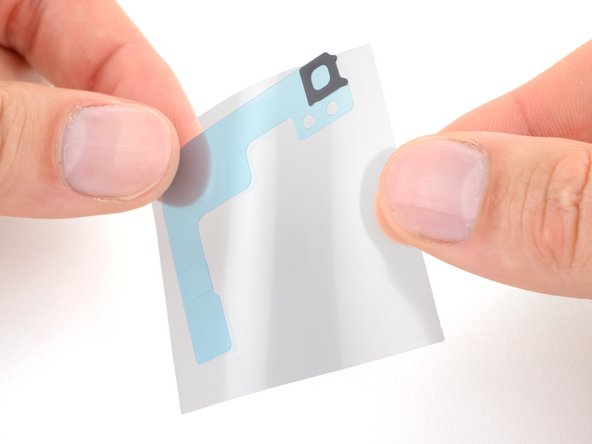
  • Remove the clear liner from the large L-shaped adhesive piece.

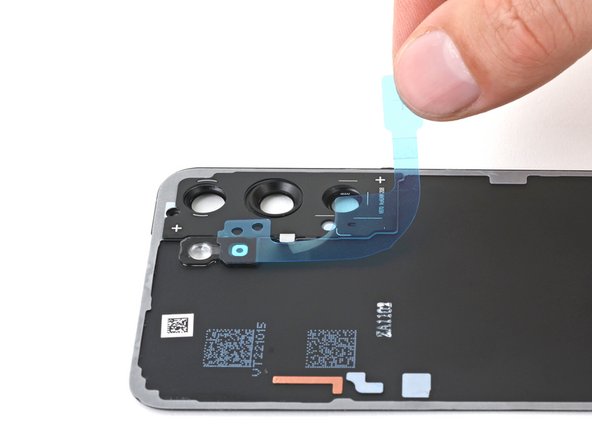
  • Place the square piece of adhesive over the back cover's microphone cutout under the flash unit, with the blue liner tab facing right.

  • Remove the blue liner.

Este paso muestra cómo instalar una junta de micrófono de repuesto. Si tu kit no viene con esta junta, omite este paso.

Utilice pinzas para quitar la junta del micrófono viejo. Puede estar adherido a la cubierta trasera o al teléfono.

Retira el revestimiento transparente de la pieza adhesiva grande en forma de L.

Coloca el trozo cuadrado de adhesivo sobre el corte del micrófono de la cubierta posterior debajo de la unidad de flash, con la pestaña del revestimiento azul hacia la derecha.

Quita el revestimiento azul.

Katkılarınız, açık kaynak Creative Commons lisansı altında lisanslanmaktadır.