Adım 6 çevriliyor
Adım 6

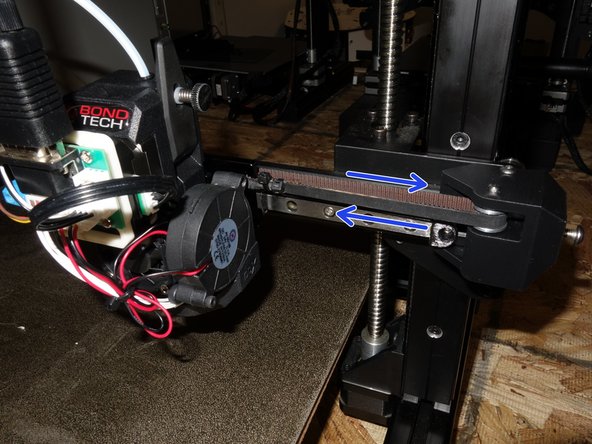


Assembly 1c. Install the X Belt
-
Route one end of the belt through the front of the belt slot on the X Carriage Plate and fold over about ½”. Using a cable tie, secure that end in place, making sure the teeth on the belt mesh together to hold tight.
-
Run the belt around the opposite side pulley and back to the open slot repeating the process, this time pulling the belt tight with your hands or needle nose pliers before securing with a cable tie.
Katkılarınız, açık kaynak Creative Commons lisansı altında lisanslanmaktadır.