Ana içeriğe geç

3D Raptor V1.1 Linear Rail Kit Install

İngilizce
Japonca
Adım 7
3D Raptor V1.1 Linear Rail Kit Install, Assembly 1c. Install the X Belt cont.: adım 0, 3 resimden 1. 3D Raptor V1.1 Linear Rail Kit Install, Assembly 1c. Install the X Belt cont.: adım 0, 3 resimden 2. 3D Raptor V1.1 Linear Rail Kit Install, Assembly 1c. Install the X Belt cont.: adım 0, 3 resimden 3.
Assembly 1c. Install the X Belt cont.
  • The belt should be slightly loose at this point.

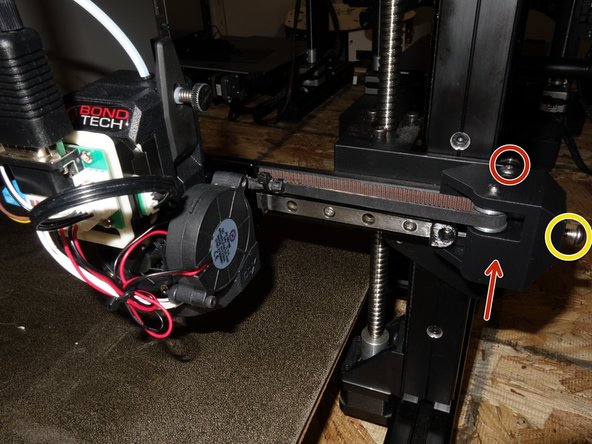
  • Loosen the screws on the top and bottom of the X Idler assembly to allow for belt tension adjustment

  • The printed Idler mount and tension can be adjusted by the M5 screw on the end of the Idler Mount.

  • Once tension is set, tighten the top and bottom screw to hold the tension

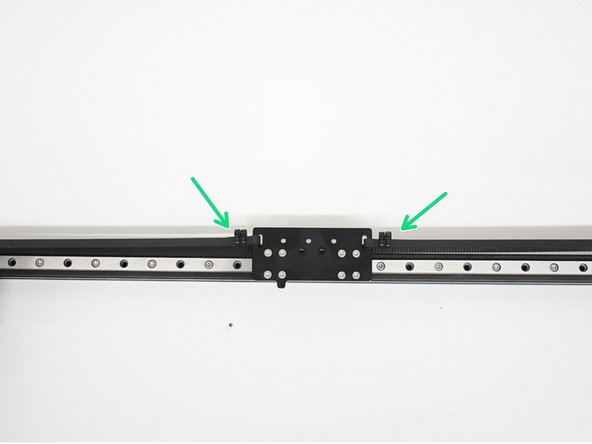
  • Add a second cable tie to both sides next to the others.

Çeviri buraya girin

Çeviri buraya girin

Çeviri buraya girin

Çeviri buraya girin

Çeviri buraya girin

Katkılarınız, açık kaynak Creative Commons lisansı altında lisanslanmaktadır.