Ana içeriğe geç

Smontaggio drone DJI FPV

Uyarı: Ön koşul olan bir kılavuzu düzenliyorsunuz. Yapacağınız bütün değişiklikler bu adımın yer aldığı diğer kılavuzları da etkileyecektir.

Adım 12 çevriliyor

İngilizce
İtalyanca
Adım 12
DJI FPV Drone Disassembly, Disconnecting the motor control board: adım 0, 2 resimden 1. DJI FPV Drone Disassembly, Disconnecting the motor control board: adım 0, 2 resimden 2.
Disconnecting the motor control board
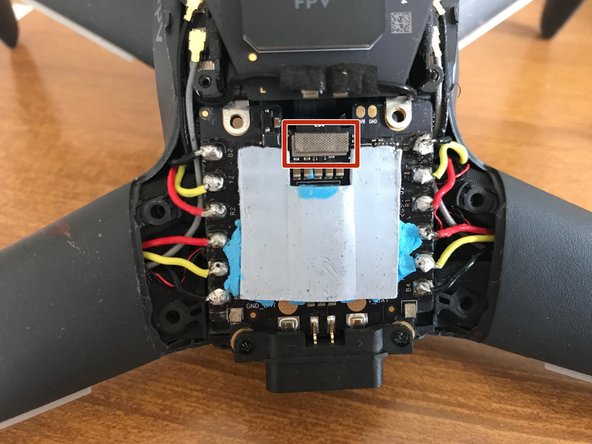
  • Each of the 4 motors has 3 wires soldered to the motor control board. The colours should be the same as in the photo. Were you to accidentally reverse any two on reconnecting them, the corresponding motor would spin backwards, causing an instant crash on take-off.

  • Unsolder all 12 wires (or only the 6 on one side if you are simply replacing an arm).

  • Lead-free solder requires an extra hot iron to melt. It will melt much more easily if you add a little leaded solder. This will not only increase the thermal contact between the iron and the lead-free solder, but will also reduce its melting point as the solders mix. Use a solder sucker or solder wick to remove excess solder before reconnecting.

  • Lift off the connector at the top of the motor control board.

  • On reassembly, double check that this connector is fully engaged and pressed home (force is not required). If not fully engaged, you may find the drone appears completely dead. At the end of a couple of hours of intensive work on your precious toy this can cause an unpleasant sinking feeling in the pit of the stomach.

Ciascuno dei 4 motori ha 3 fili saldati alla scheda di controllo del motore. I colori devono essere gli stessi della foto. Se si invertono accidentalmente due al ricollegarli, il motore corrispondente girerebbe all'indietro, causando un crash istantaneo al decollo.

Scollegare tutti i 12 fili (o solo il 6 su un lato se si sta semplicemente sostituendo un braccio).

La saldatura senza piombo richiede un ferro caldo extra per fondere. Si scioglierà molto più facile se si aggiungono alcune saldature con piombo. Questo non solo aumenta il contatto termico tra il ferro e la saldatura senza piombo, ma ne riduce anche il punto di fusione mentre le saldature si fondono.

Sollevare il connettore nella parte superiore della scheda di controllo del motore.

Al momento del riassemblaggio, verificare che il connettore sia completamente inserito e premuto a casa (non è richiesta la forza). Se non è completamente agganciato, puoi scoprire che il drone appare completamente morto.

Katkılarınız, açık kaynak Creative Commons lisansı altında lisanslanmaktadır.