Ana içeriğe geç

Einen Knopf ersetzen

İngilizce
Almanca
Adım 3
How to replace a button, Secure with a knot: adım 0, 3 resimden 1. How to replace a button, Secure with a knot: adım 0, 3 resimden 2. How to replace a button, Secure with a knot: adım 0, 3 resimden 3.
Secure with a knot
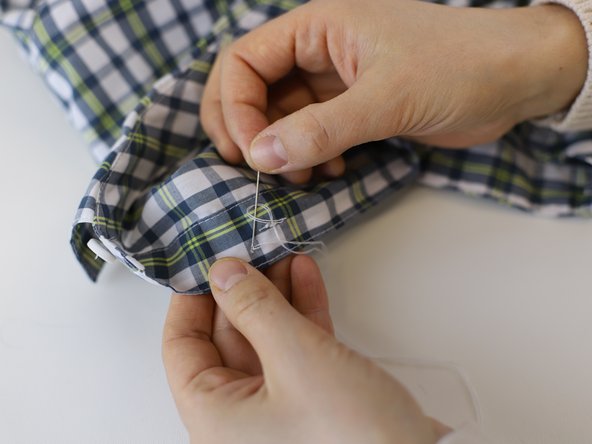
  • Once the button is secure, it is time to finish the repair on the inside, with a knot.

  • Carefully pass the needle through the loops of thread on the backside of the repair, taking care not to pass it through the fabric itself.

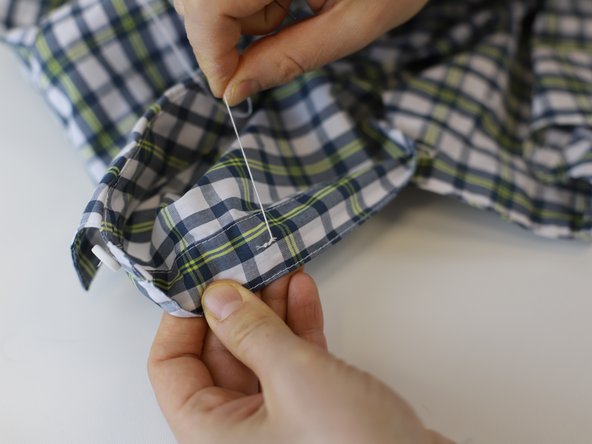
  • Careful: Do not pull tight! Leave a loop large enough to pass the needle through.

  • Pass the needle through the loop, and now pull tight to create the knot. Repeat this process once more to add a second knot, for extra security.

Wenn der Knopf befestigt ist, kannst du die Reparatur auf der Innenseite beenden, indem du einen Knoten machst.

Führe die Nadel vorsichtig durch die Fadenschlaufen auf der Rückseite der Reparatur und achte darauf, nicht durch den Stoff selbst zu stechen.

Vorsicht: Ziehe nicht zu fest! Lass eine Schlaufe, die groß genug ist, um die Nadel durchzuführen.

Führe die Nadel durch die Schlaufe und ziehe den Faden fest um den Knoten zu machen. Wiederhole diesen Vorgang, um einen zweiten Knoten hinzuzufügen, der für zusätzliche Sicherheit sorgt.

Katkılarınız, açık kaynak Creative Commons lisansı altında lisanslanmaktadır.