Adım 3 çevriliyor
Adım 3

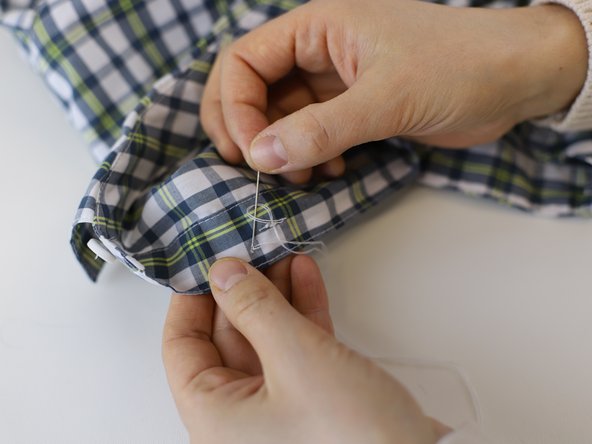


Secure with a knot
-
Once the button is secure, it is time to finish the repair on the inside, with a knot.
-
Carefully pass the needle through the loops of thread on the backside of the repair, taking care not to pass it through the fabric itself.
-
Careful: Do not pull tight! Leave a loop large enough to pass the needle through.
-
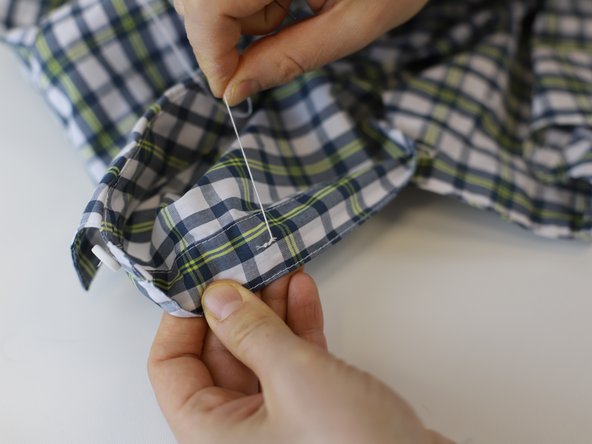
Pass the needle through the loop, and now pull tight to create the knot. Repeat this process once more to add a second knot, for extra security.
Katkılarınız, açık kaynak Creative Commons lisansı altında lisanslanmaktadır.