Ana içeriğe geç

Hoe vervang je een knoop?

İngilizce
Flemenkçe
Adım 3
How to replace a button, Secure with a knot: adım 0, 3 resimden 1. How to replace a button, Secure with a knot: adım 0, 3 resimden 2. How to replace a button, Secure with a knot: adım 0, 3 resimden 3.
Secure with a knot
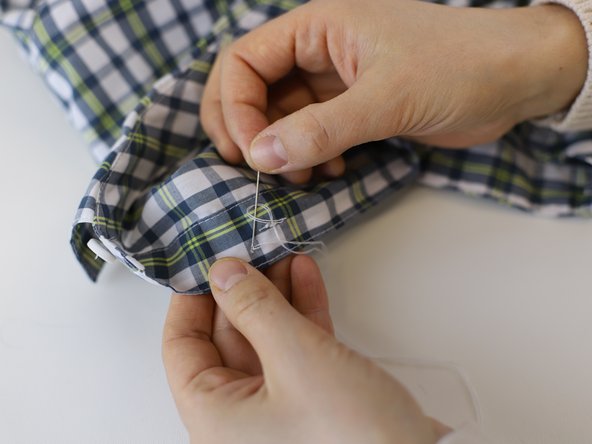
  • Once the button is secure, it is time to finish the repair on the inside, with a knot.

  • Carefully pass the needle through the loops of thread on the backside of the repair, taking care not to pass it through the fabric itself.

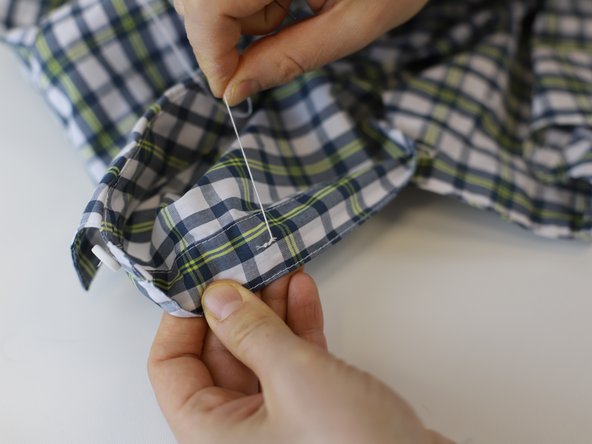
  • Careful: Do not pull tight! Leave a loop large enough to pass the needle through.

  • Pass the needle through the loop, and now pull tight to create the knot. Repeat this process once more to add a second knot, for extra security.

Zodra de knoop stevig vastzit, is het tijd om de reparatie aan de binnenkant af te ronden met een knoop.

Steek voorzichtig de naald door de draadlusjes aan de achterkant van de reparatie, zonder de stof zelf te doorboren.

Voorzichtig: Trek niet te strak aan! Laat een lus groot genoeg om de naald erdoorheen te kunnen steken.

Steek de naald door de lus en trek nu stevig aan om de knoop te creëren. Herhaal dit proces nogmaals om een tweede knoop toe te voegen voor extra veiligheid.

Katkılarınız, açık kaynak Creative Commons lisansı altında lisanslanmaktadır.