Ana içeriğe geç

Lenovo ThinkPad T16 Gen 3 I/O Board Replacement

Uyarı: Ön koşul olan bir kılavuzu düzenliyorsunuz. Yapacağınız bütün değişiklikler bu adımın yer aldığı diğer kılavuzları da etkileyecektir.

İngilizce
İspanyolca
Adım 5
Lenovo ThinkPad T16 Gen 3 I/O Board Replacement, Lift the fingerprint reader PCB: adım 0, 2 resimden 1. Lenovo ThinkPad T16 Gen 3 I/O Board Replacement, Lift the fingerprint reader PCB: adım 0, 2 resimden 2.
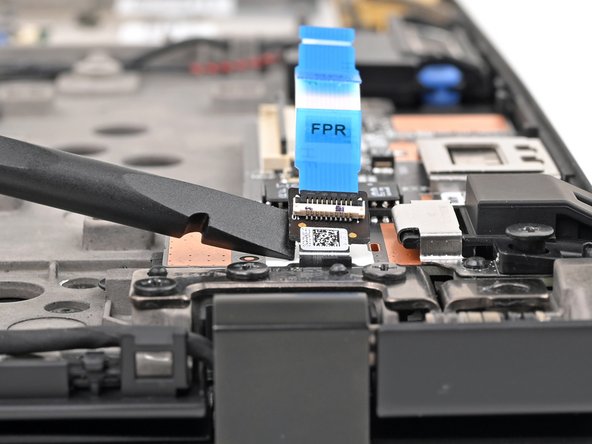
Lift the fingerprint reader PCB
  • Slide the flat end of a spudger under the PCB on the fingerprint reader cable and pry up to separate the adhesive securing it.

  • If you're having a hard time separating the adhesive, use an iOpener or hair dryer to lightly heat the PCB.

  • Don't pull on the cable or pry on the connector itself—only insert your tool under the board.

  • During reassembly, if the adhesive is still sticky you can reuse it. Otherwise, replace it with a strip of thin, double-sided tape.

Çeviri buraya girin

Çeviri buraya girin

Çeviri buraya girin

Çeviri buraya girin

Katkılarınız, açık kaynak Creative Commons lisansı altında lisanslanmaktadır.