Ana içeriğe geç

ポータブルパワーステーションのUIボードの取り外し

Uyarı: Ön koşul olan bir kılavuzu düzenliyorsunuz. Yapacağınız herhangi bir değişiklik bu adımın yer aldığı bütün 5 kılavuzları etkileyecektir.

İngilizce
Japonca
Adım 2
Portable Power Station UI Board Removal, Remove the front panel: adım 0, 3 resimden 1. Portable Power Station UI Board Removal, Remove the front panel: adım 0, 3 resimden 2. Portable Power Station UI Board Removal, Remove the front panel: adım 0, 3 resimden 3.
Remove the front panel
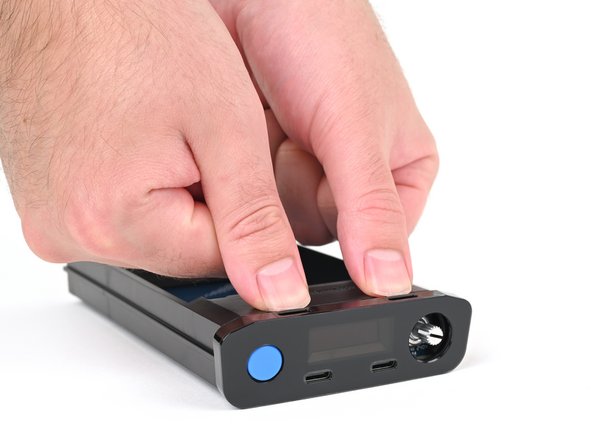
  • Use your fingers to depress the two locking tabs holding the front panel in place.

  • Press on the clips themselves (just behind the front panel) and not through the cutouts on the top edge of the front panel.

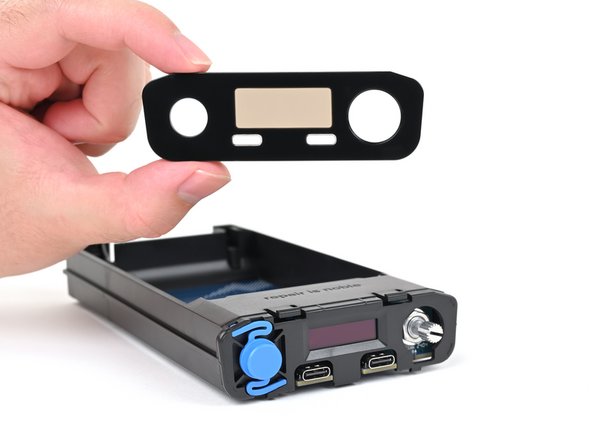
  • While pressing the tabs down, push the front panel away from the chassis and remove it.

  • During reassembly:

  • Hook in the bottom edge of the front panel first, then push the top edge until it clicks into place.

  • Make sure the two USB-C ports slide into their cutouts in the front panel and aren't trapped underneath.

フロントパネルを固定している2つのロックタブを指で押し下げます。

フロントパネル上端の切り欠き部分ではなく、クリップ部分 (フロントパネルのすぐ後ろ)を押してください。

タブを押し下げながら、フロントパネルをシャーシから離して取り外します。

再組み立ての際

まずフロントパネルの下端を引っ掛け、次に上端をカチッと音がするまで押し込みます。

2つのUSB-Cポートがフロントパネルの切り欠きにスライドし、下に何も挟まっていないことを確認してください。

Katkılarınız, açık kaynak Creative Commons lisansı altında lisanslanmaktadır.